RNS quickstart
Overview
RNS aims to simplify long Ronin addresses with human-readable names. This makes it easier for users to interact with your app.
This quickstart guides you through:
- Step 1: Installing the example app
- Step 2: Resolving from a Ronin address to an RNS name
- Step 3: Resolving from an RNS name to a Ronin address
Prerequisites
- Sign up for a Ronin address on wallet.roninchain.com
- Register for a
.rondomain name on id.roninchain.com
Steps
Step 1. Install the app
For the sake of simplicity, we prepared an example RNS-enabled app in React for you to work with.
-
Clone the example app:
git clone git@github.com:axieinfinity/demo-rnsjs.git -
Install the dependencies:
yarn install -
Run the app:
yarn dev -
Connect your Ronin Wallet by clicking Connect Wallet.

Step 2. Resolve from an address to an RNS name
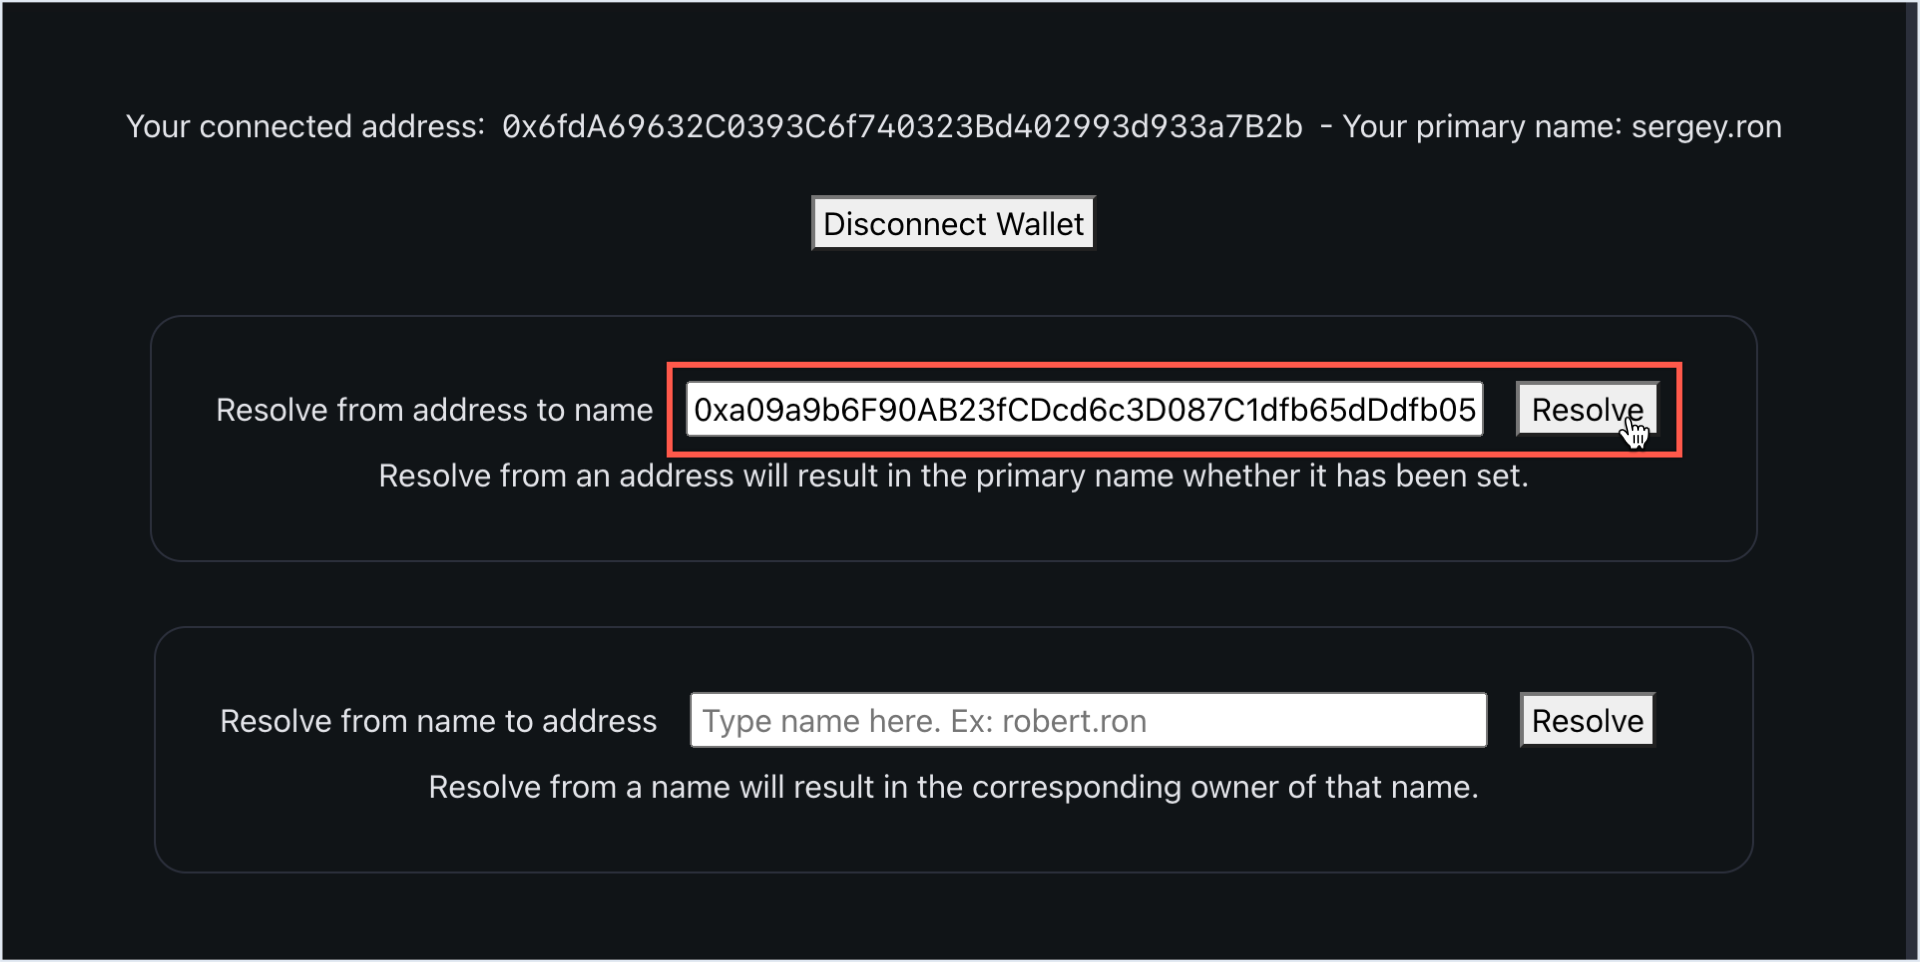
To resolve from a Ronin address to an RNS name, paste any Ronin address in the 0x... format in the top field, and then click Resolve.

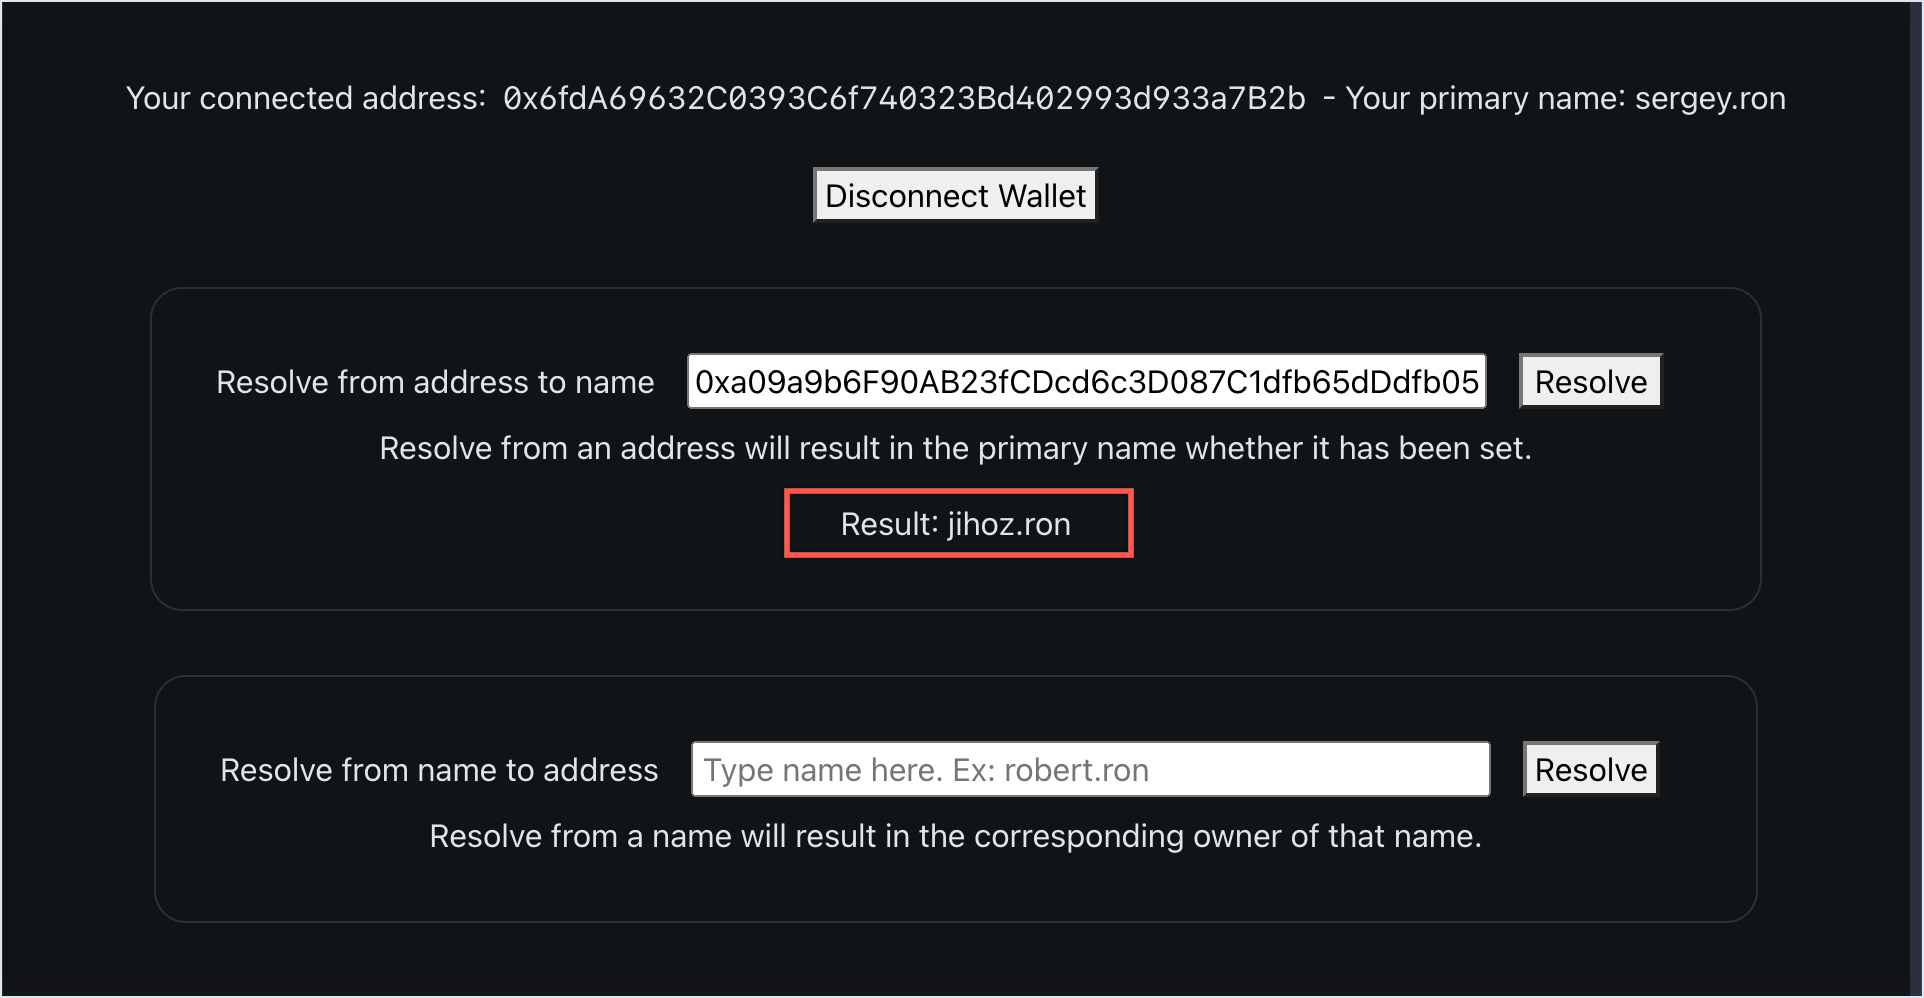
The result is the primary RNS name set by the owner for this Ronin address.

This process is called reverse resolution. You can learn more about it in Support reverse resolution.
Step 3. Resolve from an RNS name to a Ronin address
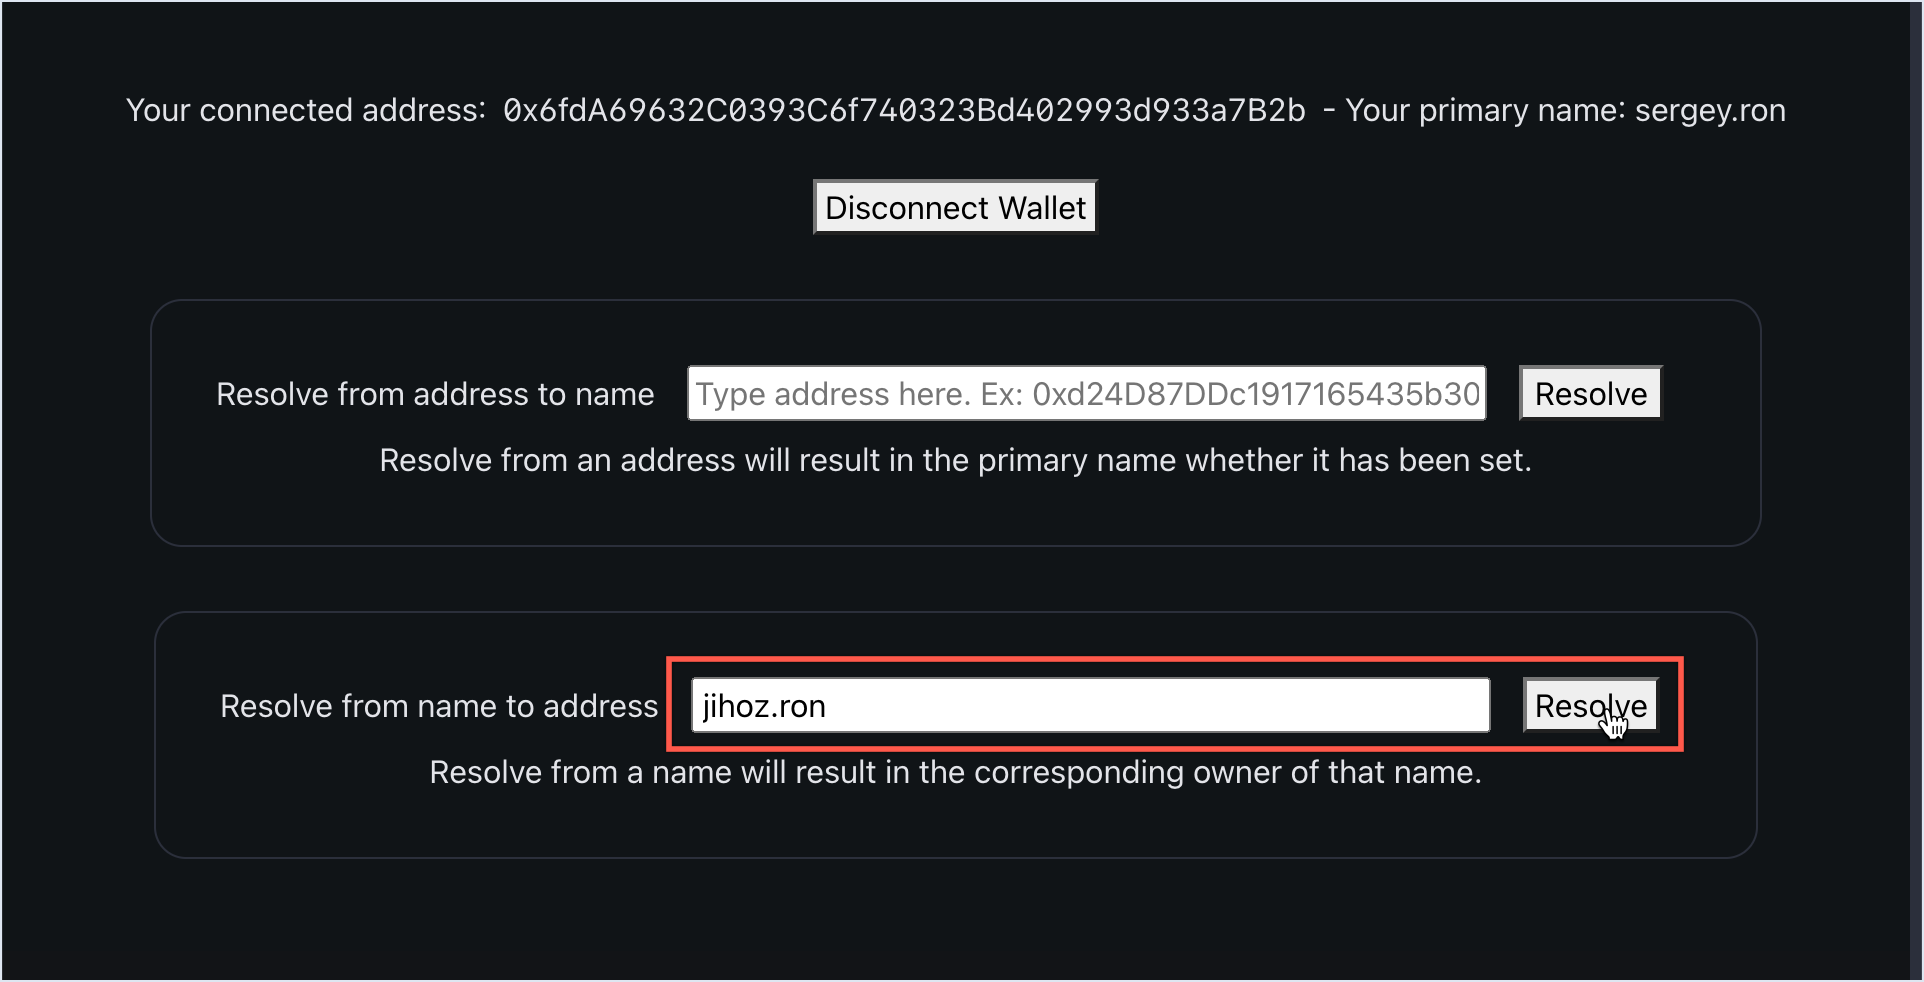
To resolve from an RNS to a Ronin address, paste any RNS name into the bottom text field, and then click Resolve.

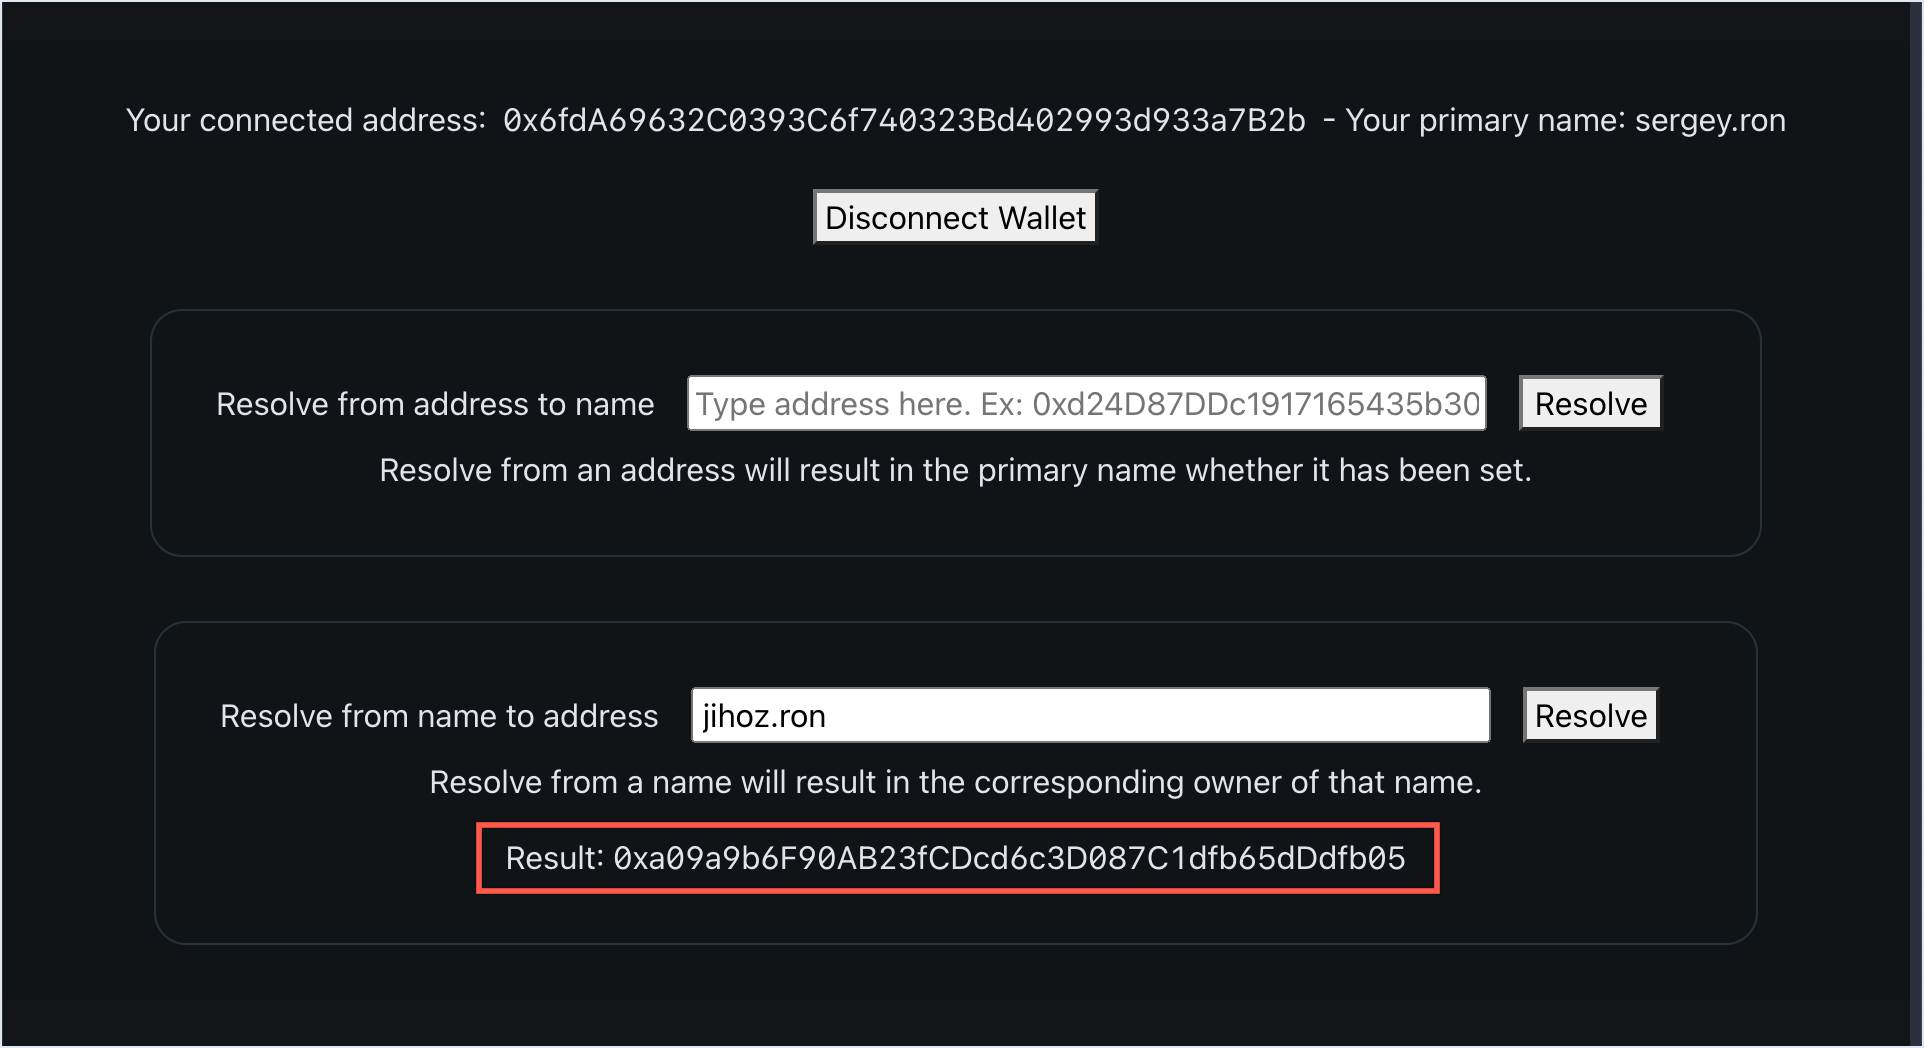
The result is the Ronin address of the RNS name's owner.

This process is called forward resolution. You can learn more about it in Configure RNS name resolution.