Create a Launchpad on Ronin Market
Overview
Launchpad is the NFT primary marketplace within Ronin Market, where game studios sell digital assets directly to players using tokens on the Ronin chain.
Creators can introduce their projects to the community with customizable landing pages and structured launch stages. Each launch includes multiple allowlist stages and a public stage, enabling eligible users to mint NFTs under specific conditions.
The stages progress sequentially, with each stage offering its own supply and rules, ensuring a fair and organized sale process.
This guide provides a detailed step-by-step tutorial on how to set up a Launchpad Sales on Ronin Market using Ronin Developer Console.
Preparation
Before setting up a Launchpad Sale:
- You must already create an NFT collection on Ronin Mainnet.
- You must have access to NFT contract owner's wallet address.
- Your NFT collection must be compatible with Ronin NFT Launchpad
Once you have those, let's get started.
Integrate your NFT smart contract
During the minting process, the launchpad calls the mintLaunchpad(to, quantity, calldata) function in your contract to issue NFTs to the user. The following are the function parameters:
to: theaddressof the user who receives the minted NFTs.quantity: a uint256 representing the number of NFTs requested by the user.calldata: abytesparameter containing any additional data that required during the minting process. This field is typically left empty.
The launchpad also implements the ERC-165, which requires the NFT contract to provide supportsInterface(interfaceId).
For optimal integration, refer to SampleNFT721Launchpad and SampleNFT1155Launchpad.
Grant the minter role to the Launchpad
- Visit app.roninchain.com and search for your deployed NFT contract.
- On the Contract tab, click Write Contract.
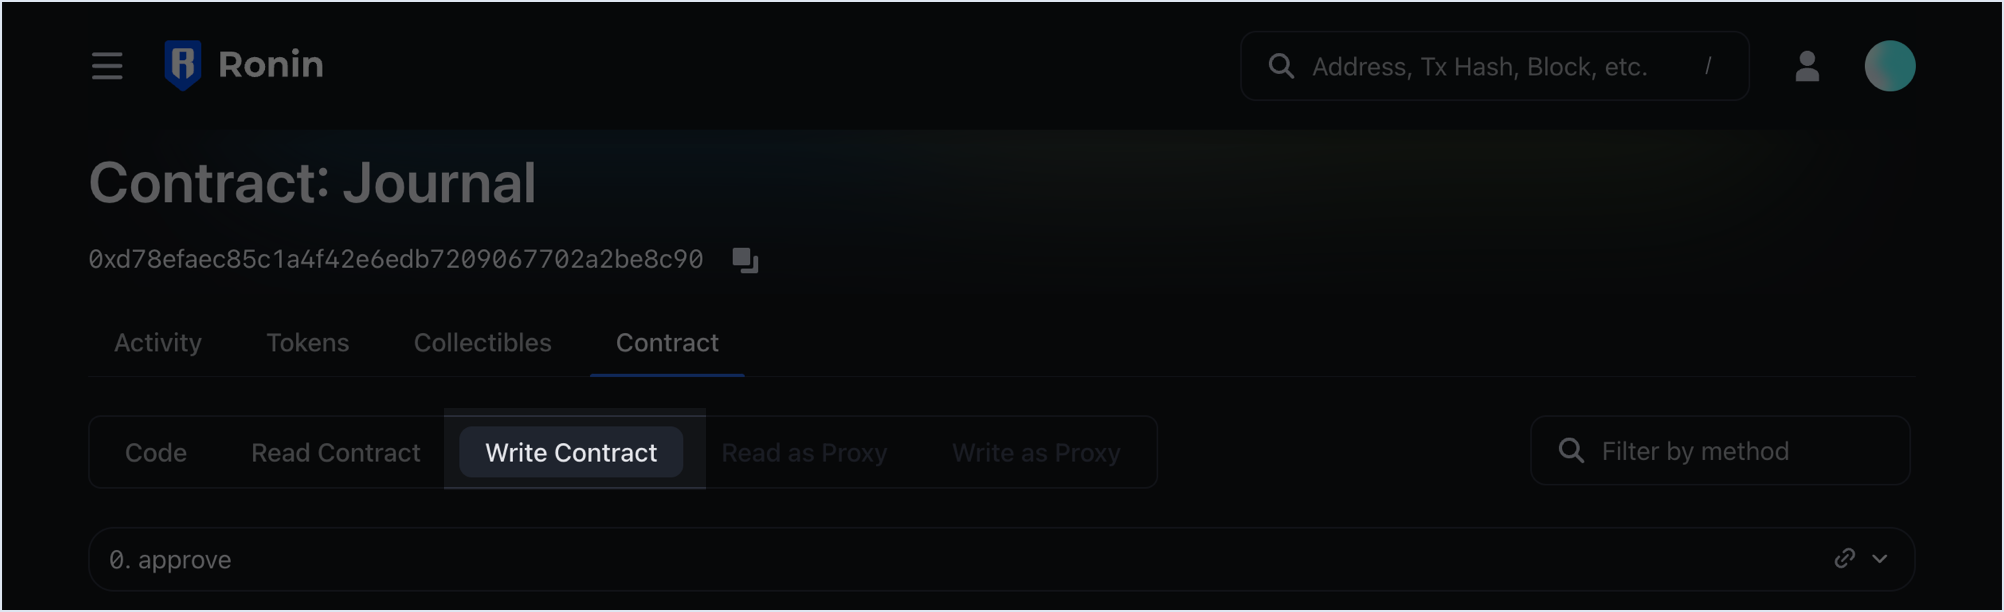
- Locate the
grantRolemethod and fill in the following parameters:
- Role: the role you want to grant. Use
0x9f2df0fed2c77648de5860a4cc508cd0818c85b8b8a1ab4ceeef8d981c8956a6(theMINTER_ROLEasbyte32). - Account: the address of Ronin NFT Launchpad depending on the network you deploy to:
- Ronin mainnet:
0xa8e9fdf57bbd991c3f494273198606632769db99 - Saigon testnet:
0x9eaf882f8cdfef42a3c272365f9cd069a220ce7c
- Ronin mainnet:
Go to Launchpad on Ronin Developer Console
- Log in to Ronin Developer Console
- Select your project or create a new project.
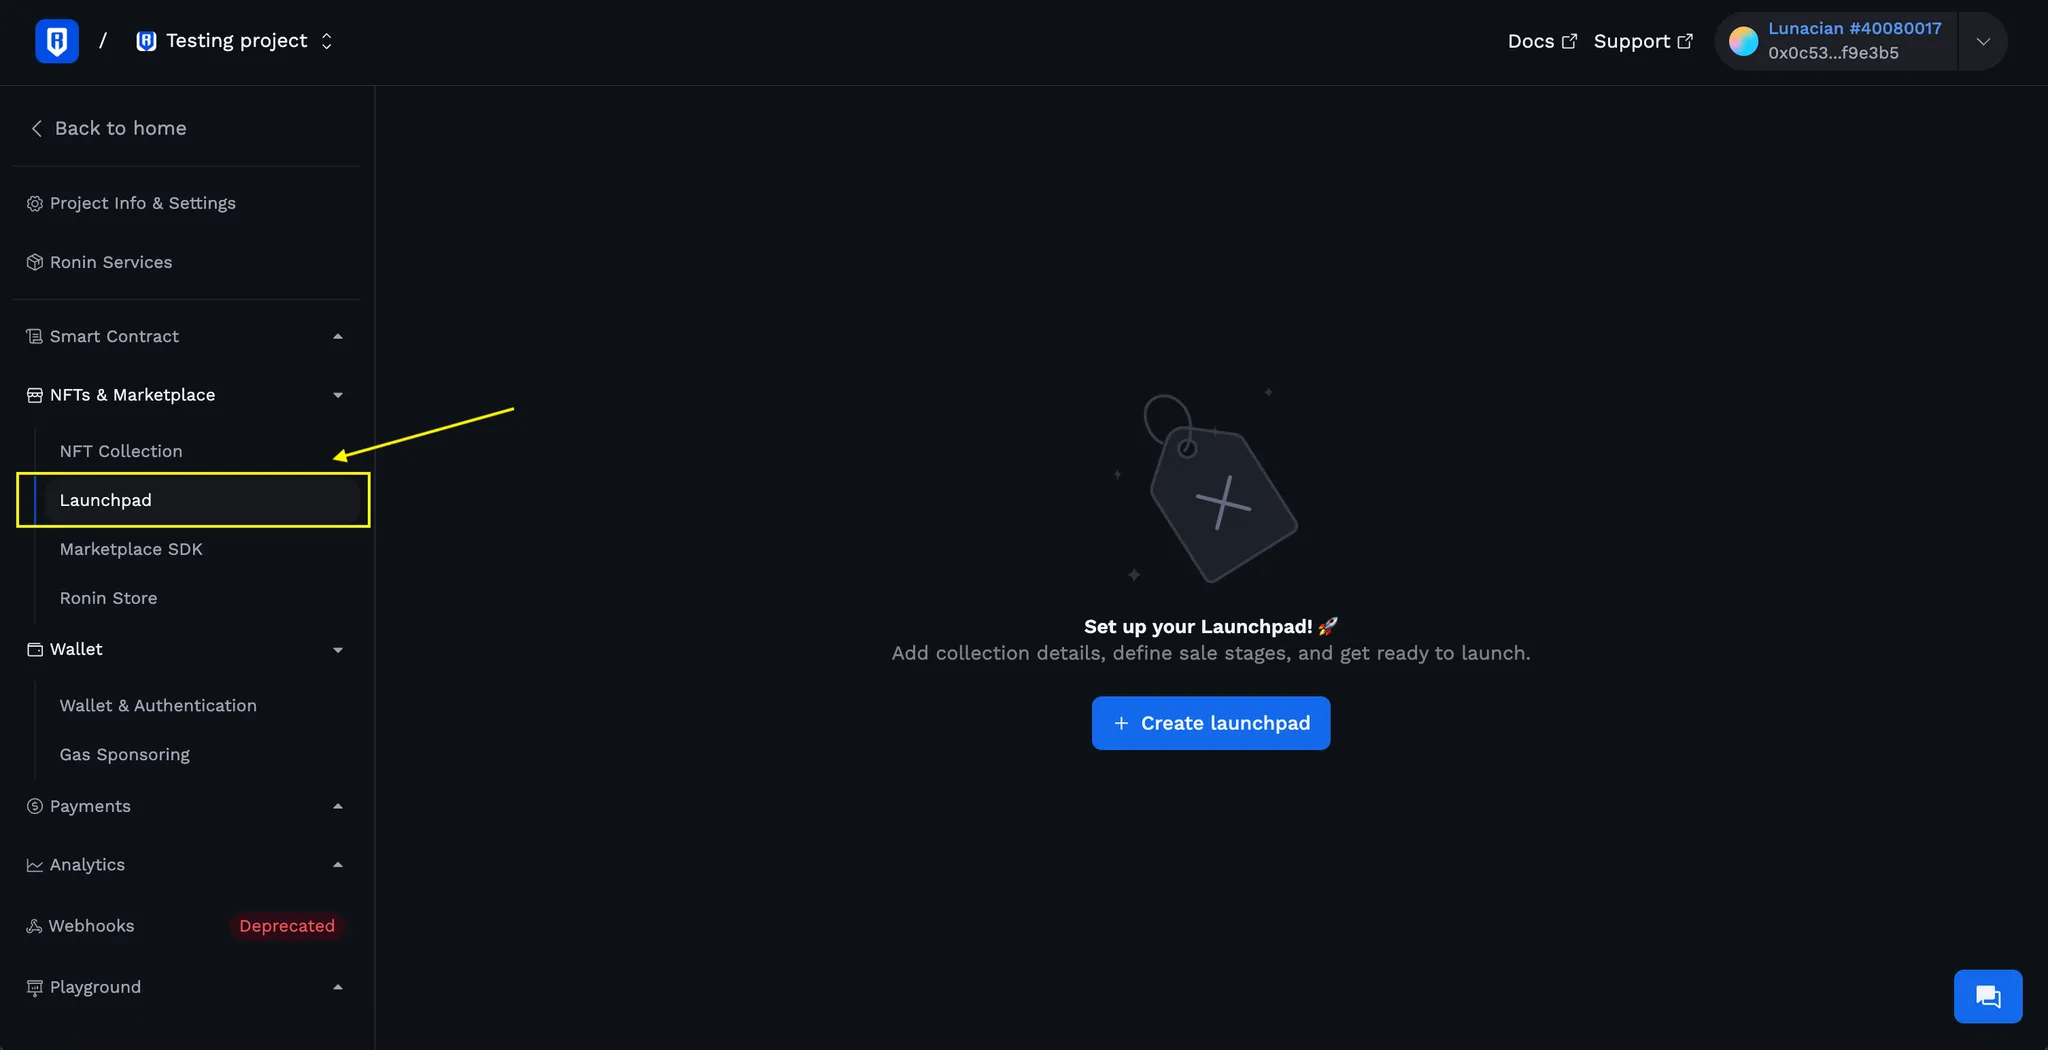
- Under the left bar menu of your project, choose Ronin Marketplace > Launchpad Listing.
Create a Launchpad
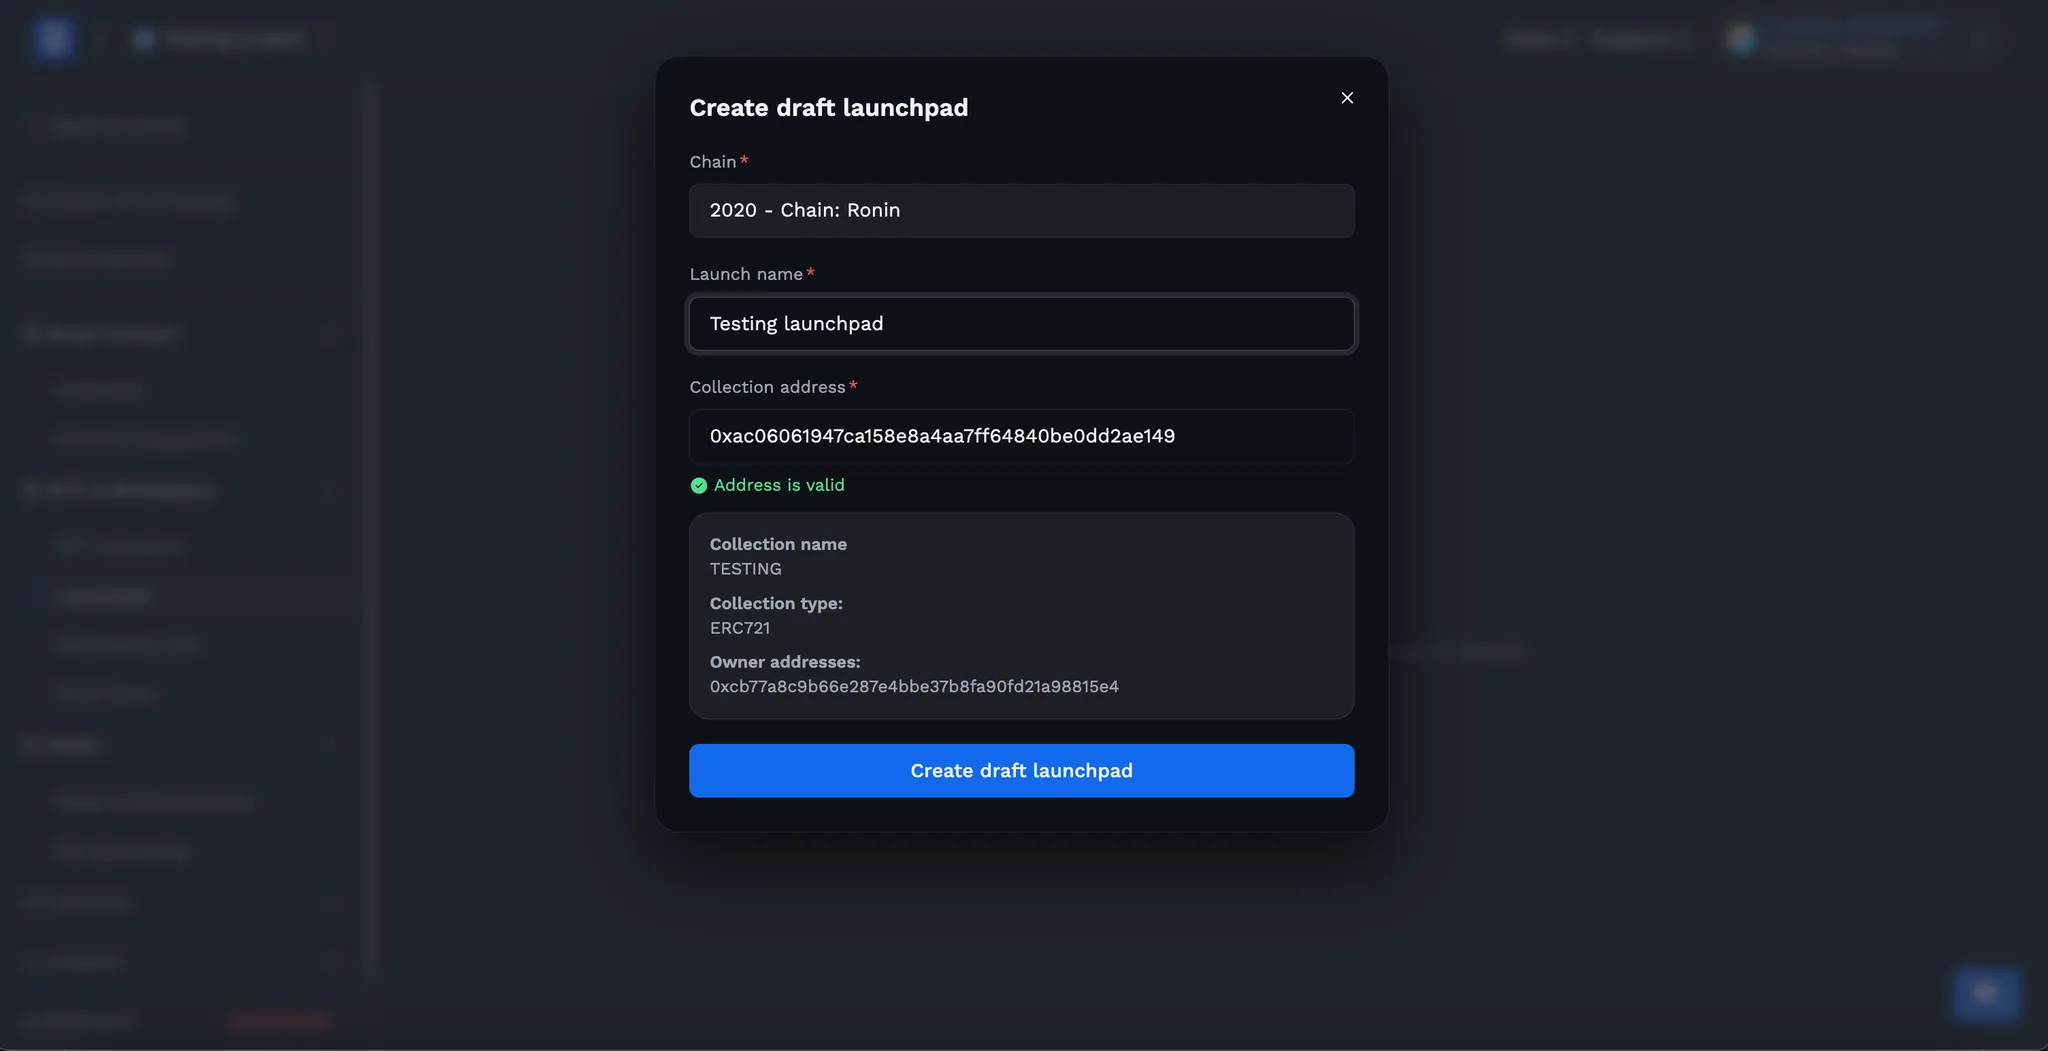
First, create a new launchpad:
- Click
Create Launchpad. - Fill in:
- Launch Name: Your launchpad name.
- Collection Address: Your NFT collection contract address on Ronin Mainnet.
- Click
Create draft launchpad.
Fill in Launchpad Details
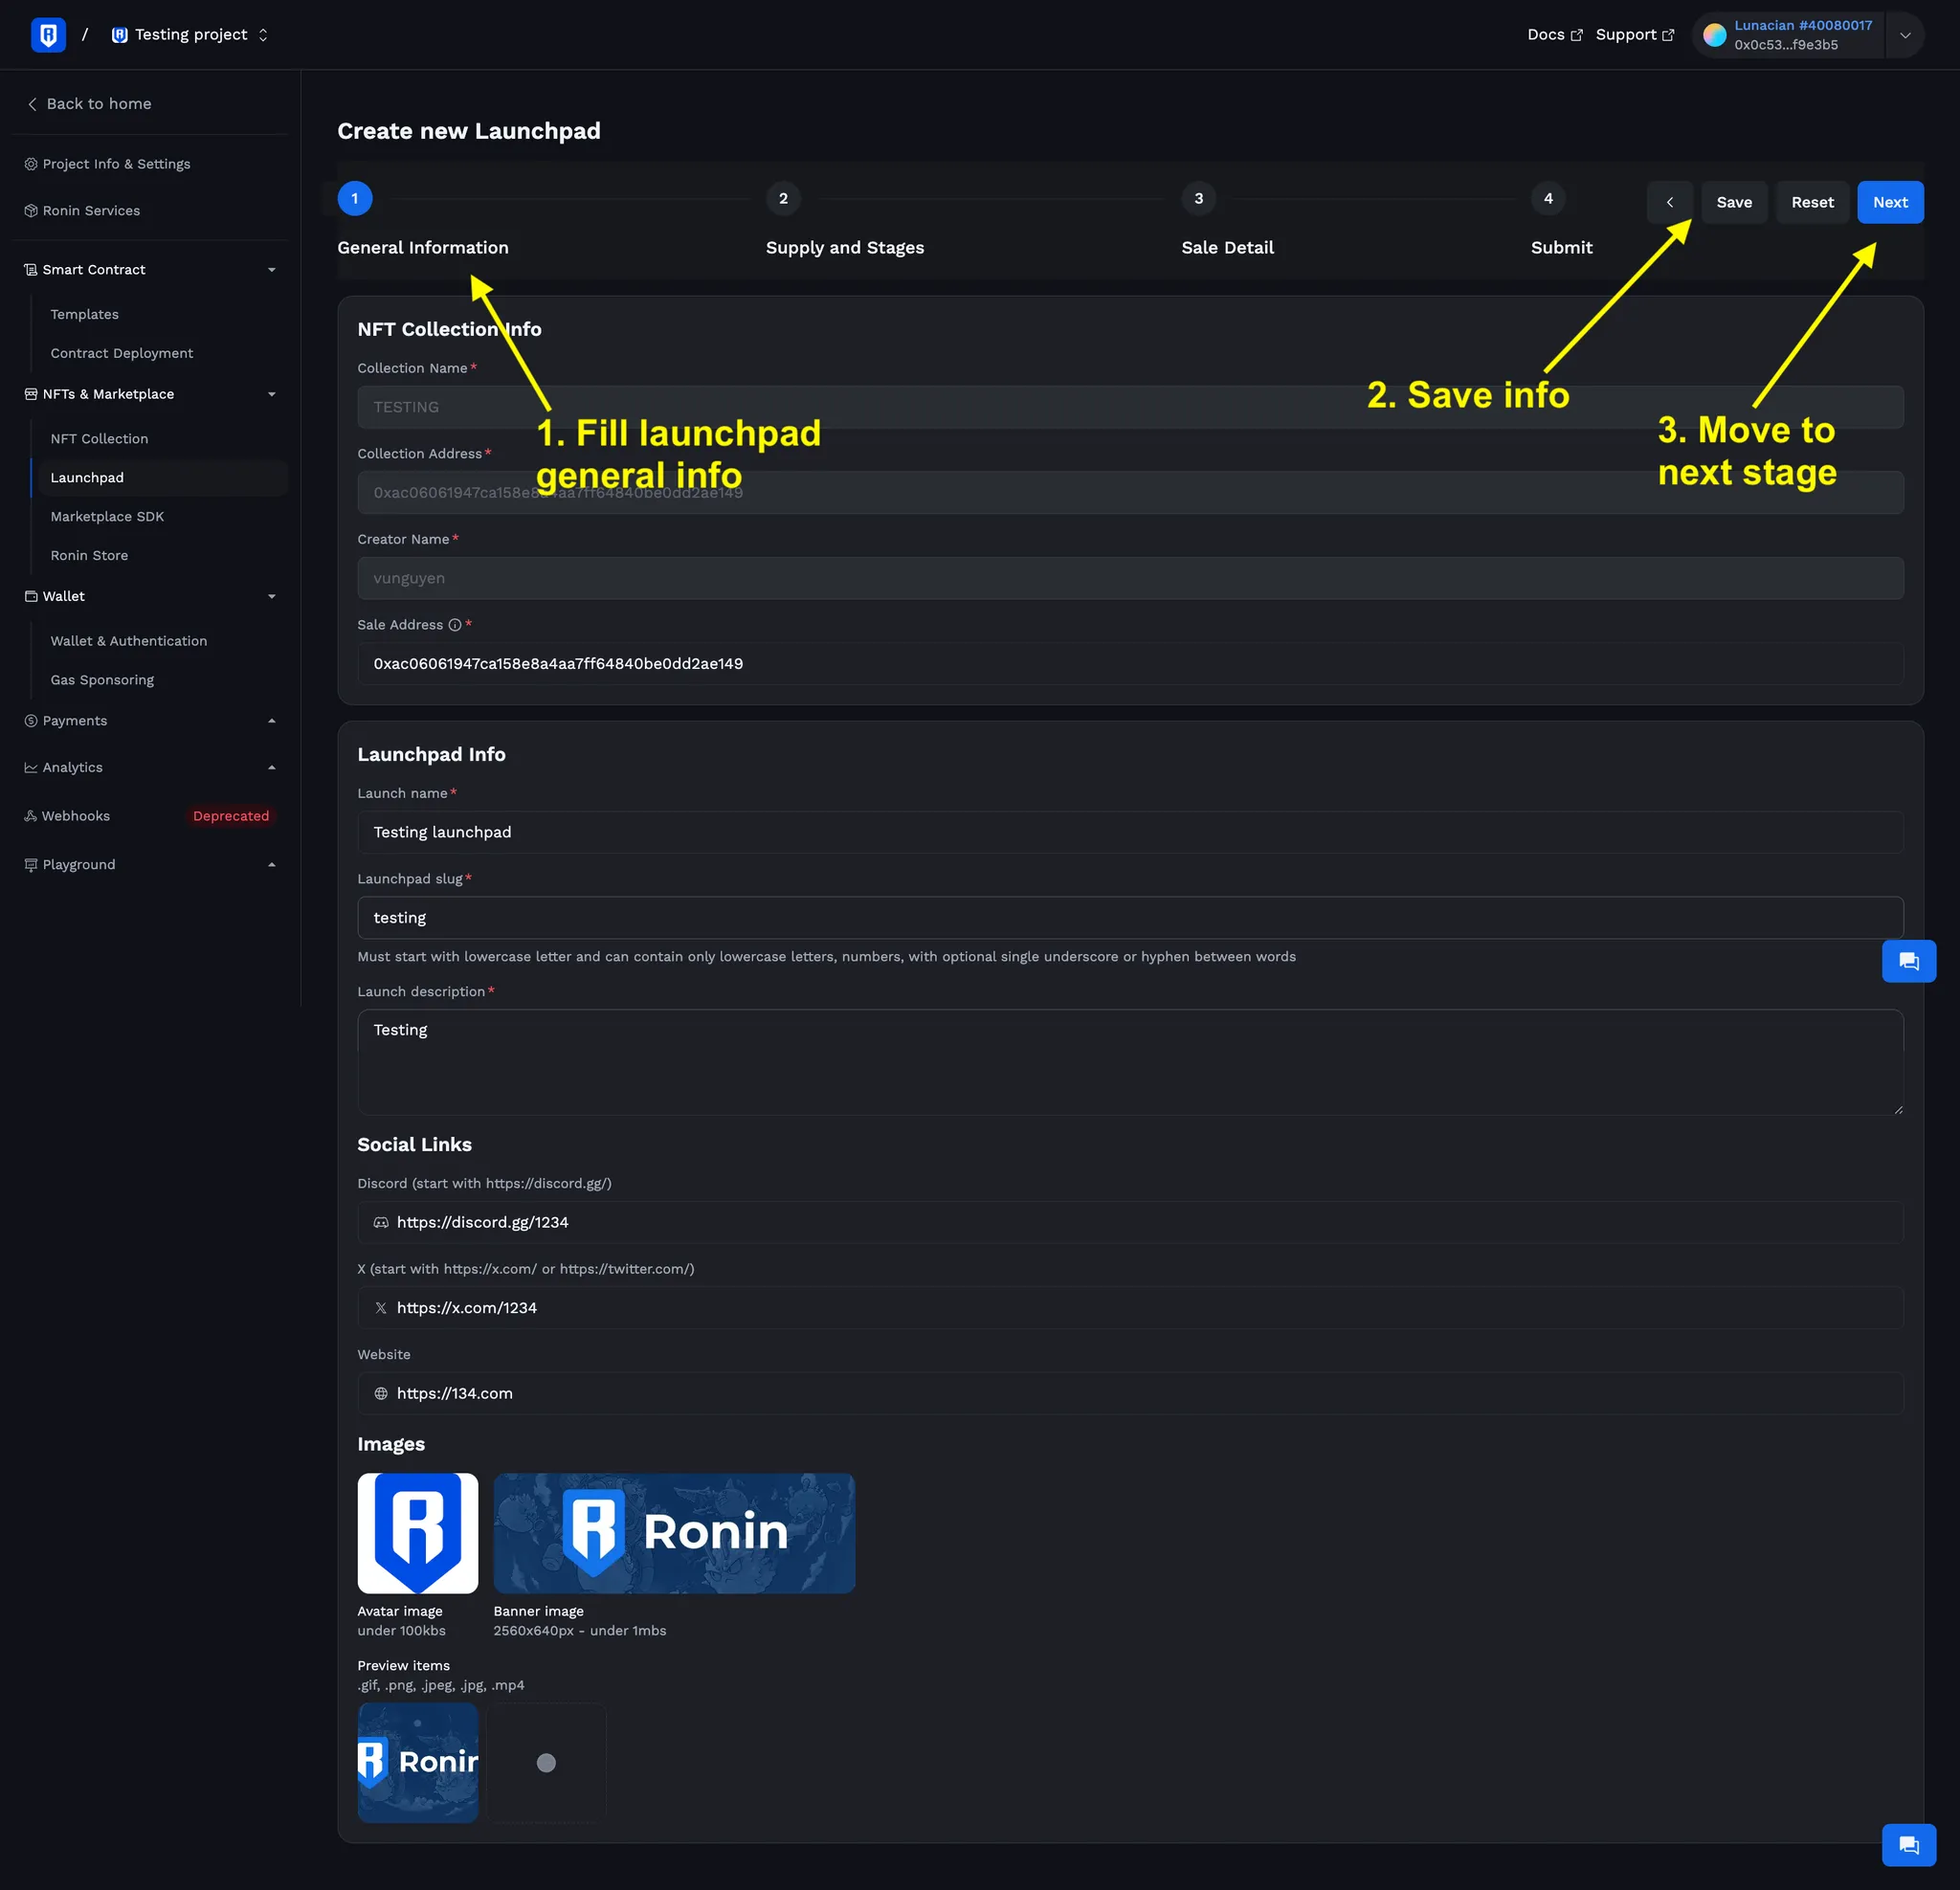
Step 1: Launchpad general info
Fill in these required fields:
- Sales Address: wallet address to receive your launchpad sale revenue.
- Slug: custom slug of your Launchpad (better for SEO). If not set, it will be your contract address by default.
- Allowed characters: lowercase letters, numbers, hyphens (
-), and underscores (_) only. - E.g. if your slug is
sabong-saga-genesis, then your Launchpad URL will behttps://marketplace.roninchain.com/launchpads/mints/sabong-saga-genesis
- Allowed characters: lowercase letters, numbers, hyphens (
- Launch Description: a brief overview of your launchpad sale
- Avatar: a square image (512x512px) representing the launchpad
- Banner: a banner image (2560x640px) for launchpad
- Previews: media file of your NFT previews (max 5 files, each < 5MB)
- Support
.gif,.apng,.png,.jpeg,.jpg,.mp4formats
- Support
Optional info:
- Discord: Discord invite link
- X: official Twitter/X profile link
- Website: URL link to your official website
Click Save, and then click Next to move to step 2.
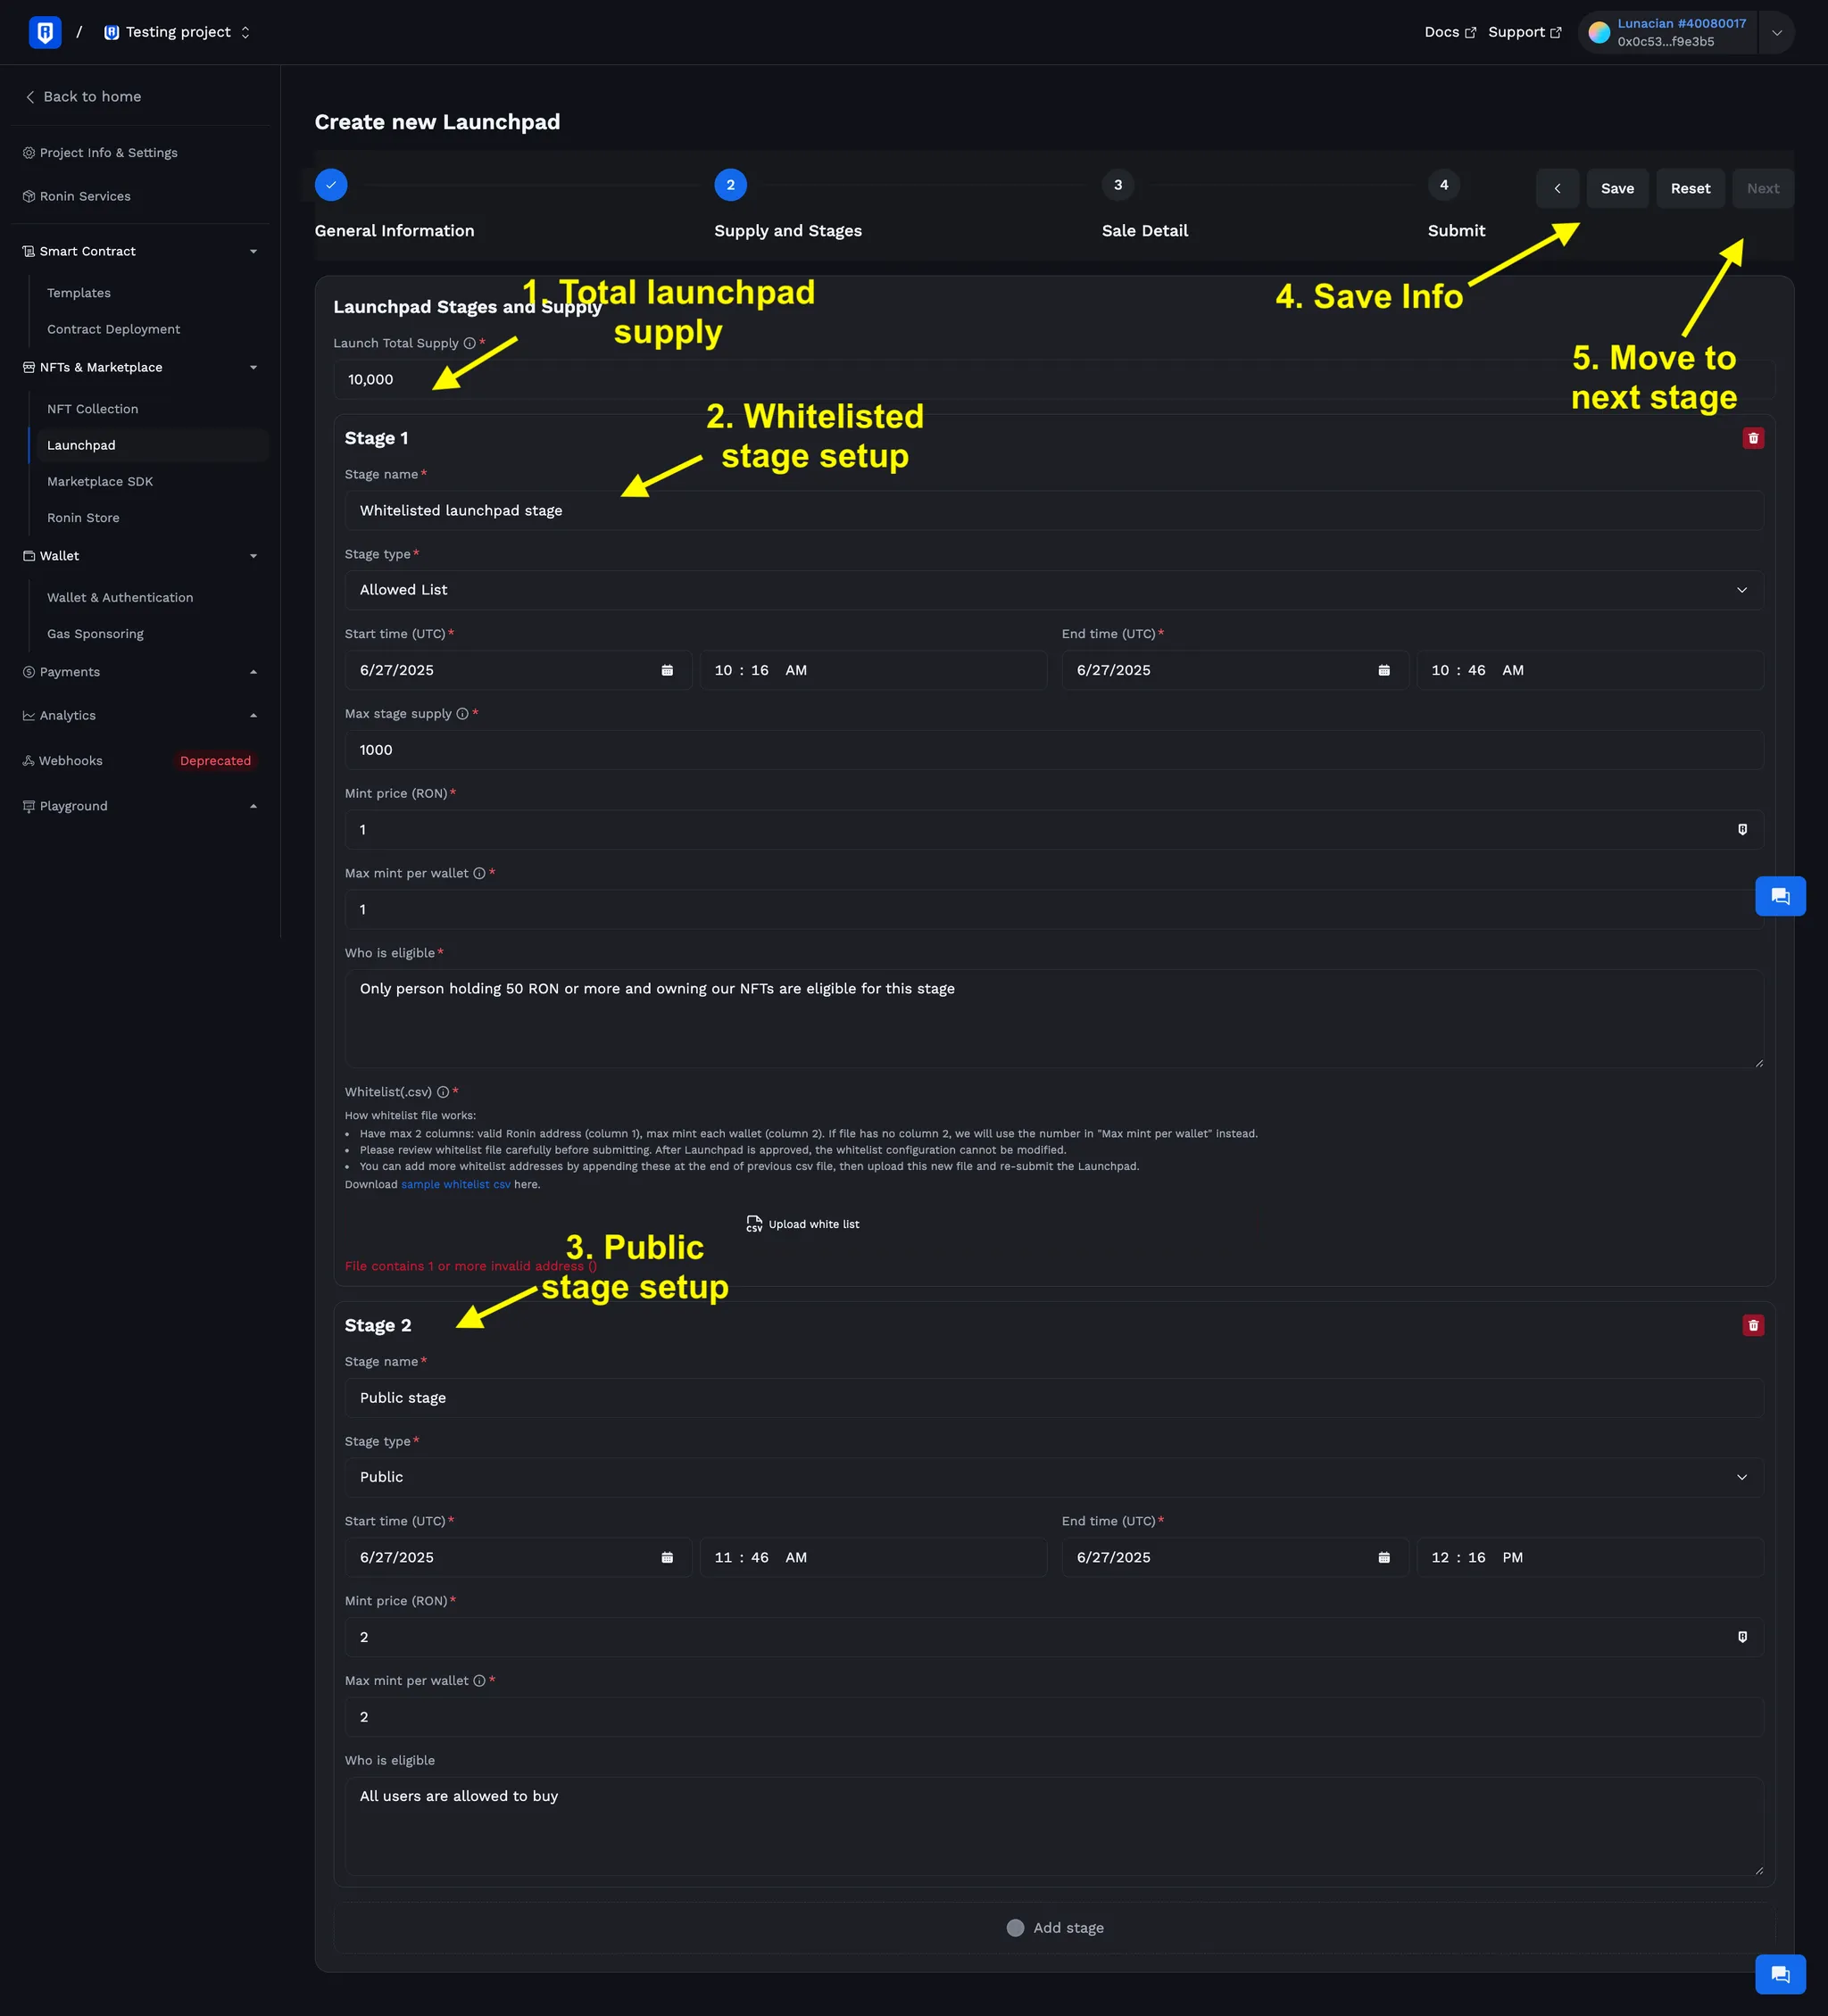
Step 2: Setup launchpad stages
There are two types of launchpad stage:
- Allowed List stage: Only whitelisted wallet addresses (defined in a csv file) are allowed to join. One launchpad can have many allowed list stages.
- Public stage: Any user could join. One launchpad can only have one public stage.
Setup for each stage:
- Stage name: display name of launchpad stage.
- Stage type: Allowed List / Public.
- Start time / End time (UTC timezone): must be at least 72 hours from your listing request submission, and not overlap with previous stages.
- Max supply: max number of NFTs allowed to mint in this stage a. Max supply <= total launch supply b. If actual mint <= max supply, the remaining will be left over to the next stage.
- Max mint per wallet: max number of NFT mints allowed for each wallet a. Max mint per wallet <= total launch supply
- Who is eligible: text describing eligible criteria for joining in this stage
- Whitelist (.csv): have at most 2 columns defining wallets eligible to join this stage.
- Wallet address (column 1):
- Must be a valid Ronin address with prefix
0xand lower case, no RNS. - All addresses must be unique.
- Must be a valid Ronin address with prefix
- Quantity (column 2): define max number of NFT mints allowed for each address. If this column is not defined,
max mint per walletwill be applied.
- Wallet address (column 1):
⚠️ Please check your whitelist file very carefully before submitting. Once Launchpad is approved, the config of csv file CANNOT BE CHANGED.
Click Save, and click Next to move to step 3.
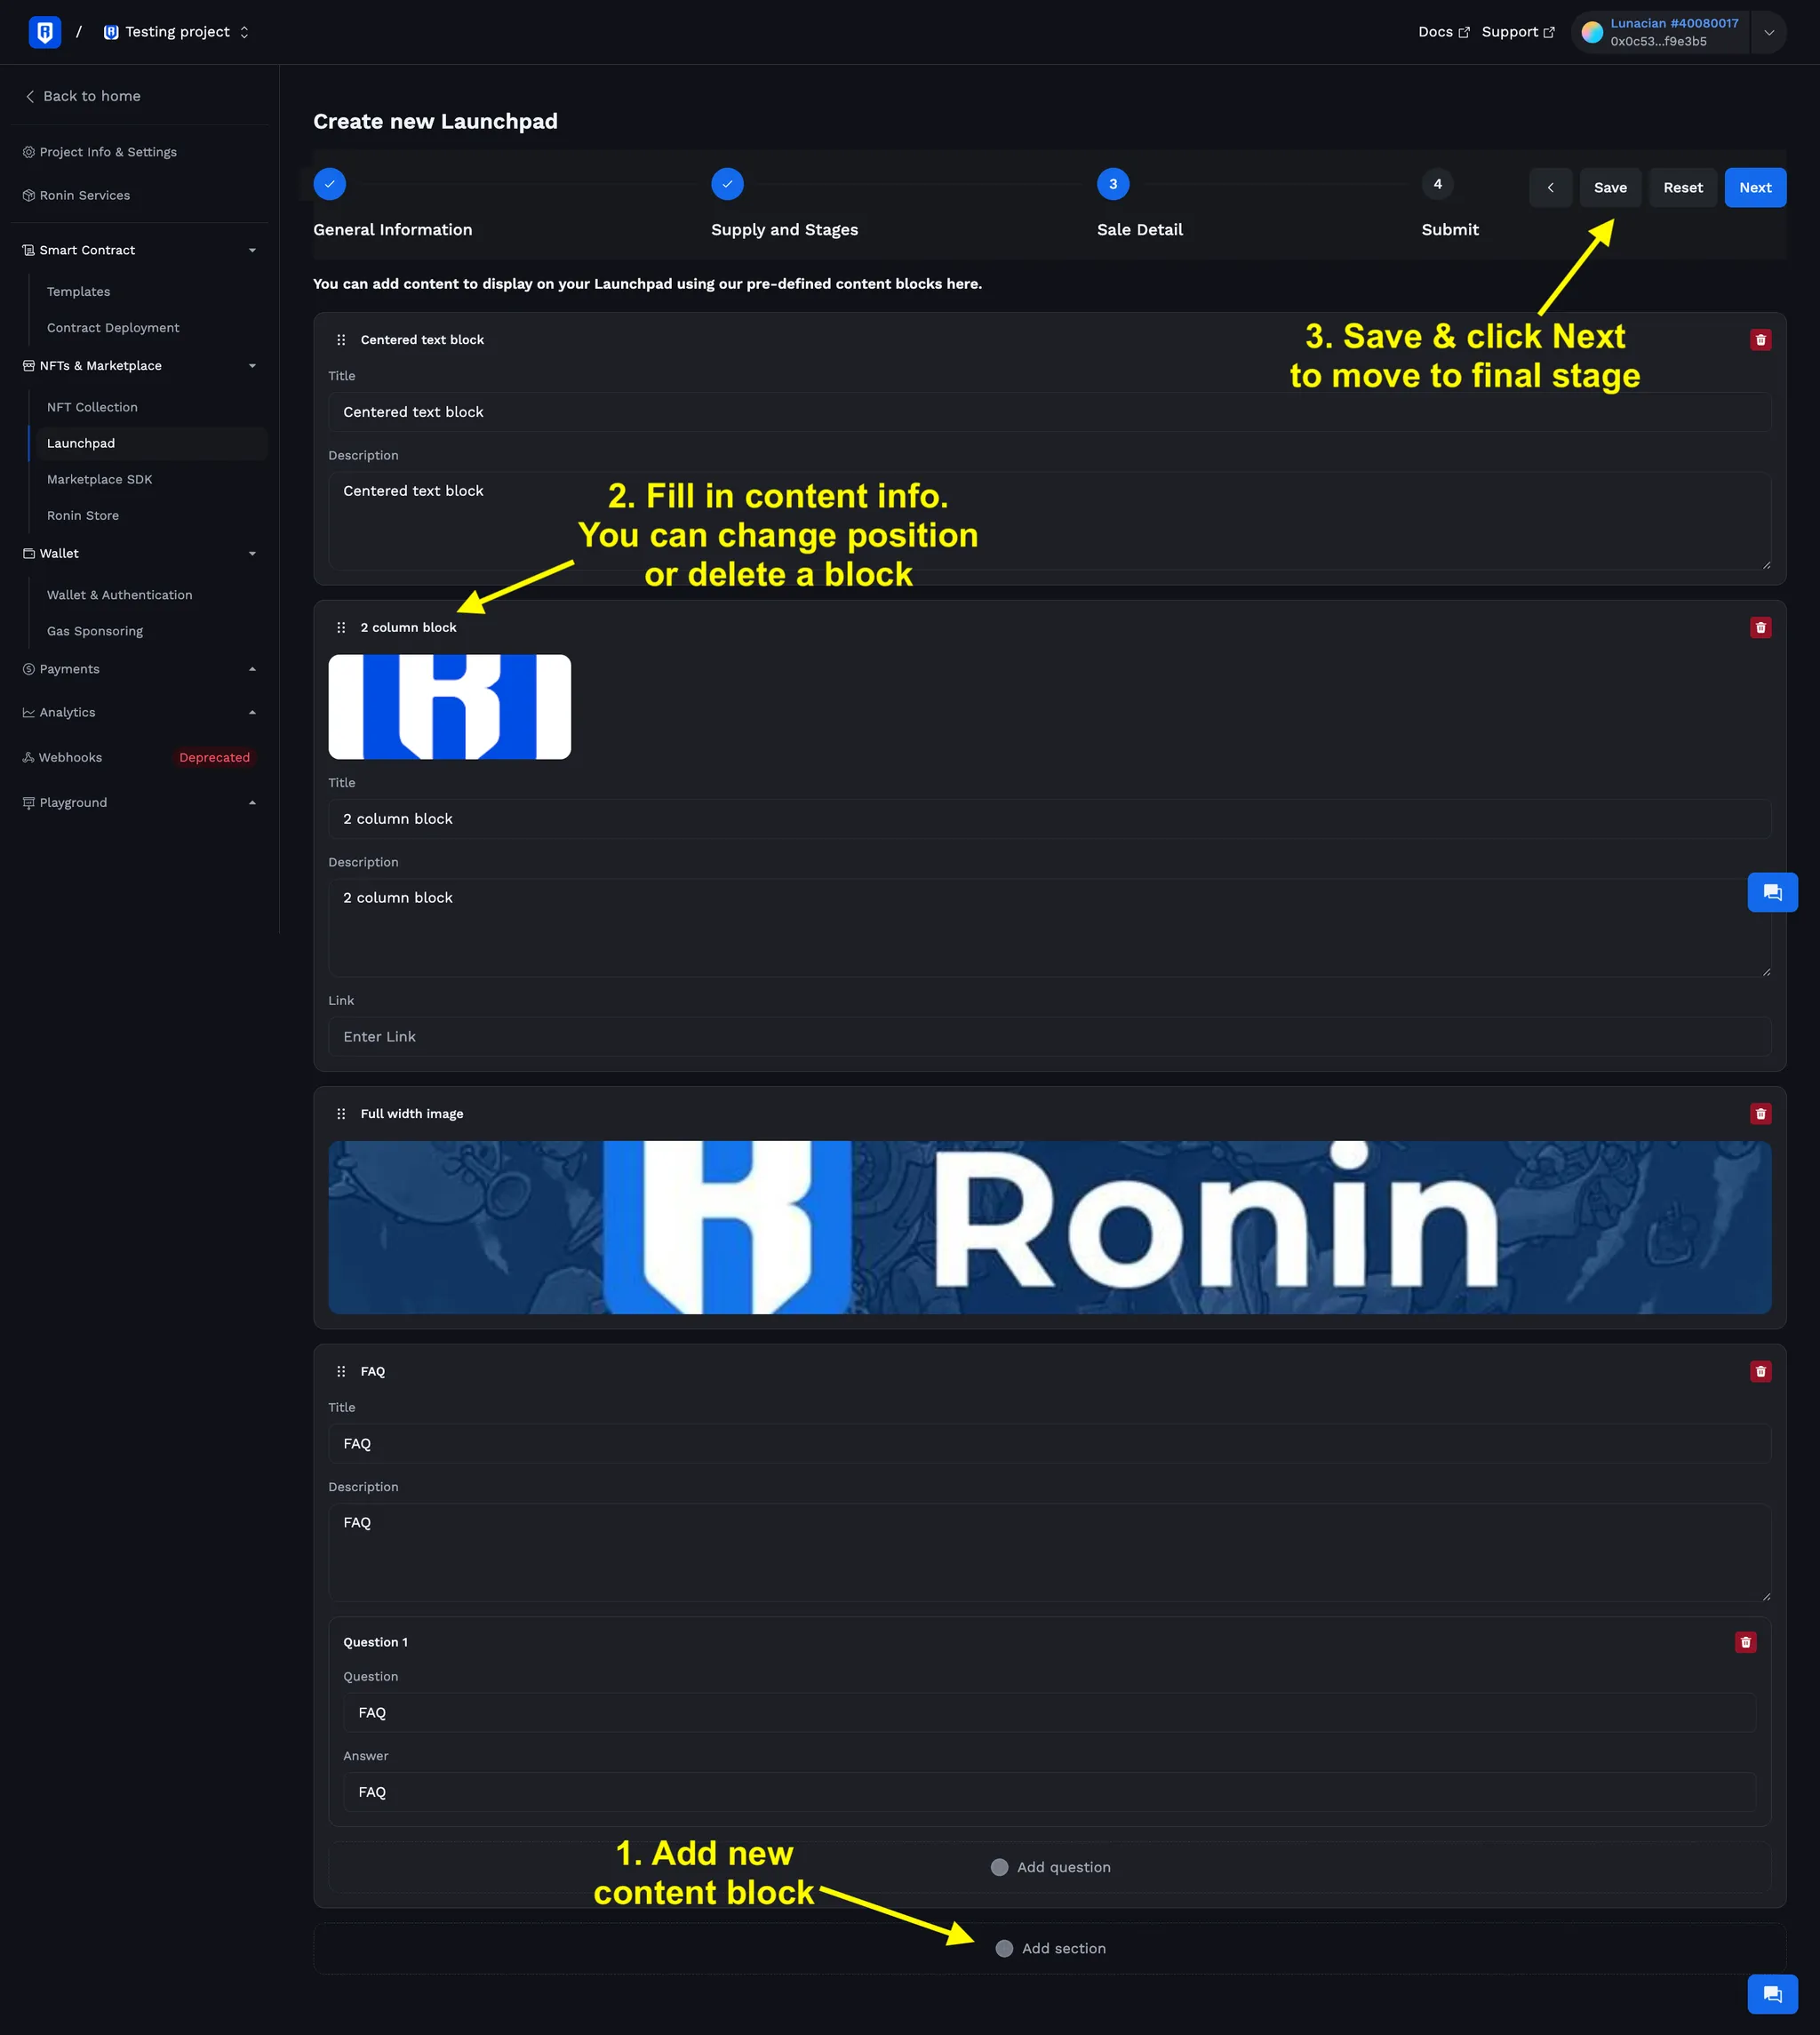
Step 3: Setup launchpad details
We support 5 pre-defined blocks to display contents related to your Launchpad, each requiring different content fields. You can see how each block looks like as below.
Centered text block:

2-column style:

4-column style:

Full width image:
FAQS:

You can add as many content blocks as you want for your launchpad. After finishing, click Save, and click Next to move to final step.
Step 4: Preview and Submit
Click on button Preview to see how your Launchpad are displayed on Ronin Market, especially the content details in step 3.
Then, set the Display time (UTC) to show your Launchpad on Ronin Market, and click Continue.
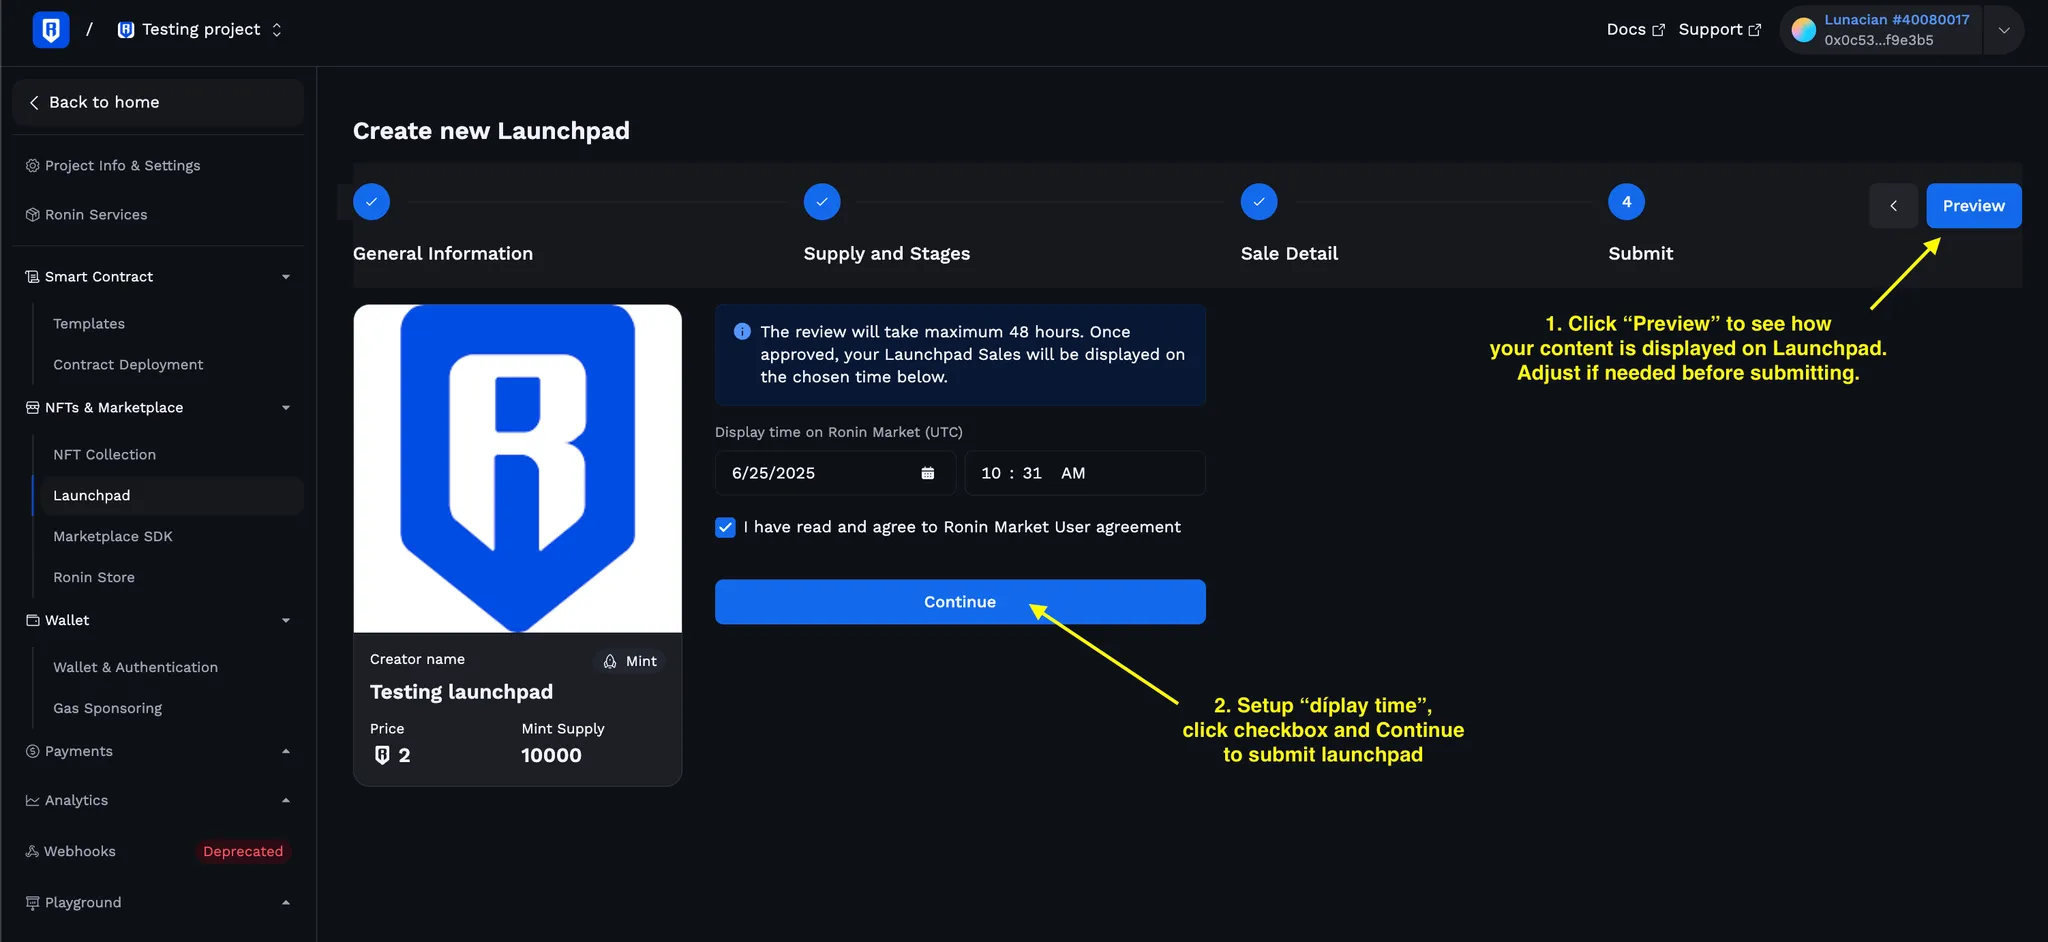
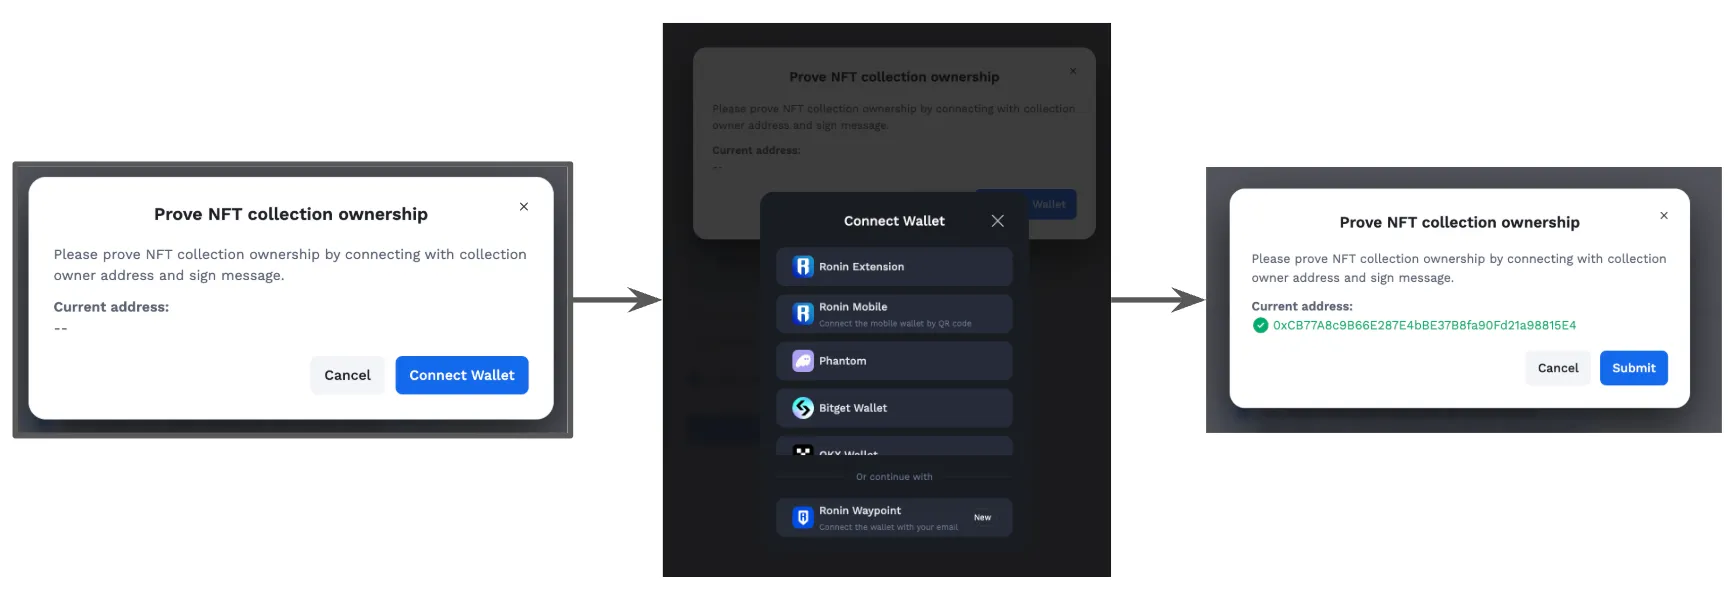
You must prove ownership of the NFT collection by connecting to owner wallet and sign a message. Then, click Submit.
Wait for result
Your submission will be reviewed and responded maximum 72 hours. If you need further help, please contact support through Discord tech chat.