Set up and configure Ronin Waypoint
Overview
To use Ronin keyless wallet, you need to follow this guideline to set up configurations on Ronin Developer Console.
Steps and guidelines
Step 1. Create a new account on Ronin Developer Console
Sign up a new account on Ronin Developer Console:
- Go to the Ronin Developer Console.
- Create an account using an email and password or social login.
Your Ronin account is ready to use.
Step 2. Create a project in Ronin Developer Console
Next, create a new project in the Ronin Developer Console:
-
Log in to the Ronin Developer Console.
-
Click New Project.
-
Enter your app's name and project's type, then click Create.
-
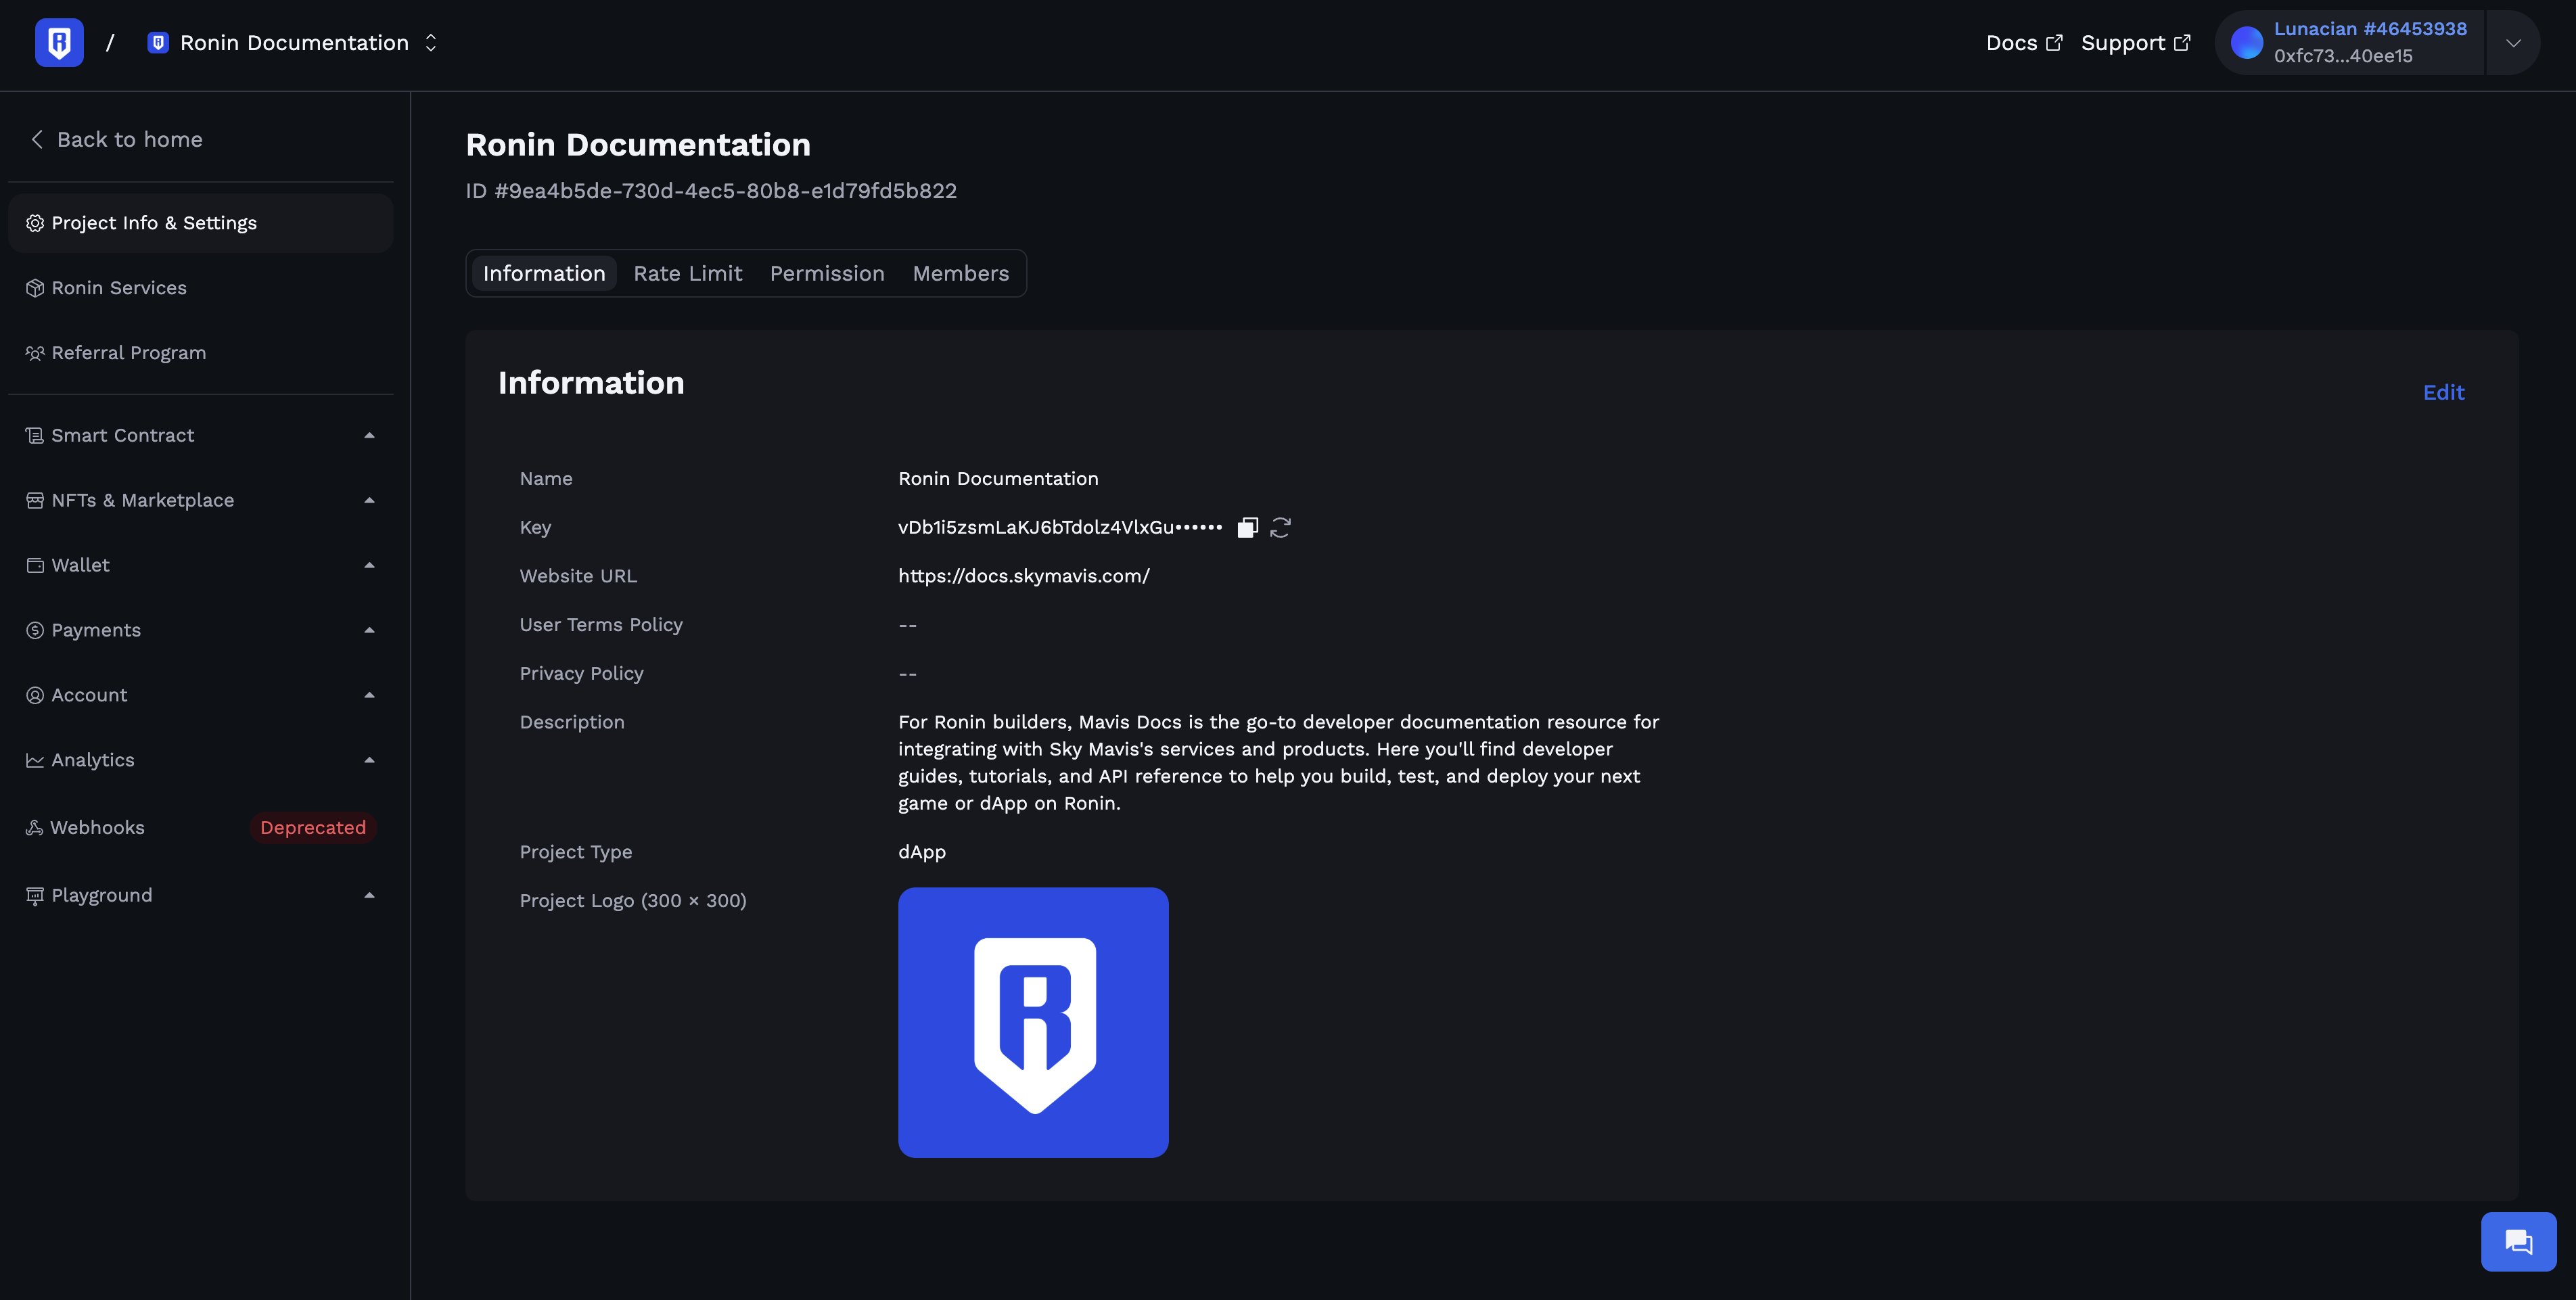
Select the app you created, then click Edit, and then on the Information tab, fill in the Website URL, and App Logo fields.
-
Click Save.
Step 3. Set up configurations
Redirect URI and Client ID are required to initialize the Ronin Waypoint SDK. Failure to provide these parameters will result in errors during the integration process.
Complete the setup steps to configure Ronin Waypoint for your app:
-
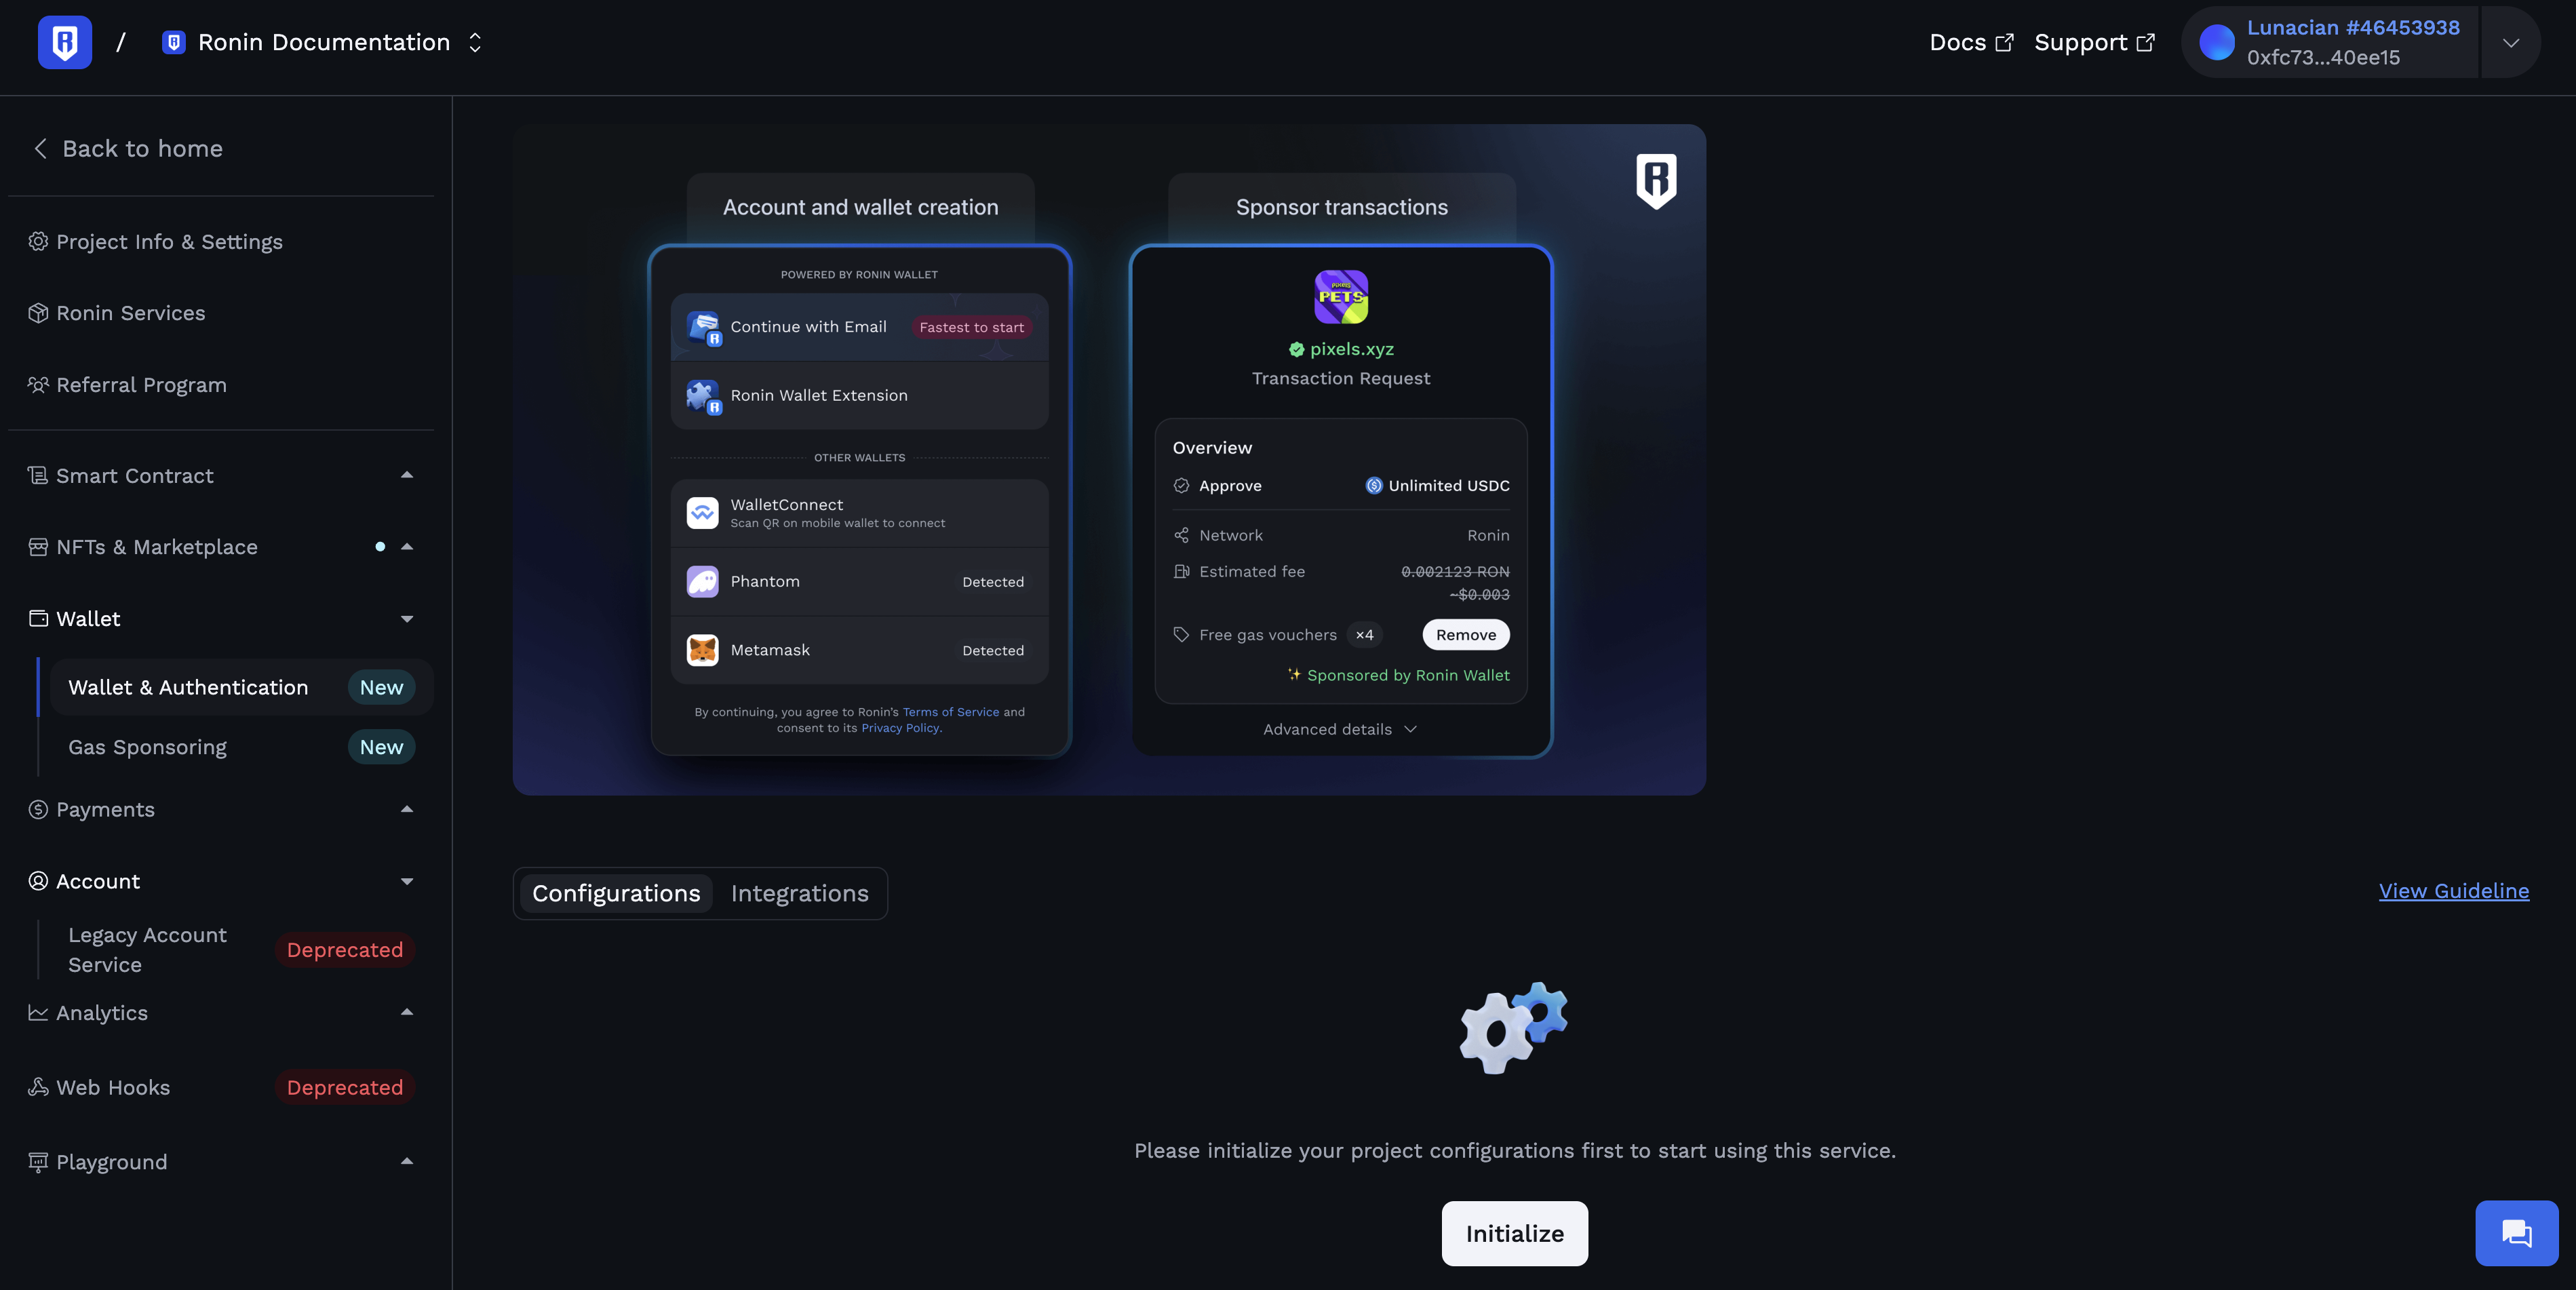
In the Ronin Developer Console, select your project, then go to Wallet > Wallet & Authentication, and click Initialize.
-
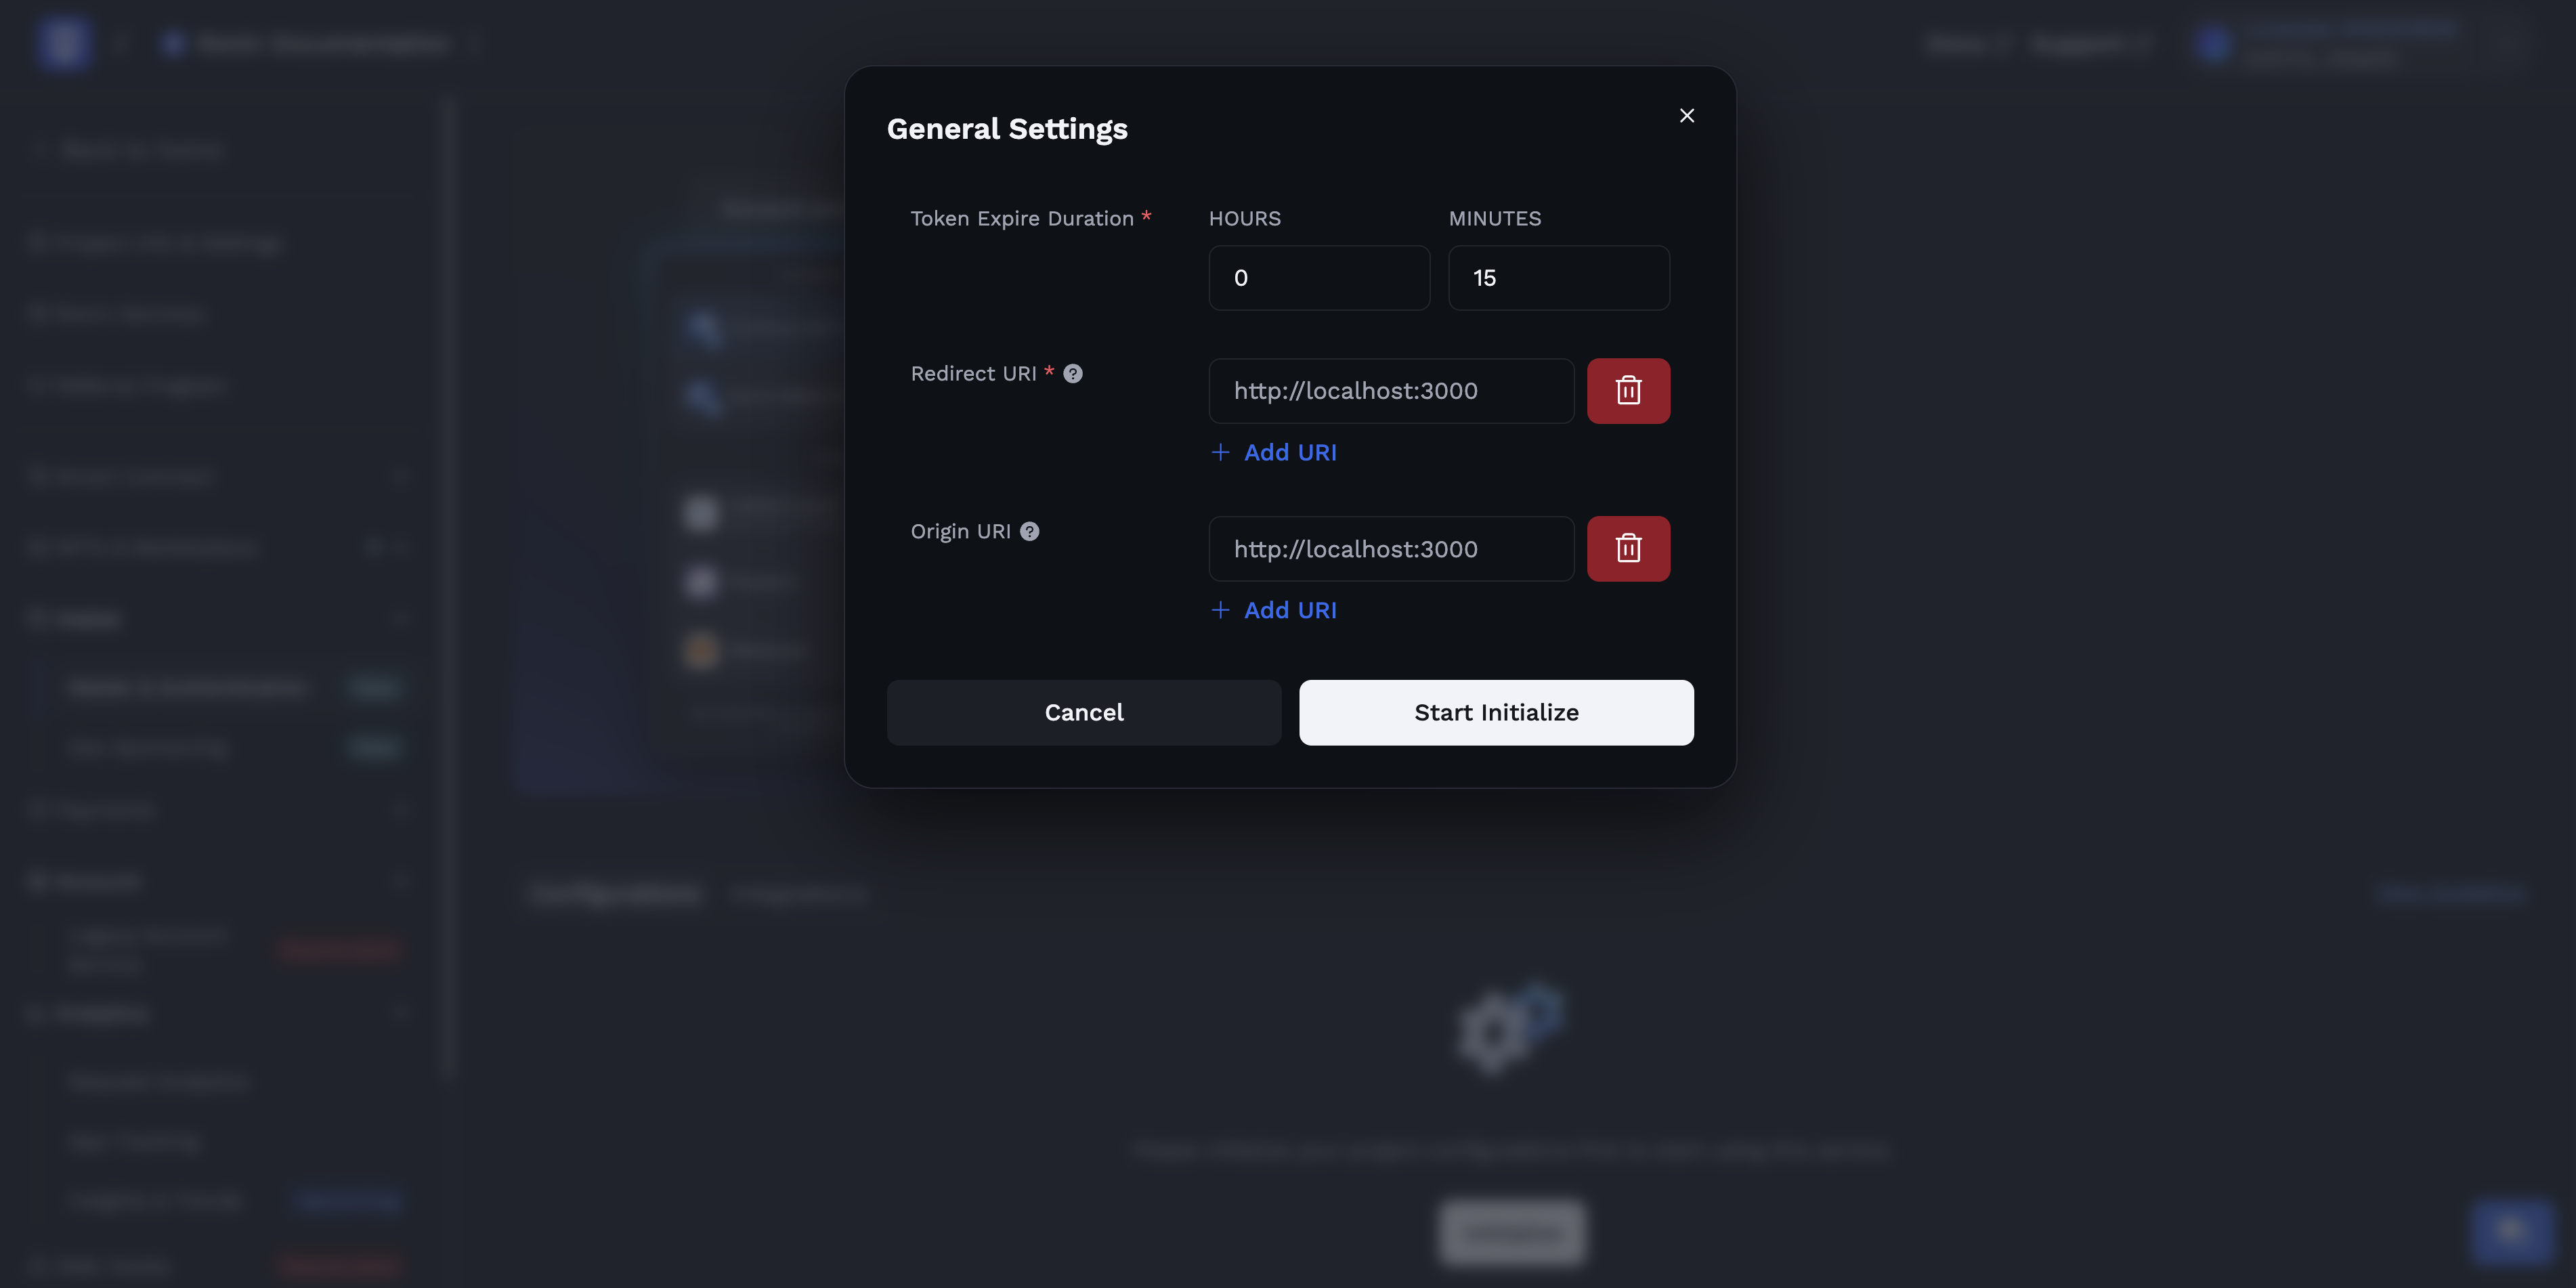
Fill in the parameters Redirect URI, Origin URI, and Token Expire Duration.
-
Token Expire Duration, define the expiration period for the ID token that is returned after user authorization with Ronin Waypoint. The recommended duration is 1 hour and at least 5 minutes. After expiration, you need to re-authorize Ronin Waypoint to issue a new ID token with the set duration.
-
In Redirect URI (required), define the URIs to which keyless wallet service navigates back after an authorization or transaction operation is completed. For mobile platforms, the redirect URI is your mobile app's deep link (for example,
mydapp://callback).Make sure to allowlist your redirect URIsShare your redirect URIs with your Sky Mavis point of contact to allowlist them for your app.
-
In Origin URI (optional) is used to define your application's origin when using the popup mode for authentication or interaction with the keyless wallet service. The origin URI must have either the
httporhttpsscheme. If your app only supports native devices, leave this field empty.
-
-
Click Initialize. Now you are ready to integrate with this service.
-
Copy the value from the CLIENT ID (PROJECT ID) field. You will need this value for the next step.
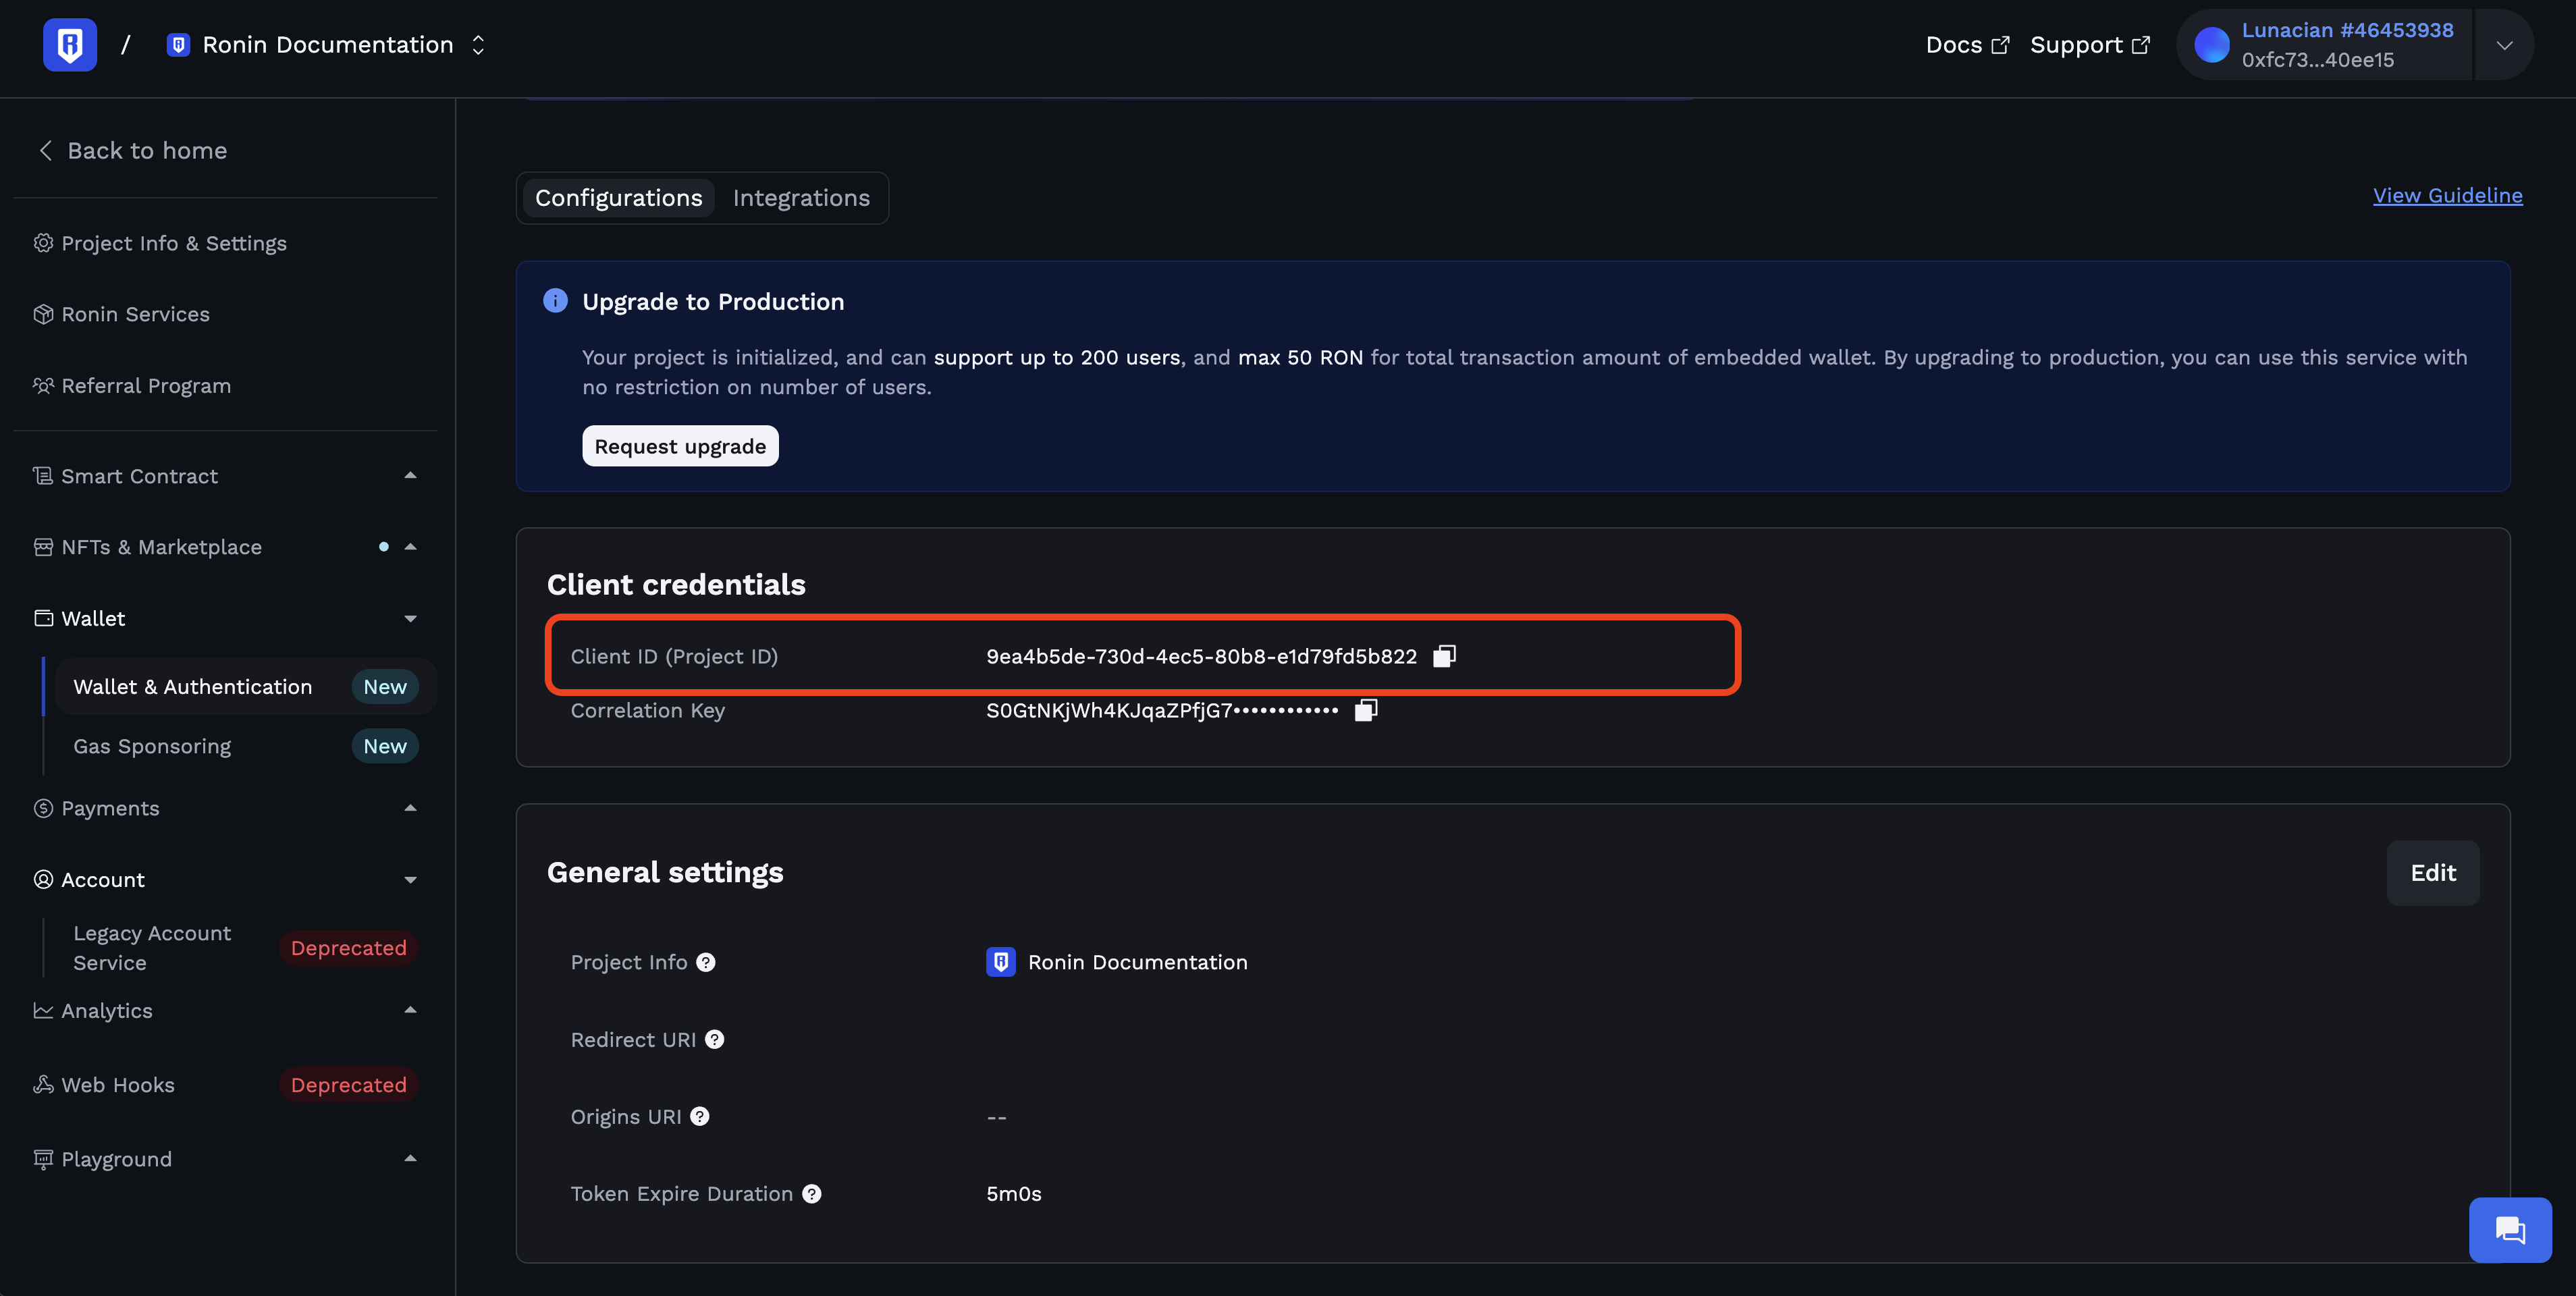
Your project is now initialized and operates in trial mode with a maximum of 200 users and 50 RON for total transaction amount of embedded wallet. To remove these restrictions and enable unlimited users, upgrade your project to production mode.
Step 4. Upgrade your app to production mode
To upgrade to production mode and remove the user restrictions, please follow:
-
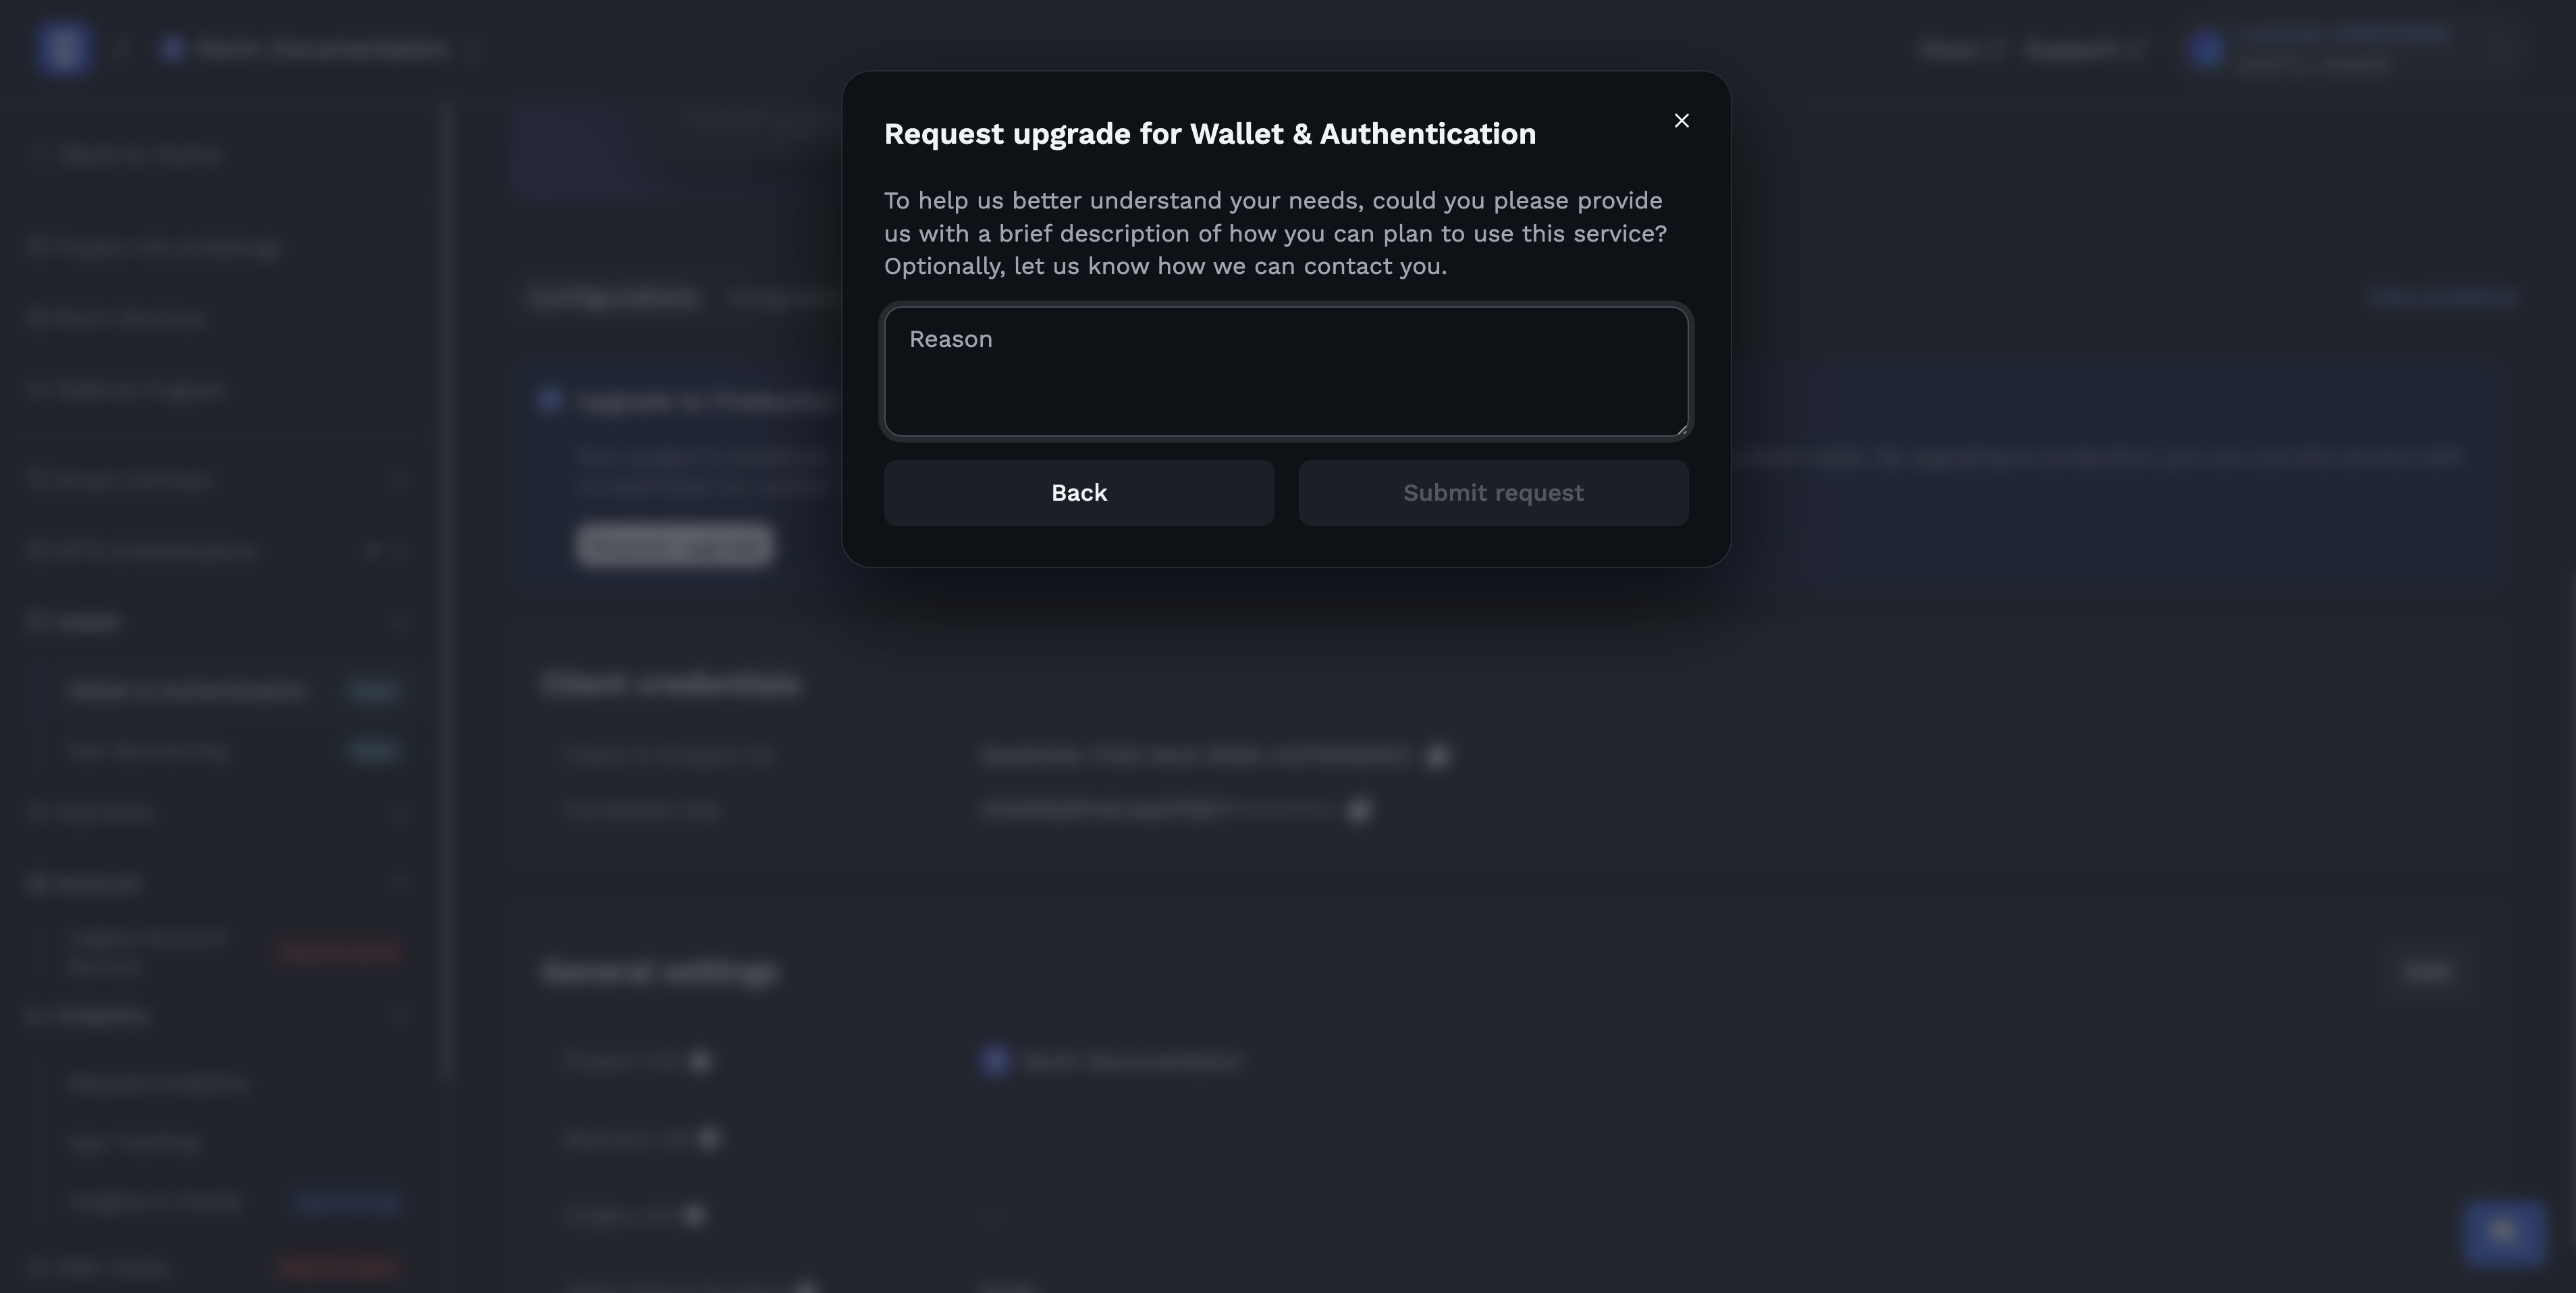
Click Request Upgrade on the Ronin Developer Console.
-
Share with us about your app on the field Reason.
-
Click Submit request. Our team will review your request within max 1 working day.
-
After approved, the restriction on number of users for your app will be removed.
Next steps
After the setup is complete, you can integrate Ronin Waypoint into your game using the SDK that best fits your platform: