Get started
Overview
This guide shows to get started as a developer: create an account, create an app to get your API key and app ID, then request access to services you want to use.
Steps
Step 1. Sign up for a Ronin Account
Register for a Ronin Account to access our Ronin Developer Console:
- Go to the Ronin Developer Console.
- Create an account using an email and password or social login.
Your Ronin Account is ready to use.
Step 2. Create an app in Ronin Developer Console
Next, create an app in the Ronin Developer Console to get your API key and app ID:
- Log in to the Ronin Developer Console.
- Click New Project.
- Enter your app's name and project's type, then click Create.
- Select the app you created, then click Edit, and then on the Information tab, fill in the Website URL, and App Logo fields.
- Click Save.
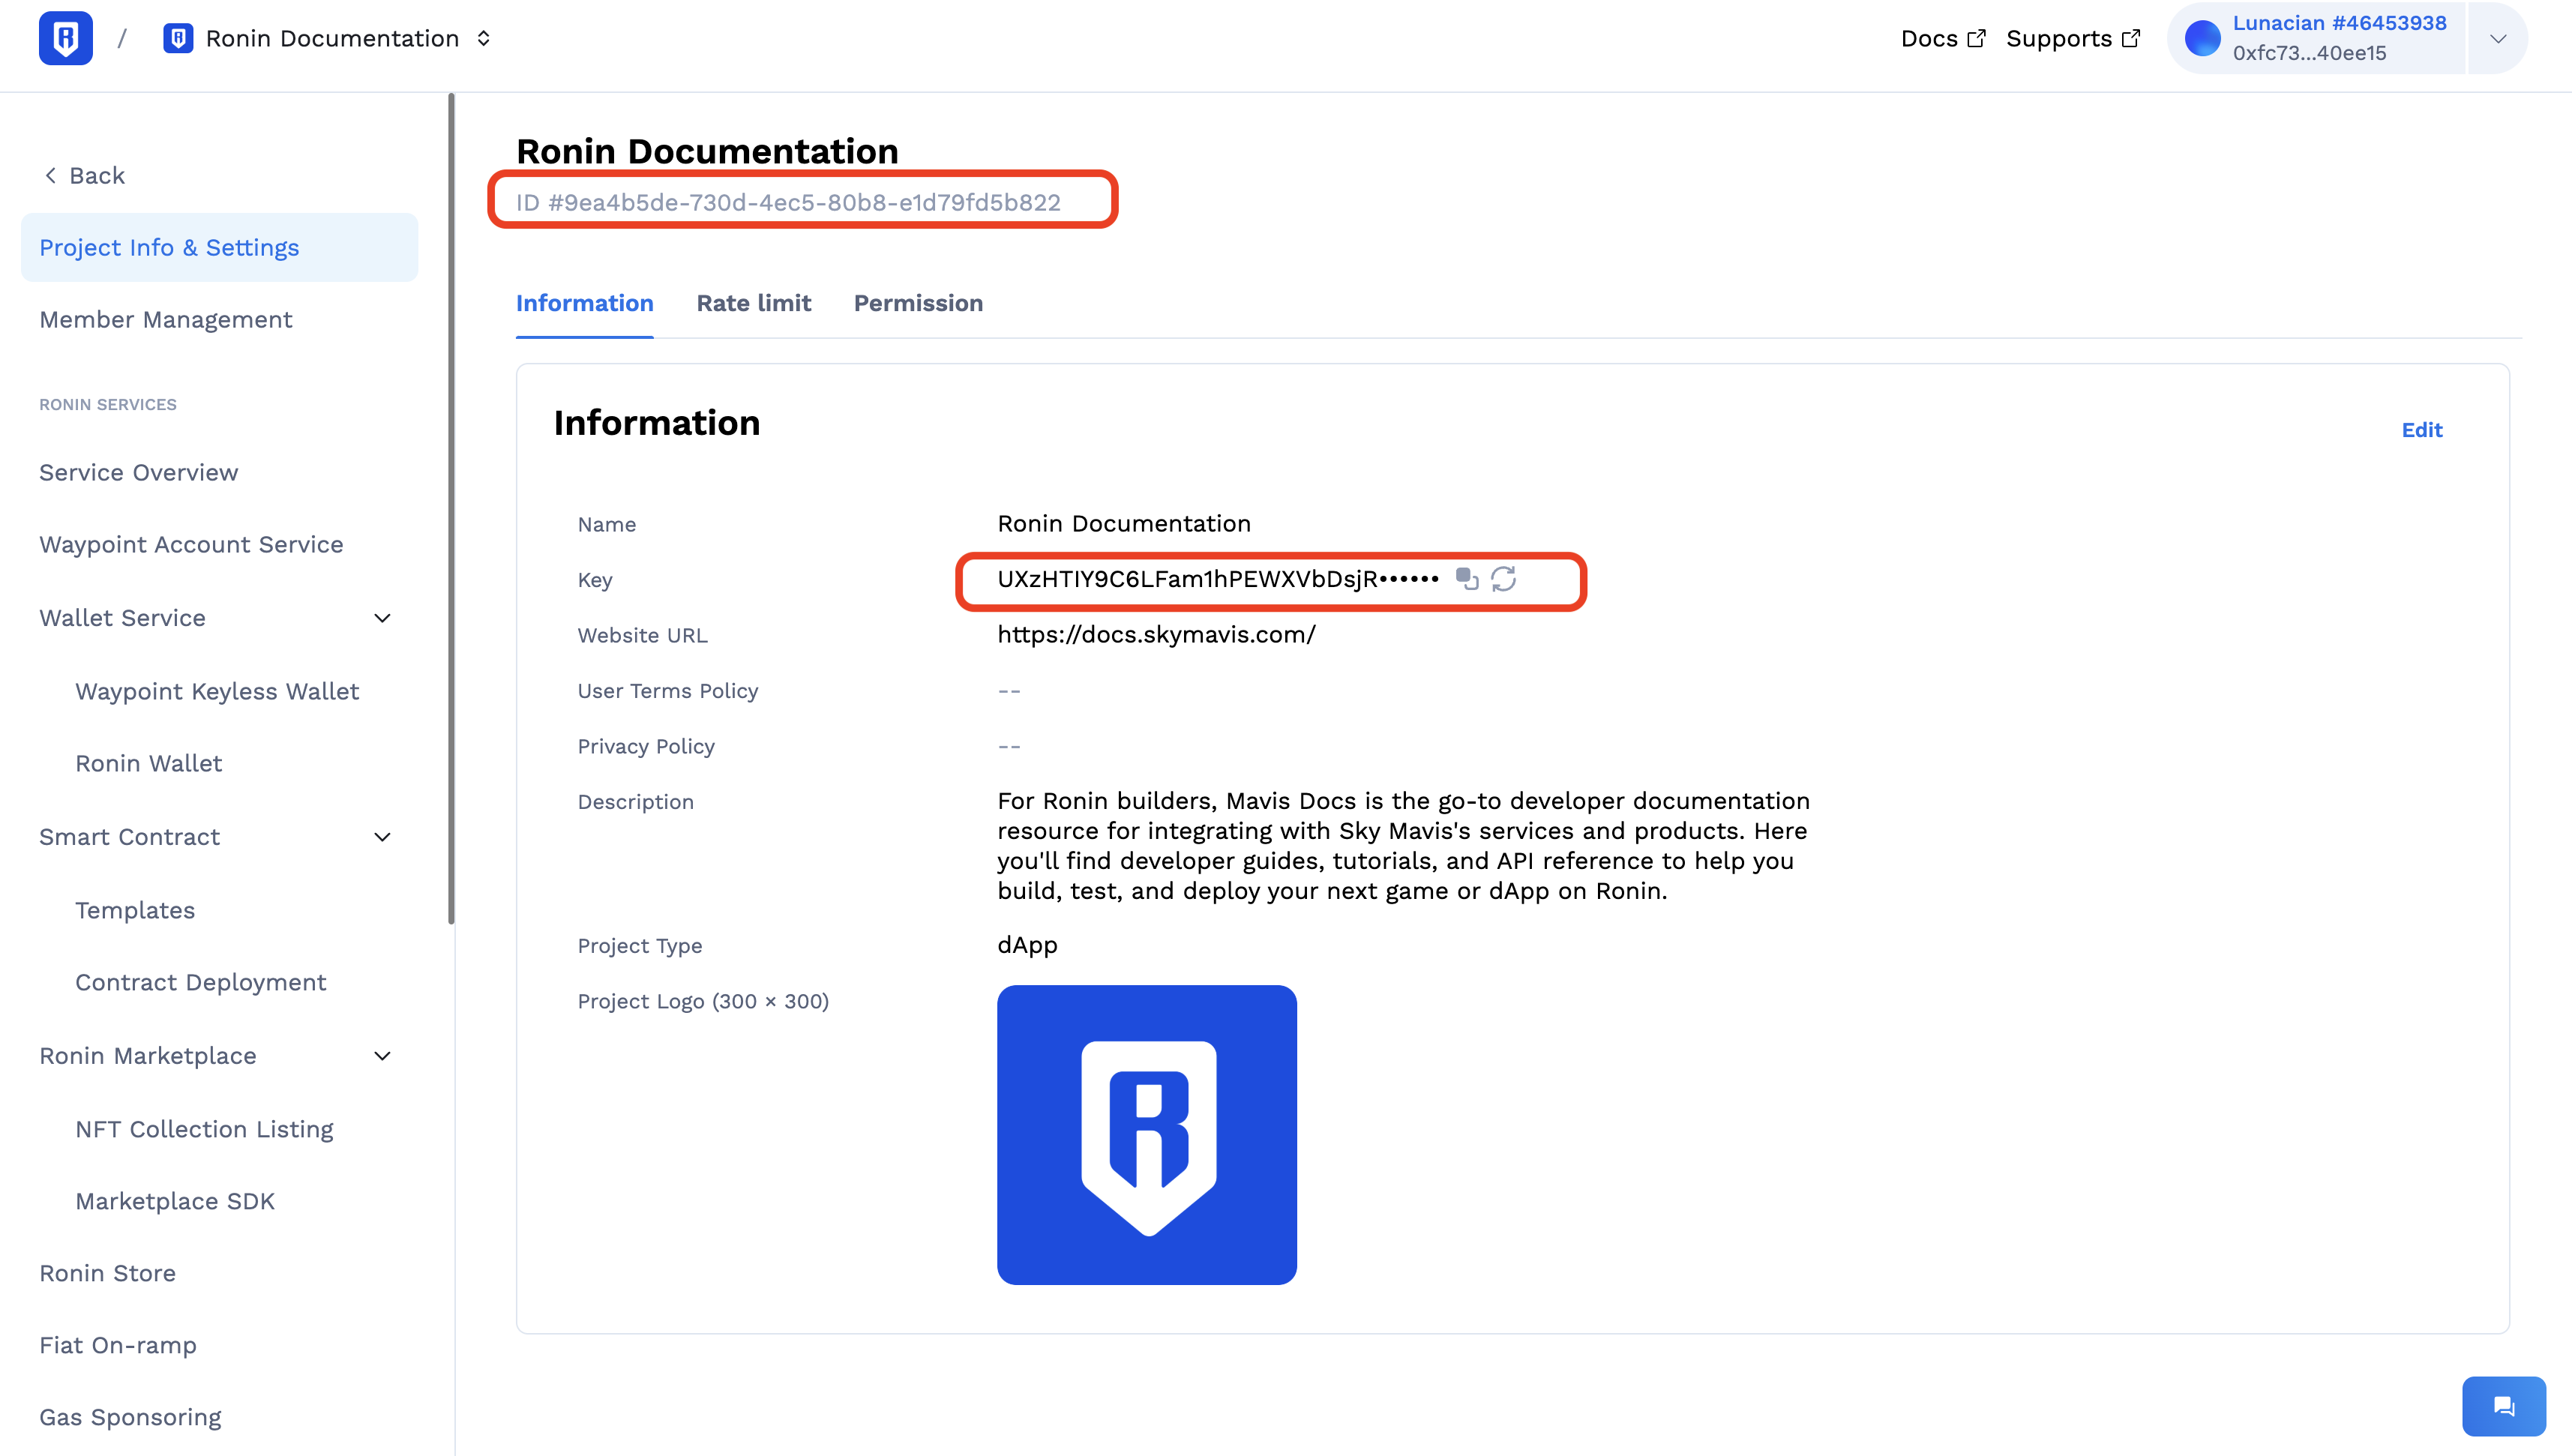
You can now view your API key and app ID by selecting the app and clicking the Information tab.
Regenerate API key
To regenerate the API key:
- Click Back to applications, then click More options (three dots) next to your app.
- Select Regenerate API key.
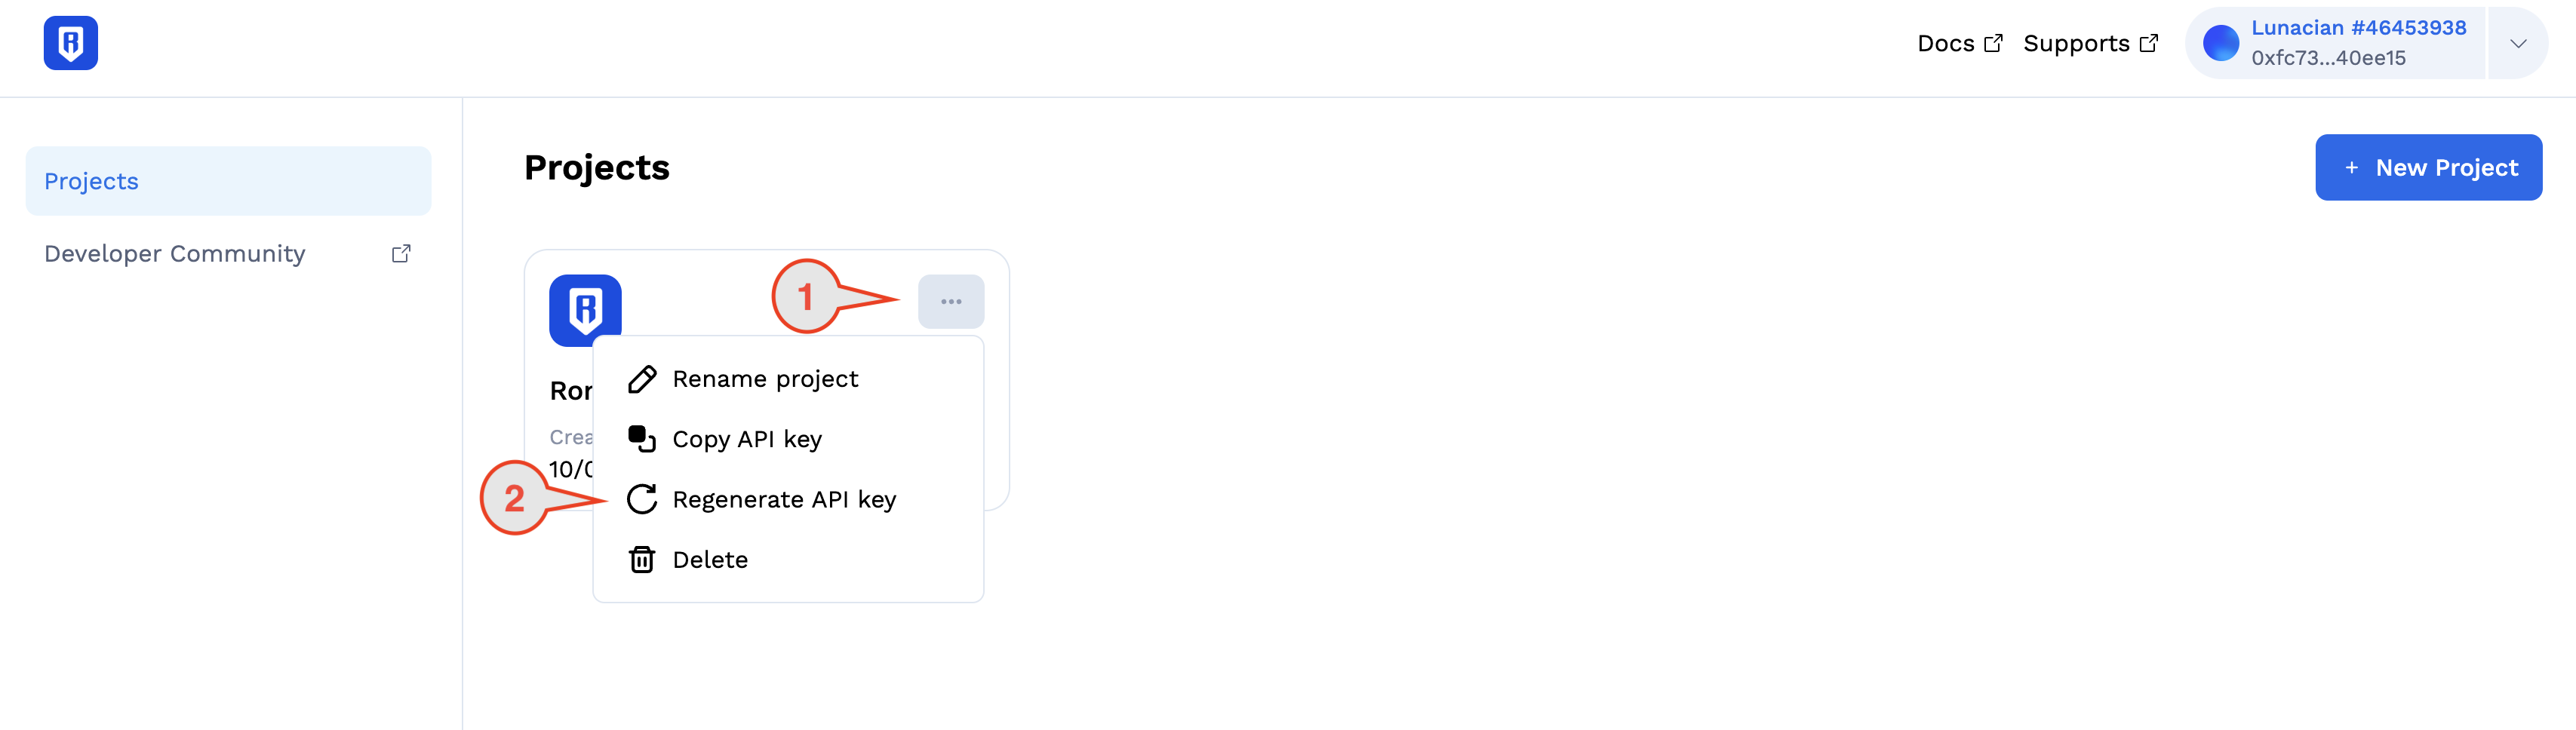
Note: If you regenerate your API key, update it in your app code or environment variables to avoid disruptions.
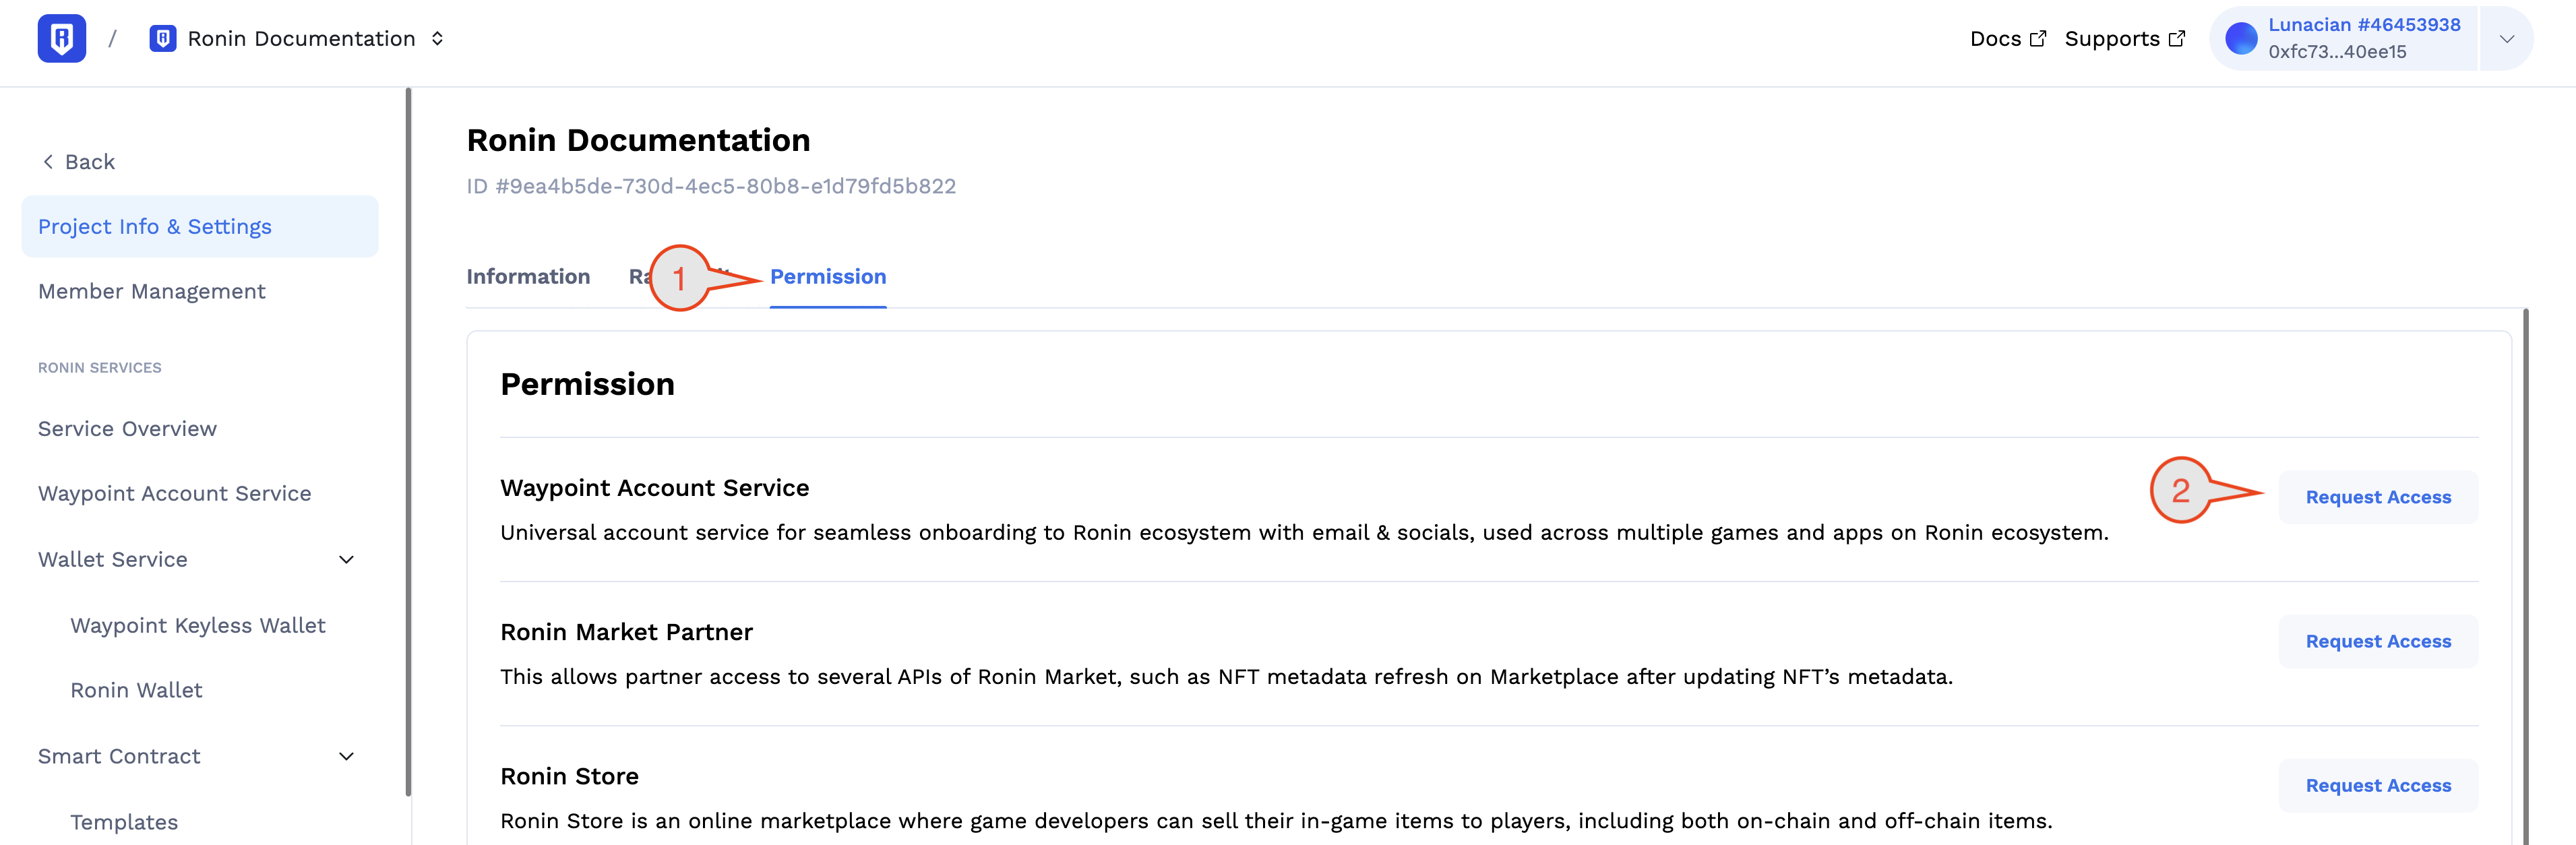
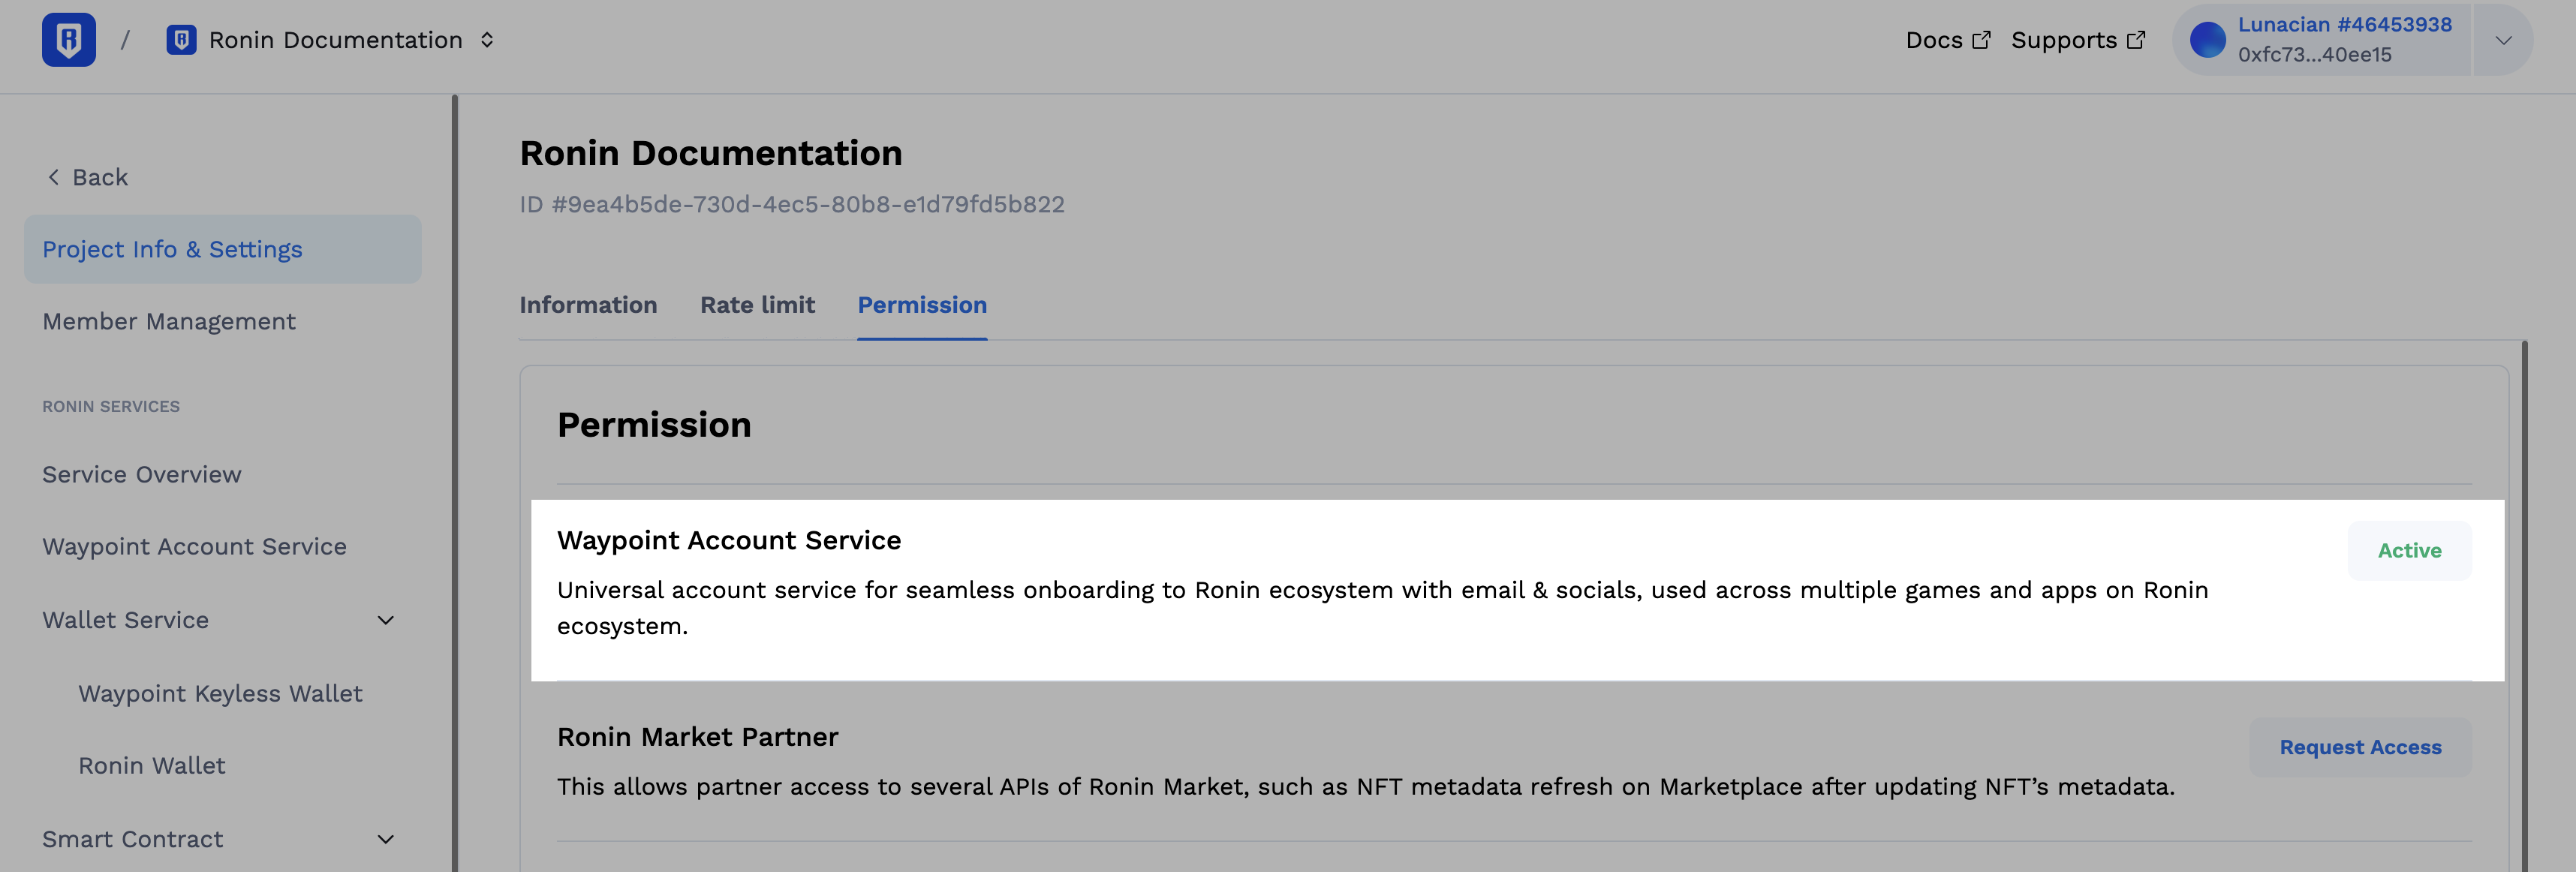
Step 3. Configure services
Some services require explicit permissions. To request access:
-
In the Ronin Developer Console, select your app, then select the App Permission tab.
-
Locate the service you want to use, then click Request Access.
-
Describe your potential use case with this service and submit the request.
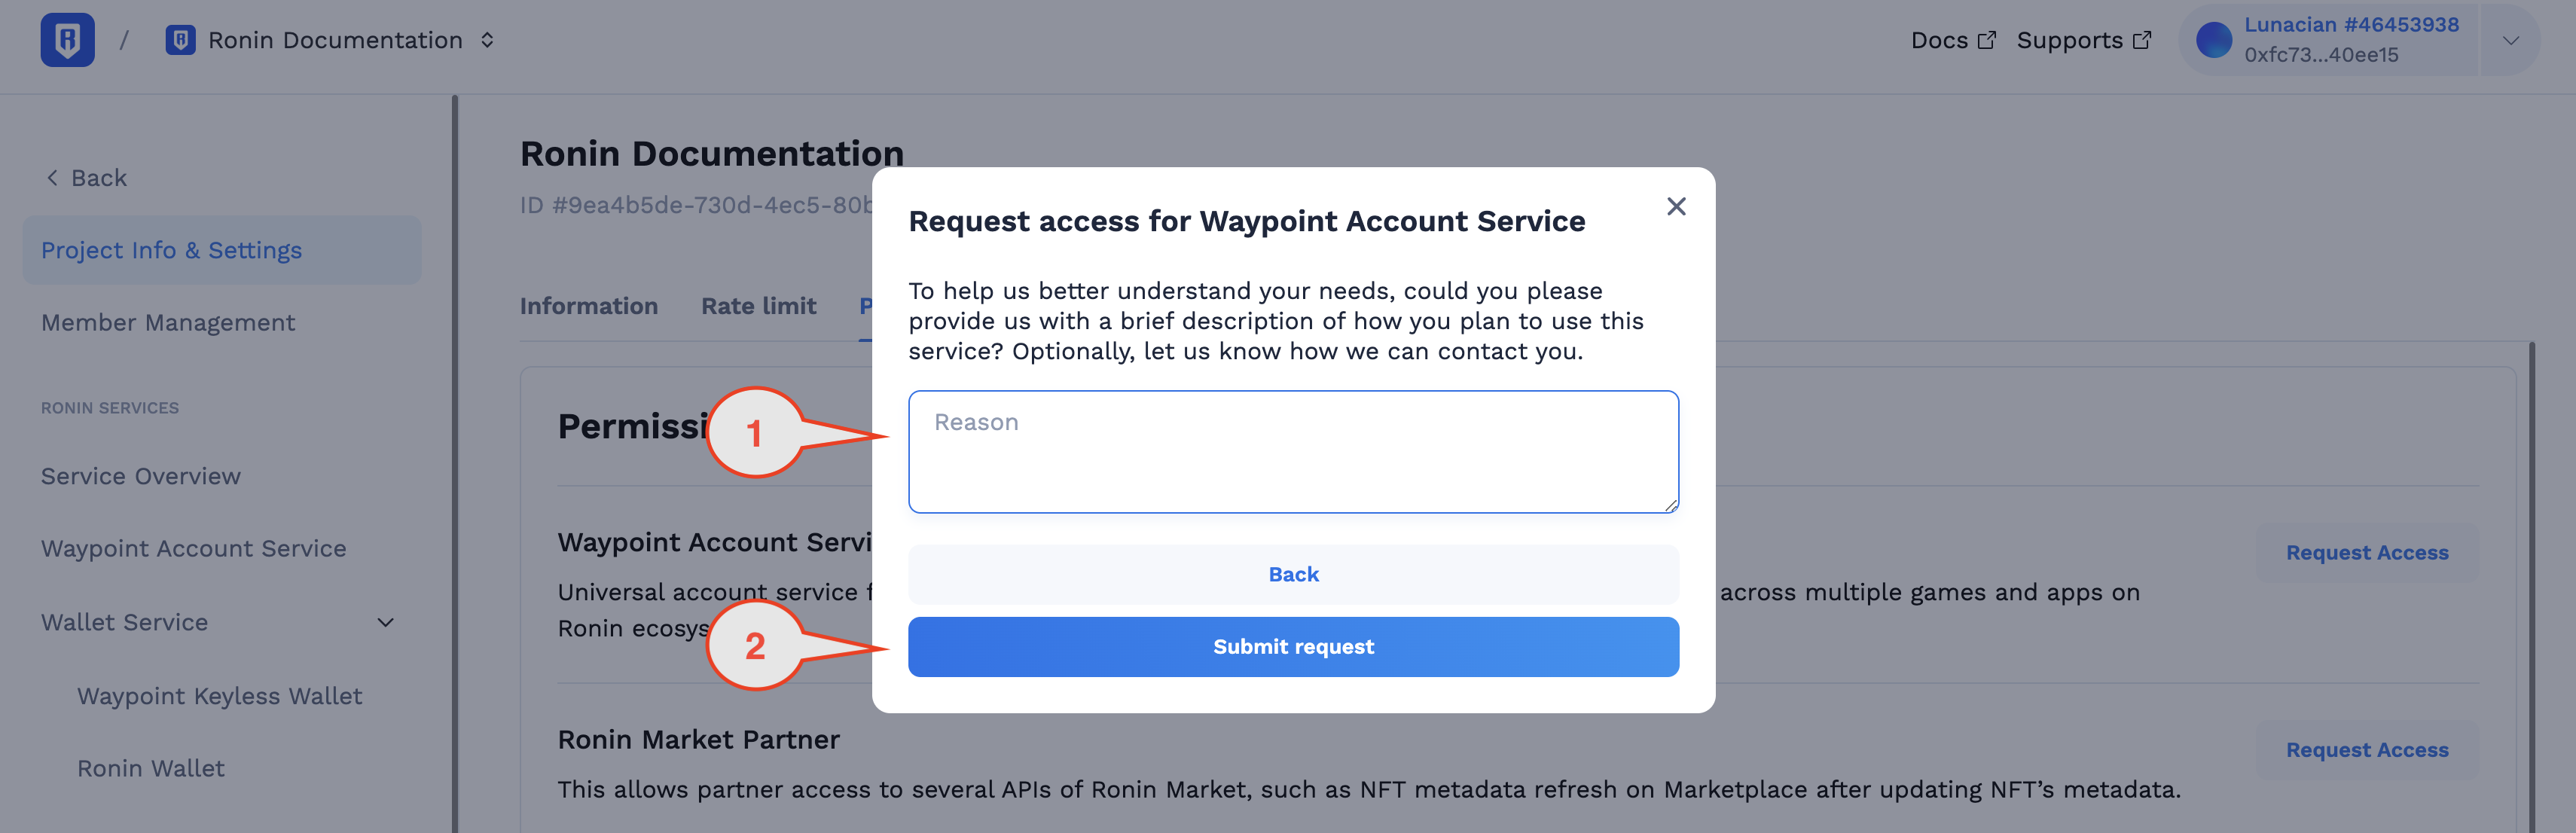
Once the request is approved, the service's status changes to "Active."
You can now integrate this service into your app. Refer to the service's documentation in the sidebar for configuration steps.