Manage items
Overview
This guide explains how to add, edit, publish, and unpublish items in your store using the Mavis Store CMS (content management system).
Prerequisites
- Mavis account. Sign up at accounts.skymavis.com.
- An app created in the Developer Console.
- Permission to use the Mavis Store service. To request, go to Developer Console > your app > App Permission > Mavis Store > Request Access.
- Completed integration with the Mavis Store API. For more information, see Integrate with Mavis Store API.
Add an item
Step 1. Fill in the details
Visit the CMS at store-cms.skymavis.com and log in with your Mavis account. If you don't have a Mavis account, sign up at accounts.skymavis.com.
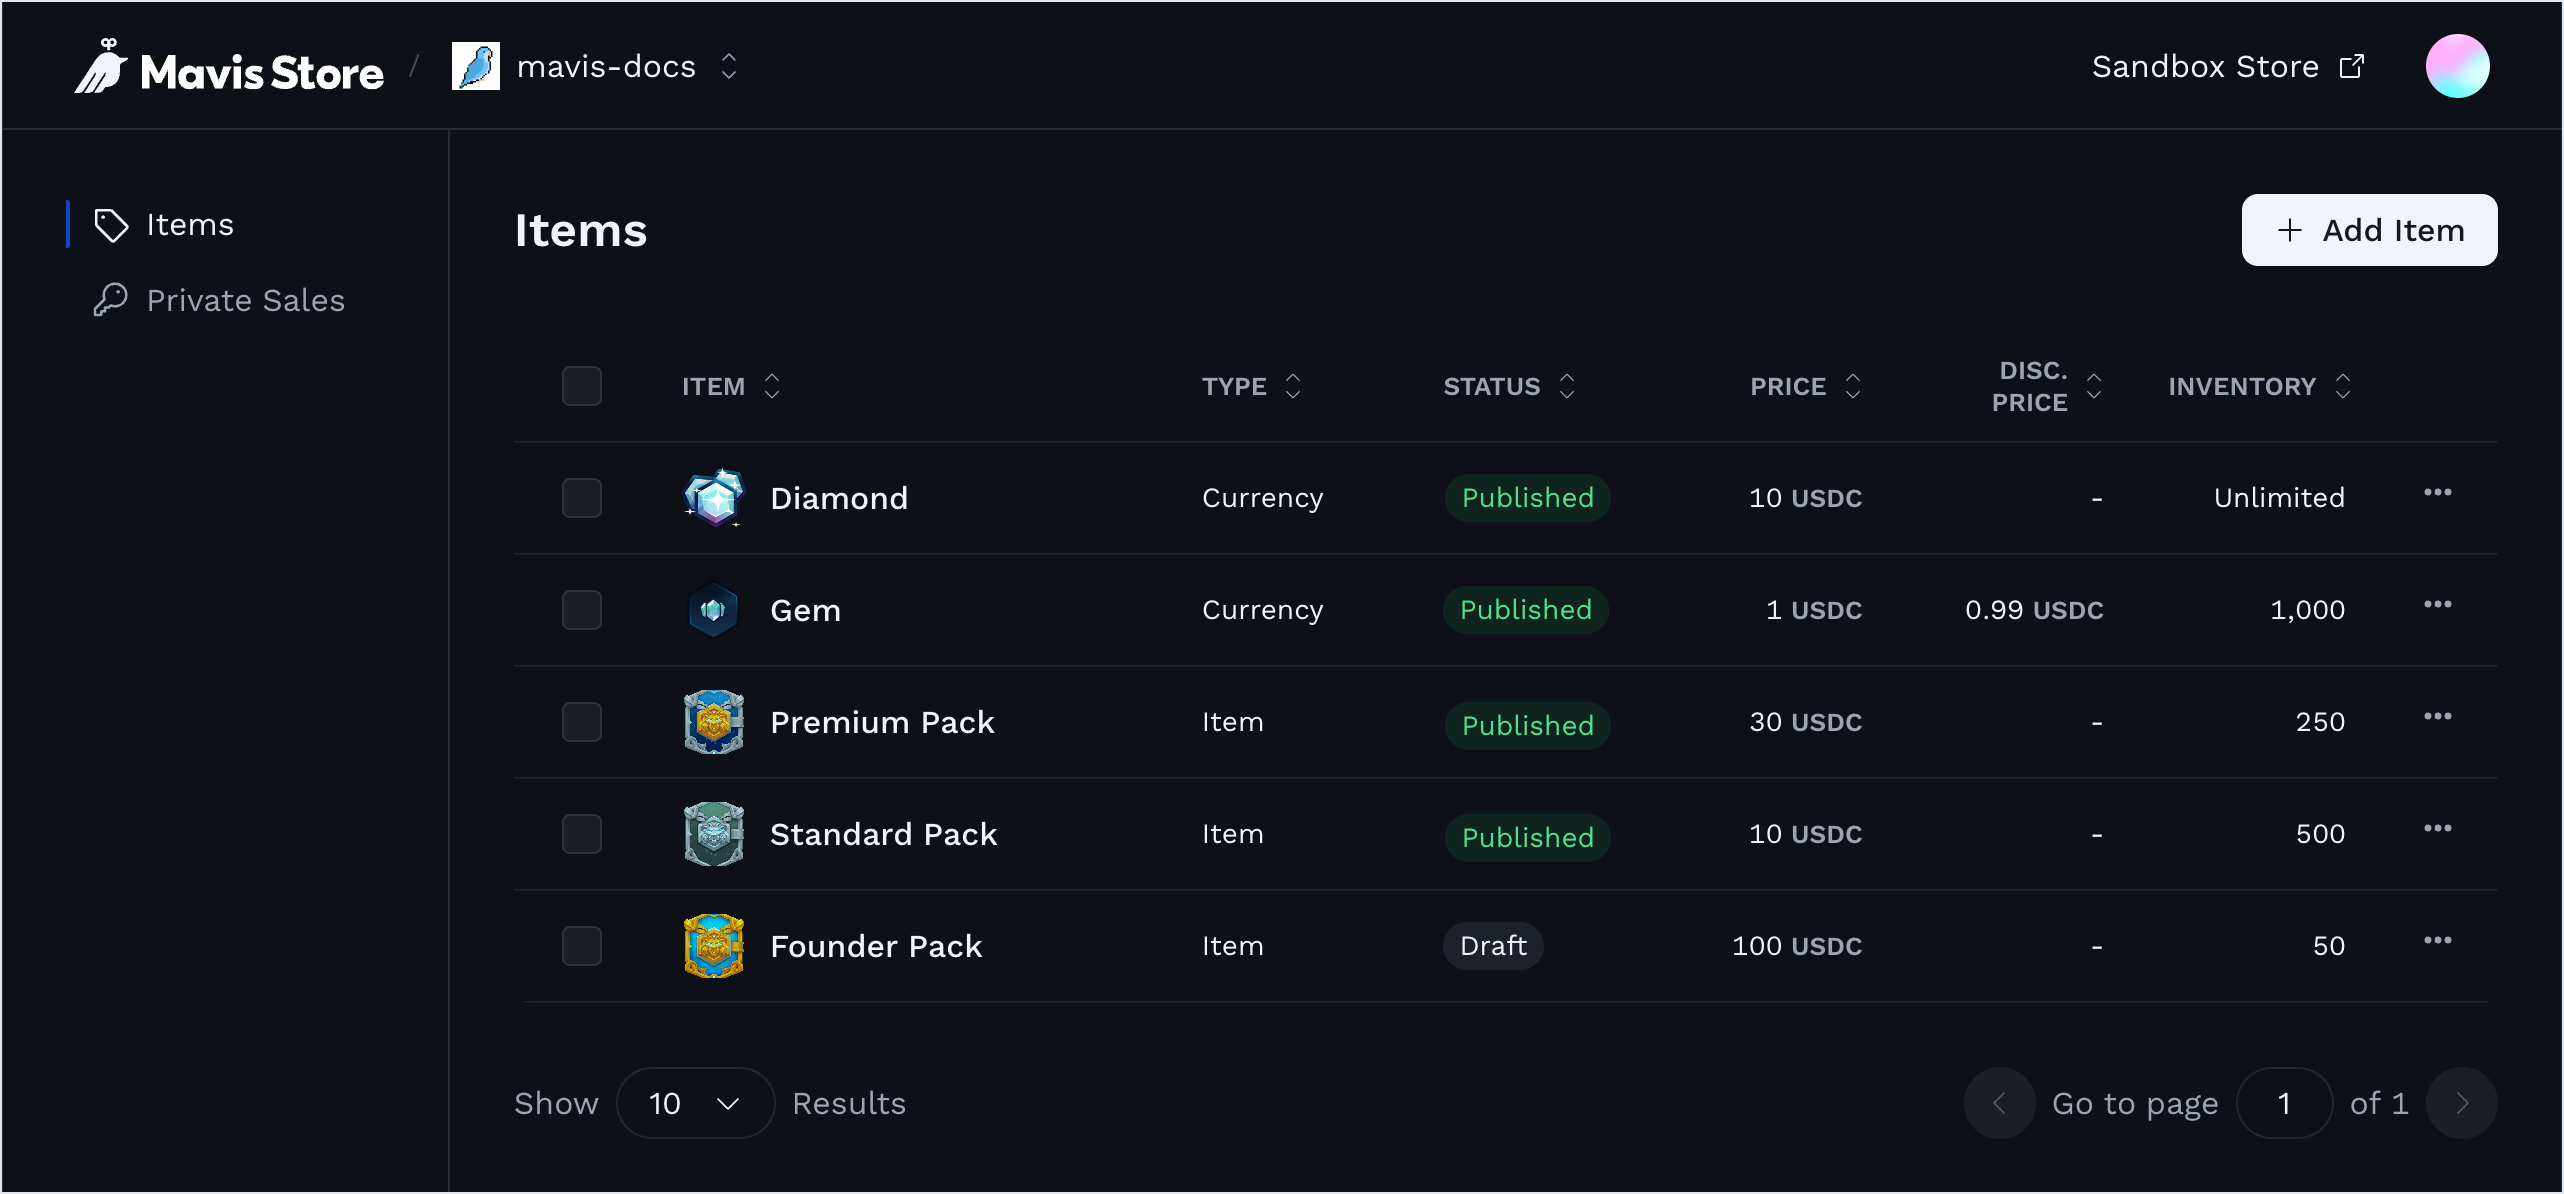
On the Items tab, click Add Item.
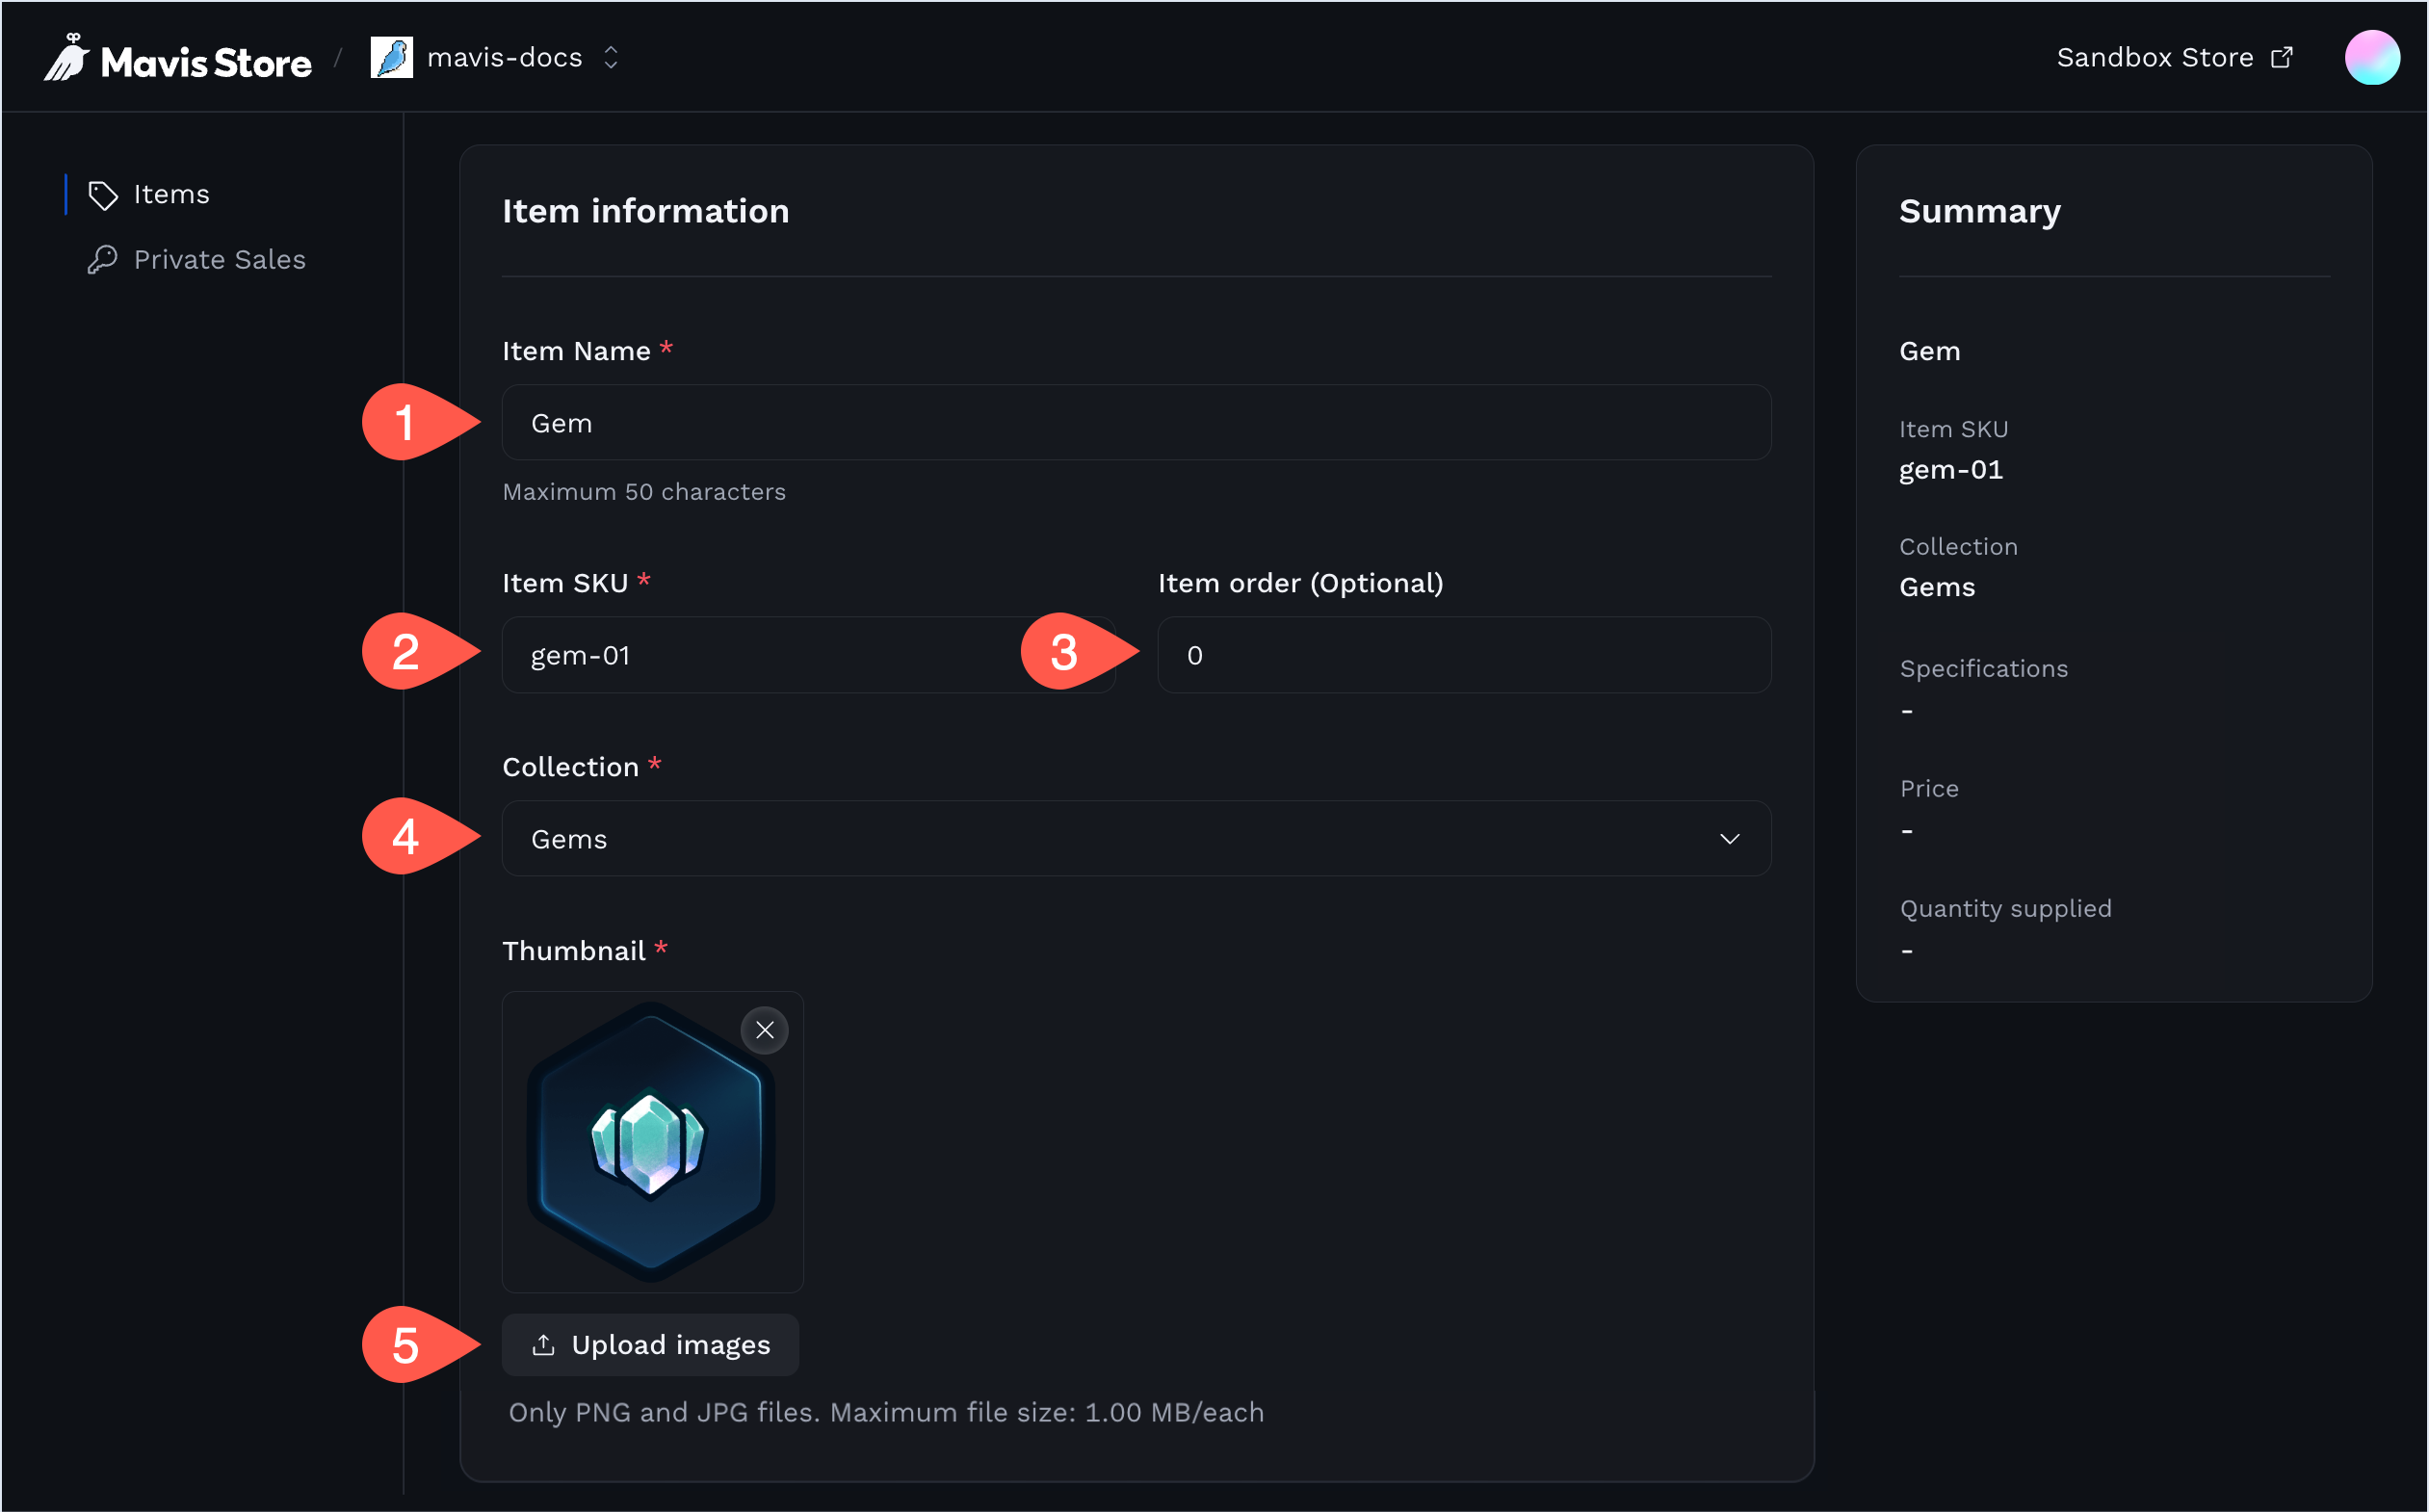
Under Item information, enter the general details of your item:
Item Name: enter the name as it appears at the storefront and on the item details page.
Item SKU: provide a unique identifier for the item. An SKU (stock keeping unit) may contain Latin alphanumeric characters, periods, dashes, and underscores. After you save the item, the system appends the SKU and a unique slug to the item's URL. You can't change the SKU after saving the item.
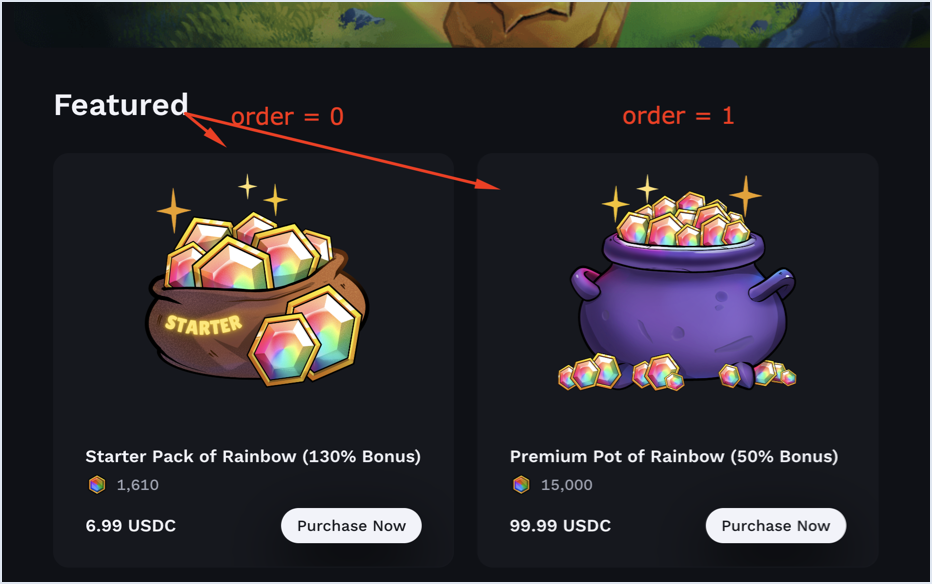
Item order: define the display order for this item in the collection, where "0" is the default value that places the item at the first position, "1" at the second, and so on. If left blank, the system arranges items in a collection by creation date, with the latest item displayed first.
Item order example
Collection: assign the item to a collection. Every item must belong to a collection. To create a new collection, select New collection from the list.
Thumbnail: upload up to four images of the item in PNG, JPEG, or SVG format, each no larger than 1 MB.
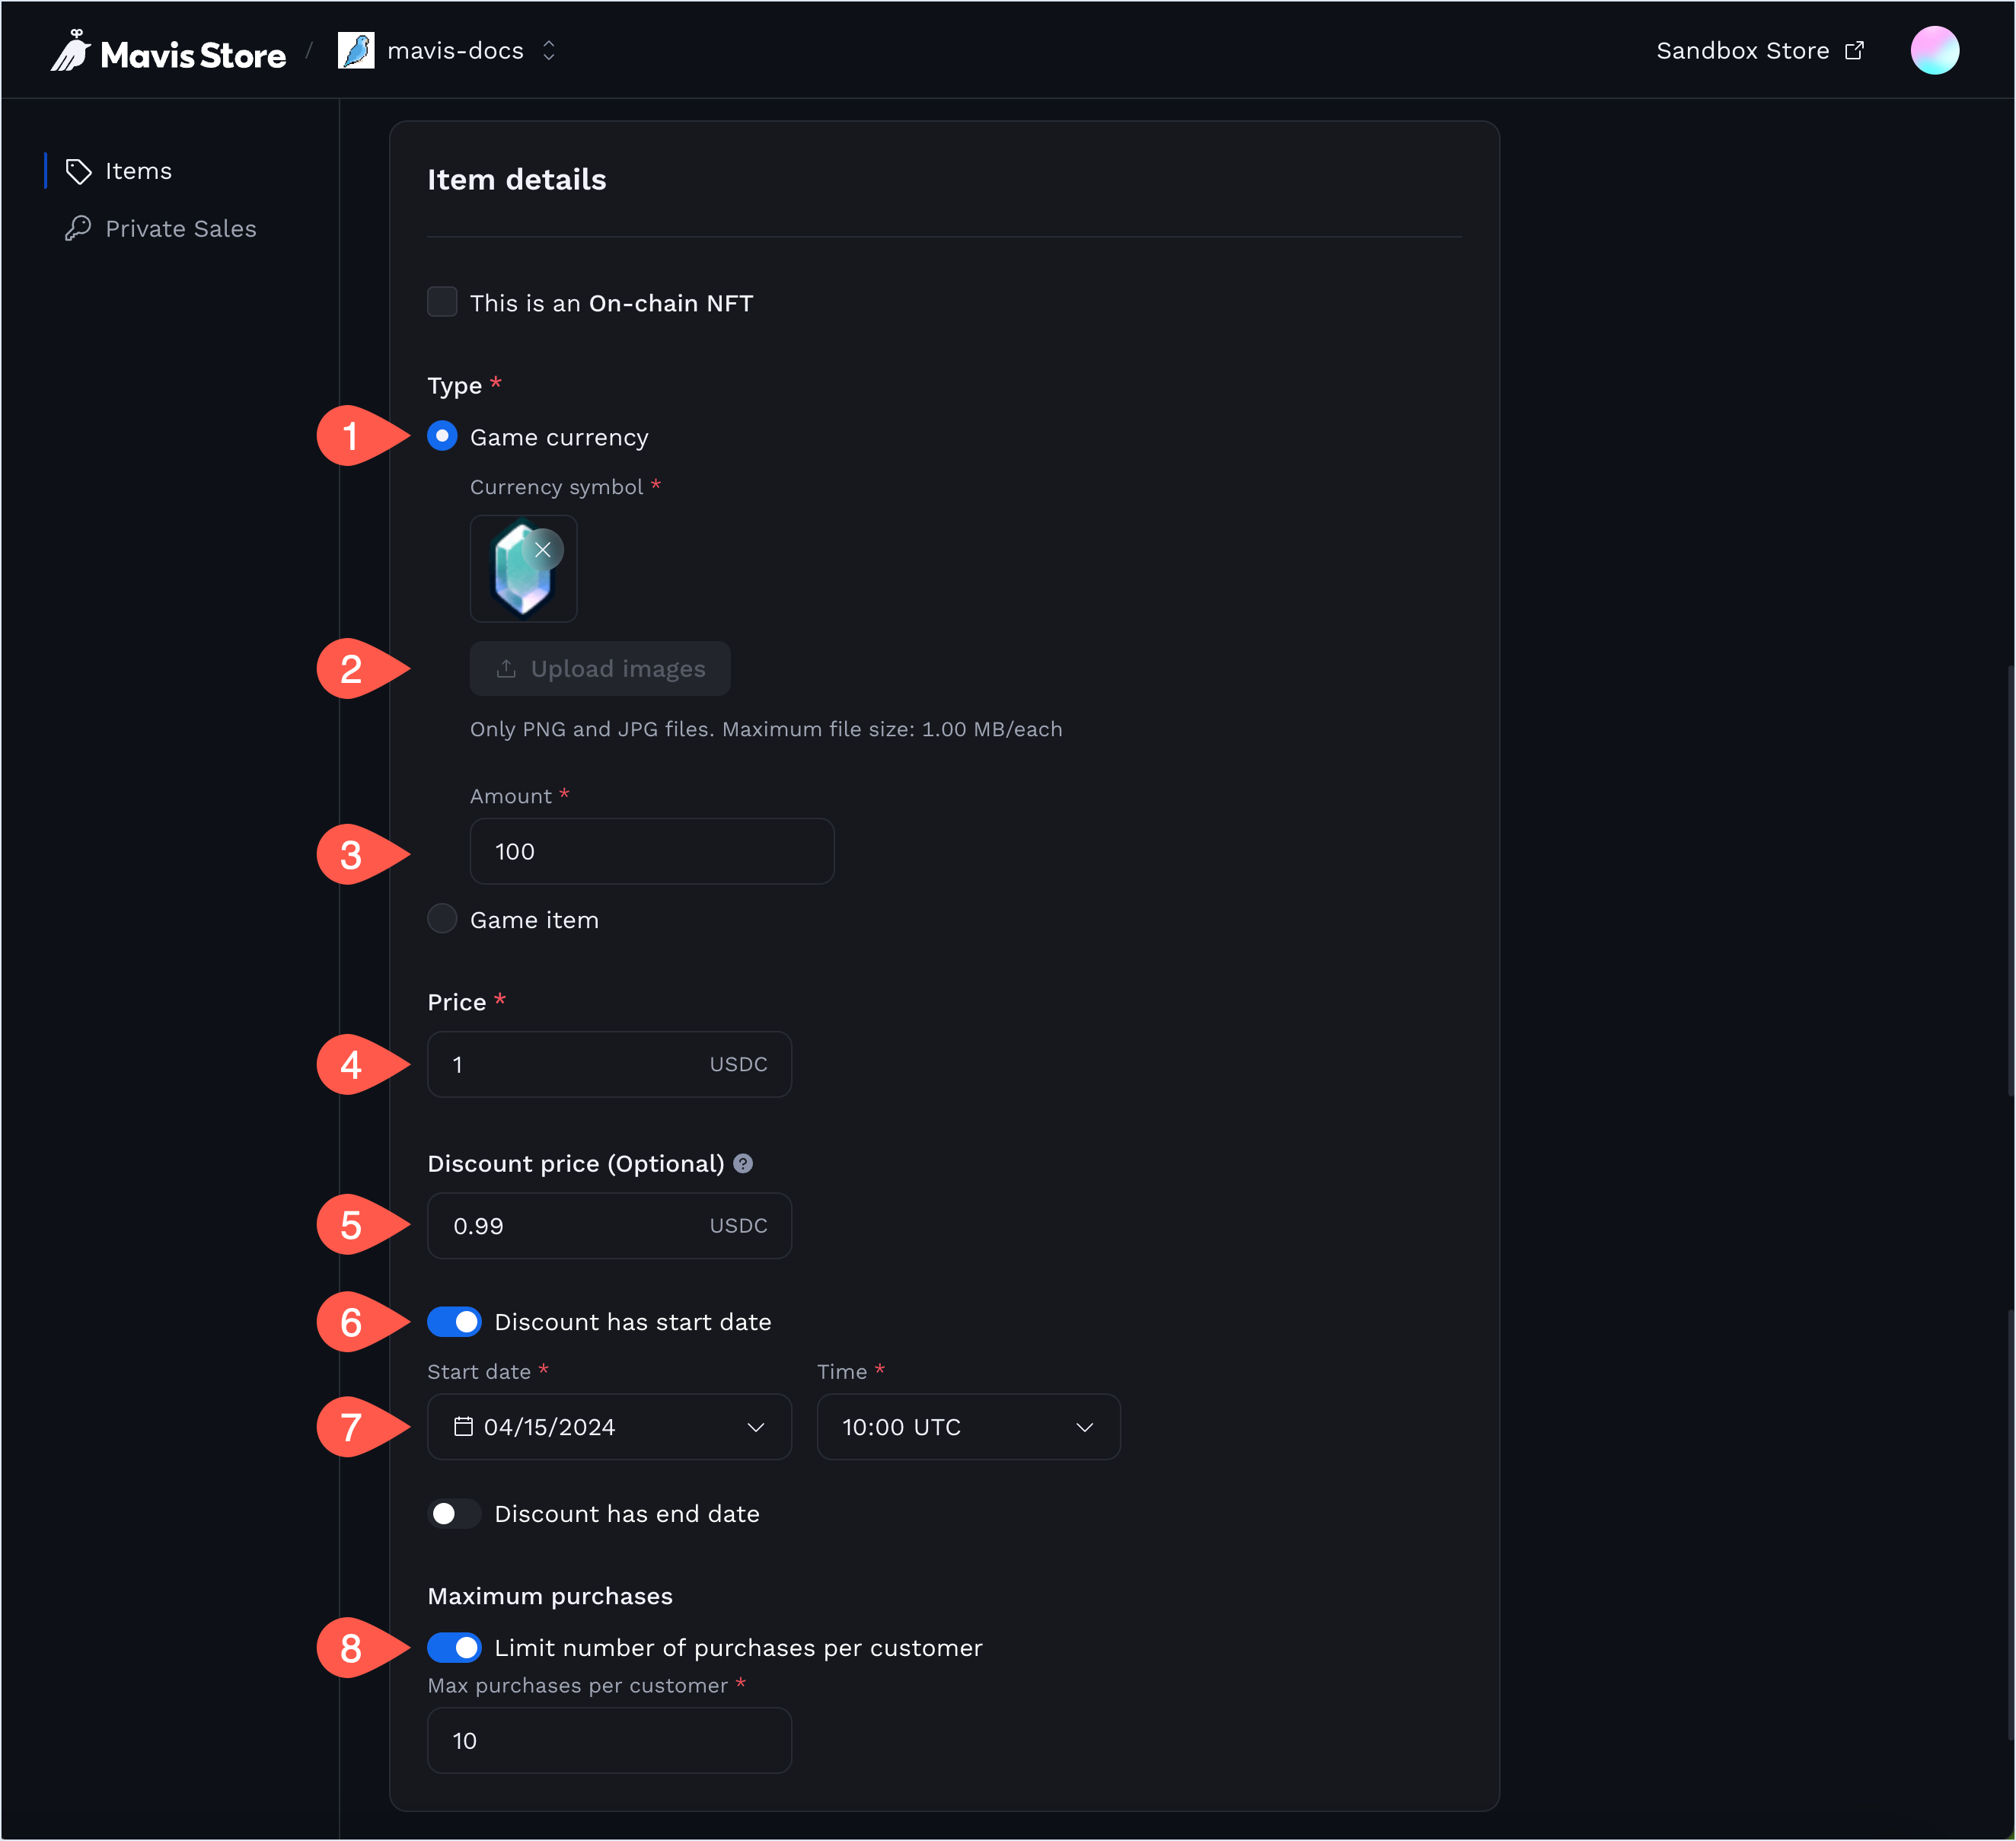
In Item Details, specify your item's unique attributes:
- This is an On-chain NFT: set whether the item is an on-chain NFT.
- If you sell on-chain items through Mavis Store, you don't need to implement the Verify user endpoint as part of the API integration. Since buyers must provide their Ronin addresses at the storefront to purchase these items, user verification is managed by Sky Mavis.
- If you sell off-chain items, implement the endpoint still, because Mavis Store makes GET requests to your server to verify the user's in-game ID.
- Type: make your item a game item or a game currency. For game items, add a caption of up to 200 characters displayed under the name on the item details page. For game currency, upload an image of the currency (in PNG, JPEG, or SVG format, no larger than 1 MB) and specify the amount received for the price paid.
- Price: set the unit price in USDC.
- Discount price: enter an optional discounted price and schedule the start and end dates for this discount, if applicable. Otherwise, the discounted price displays as soon as you publish the item and remains until you unpublish it.
- Limit number of purchases per customer: define the number of units each customer can buy.
- This is an On-chain NFT: set whether the item is an on-chain NFT.
Under Inventory, enable Track quantity to manage stock levels and specify the number of units supplied.

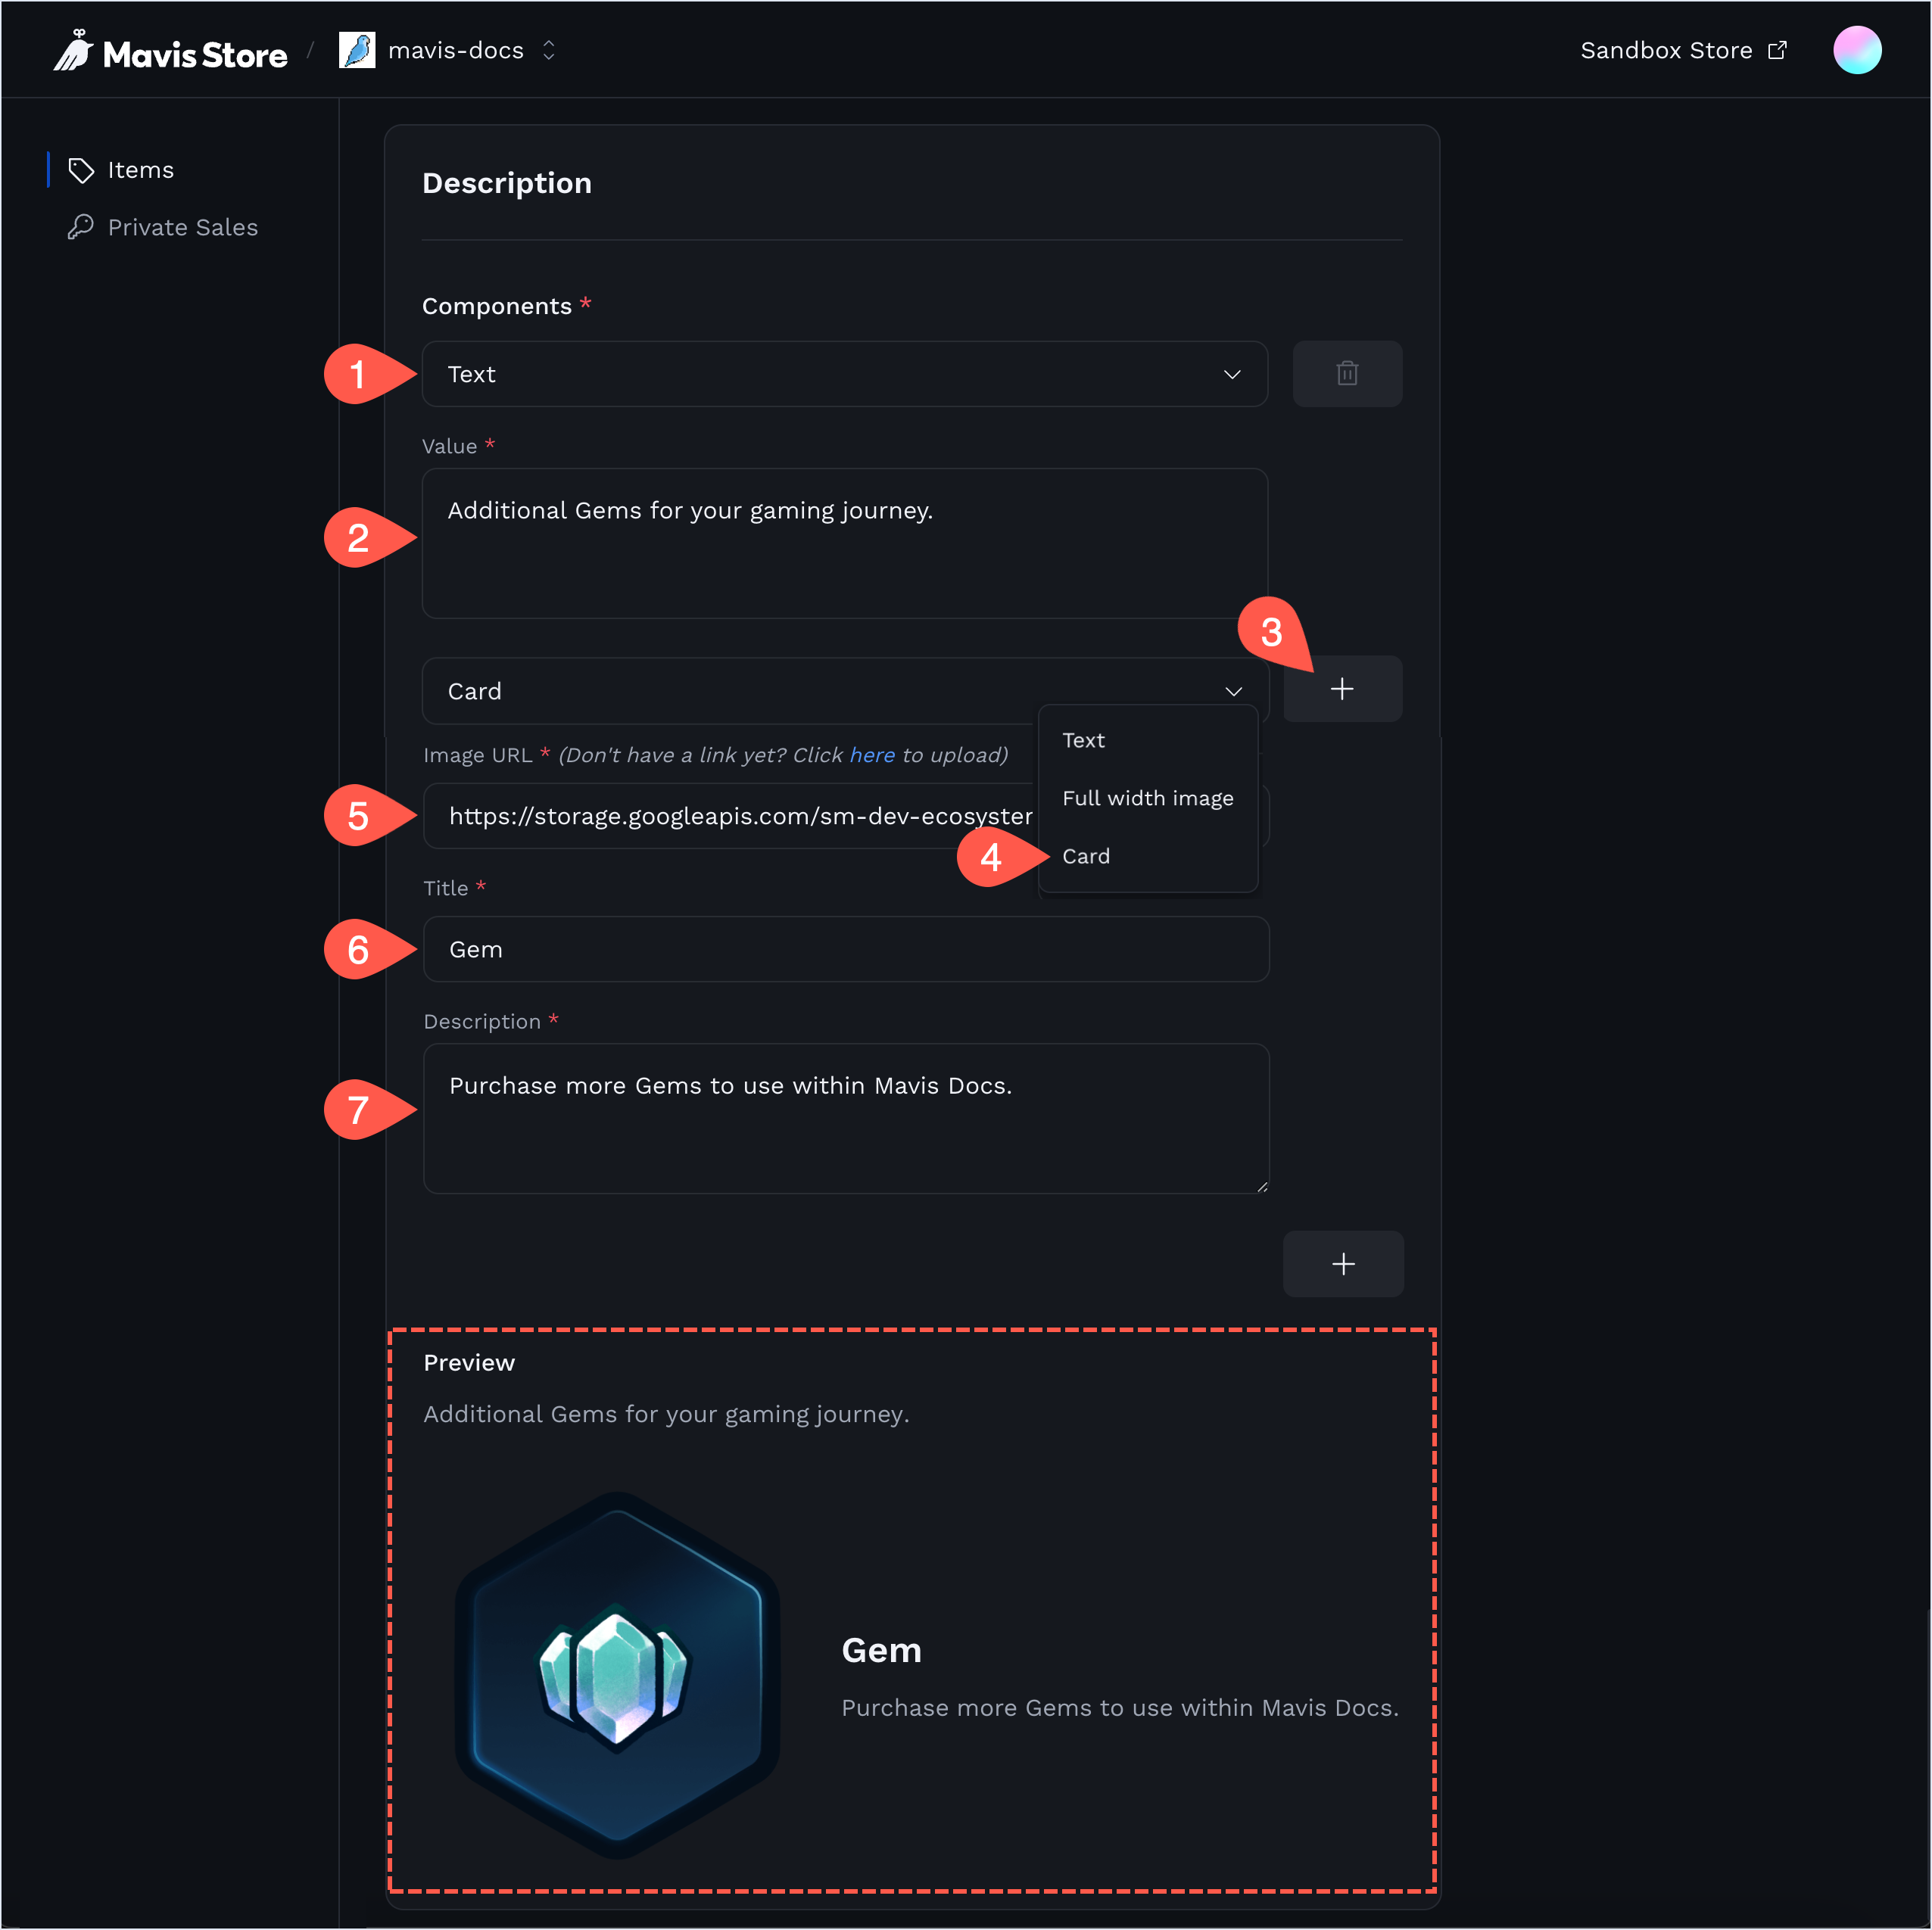
In Description, write a detailed description for the item details page. You can use rich text components, such as text, cards, or full-width images (the image occupies the full width of the description field). Click the plus button to add a new component, and preview the result in real time at the bottom of the page.
Preview the item in the store
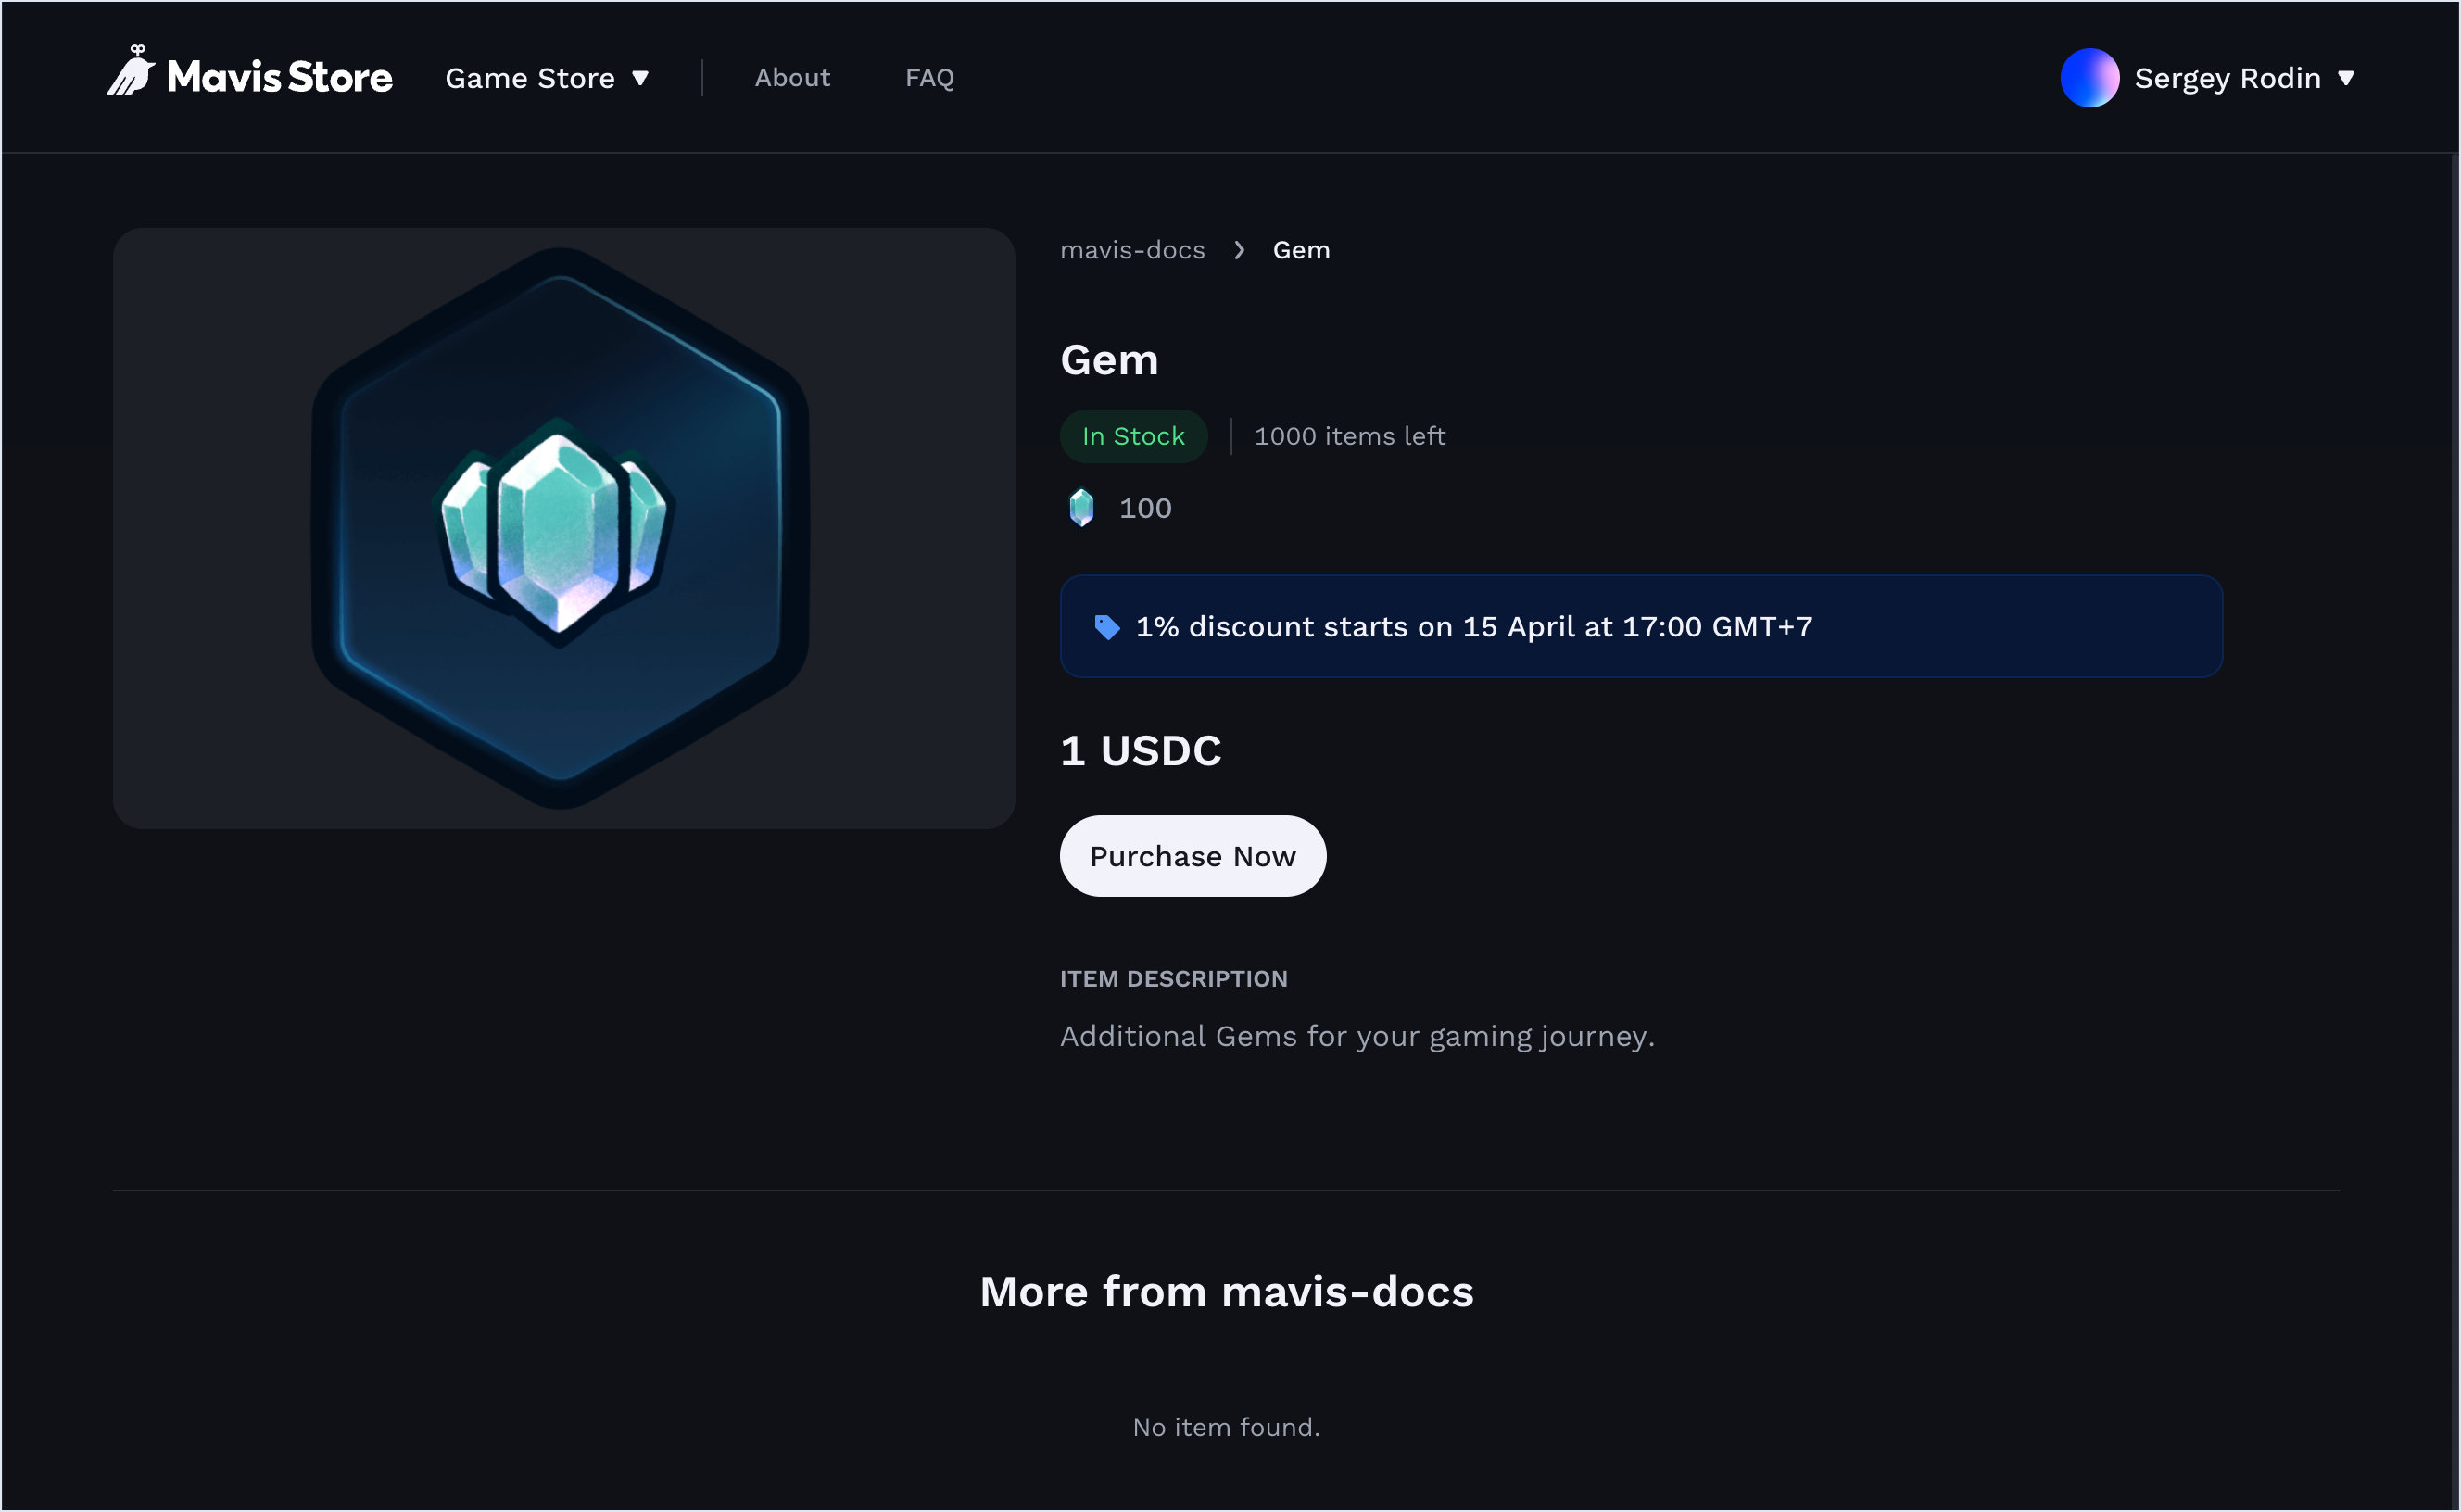
To see what the item will look like in your store, click the preview icon after completing the required fields.

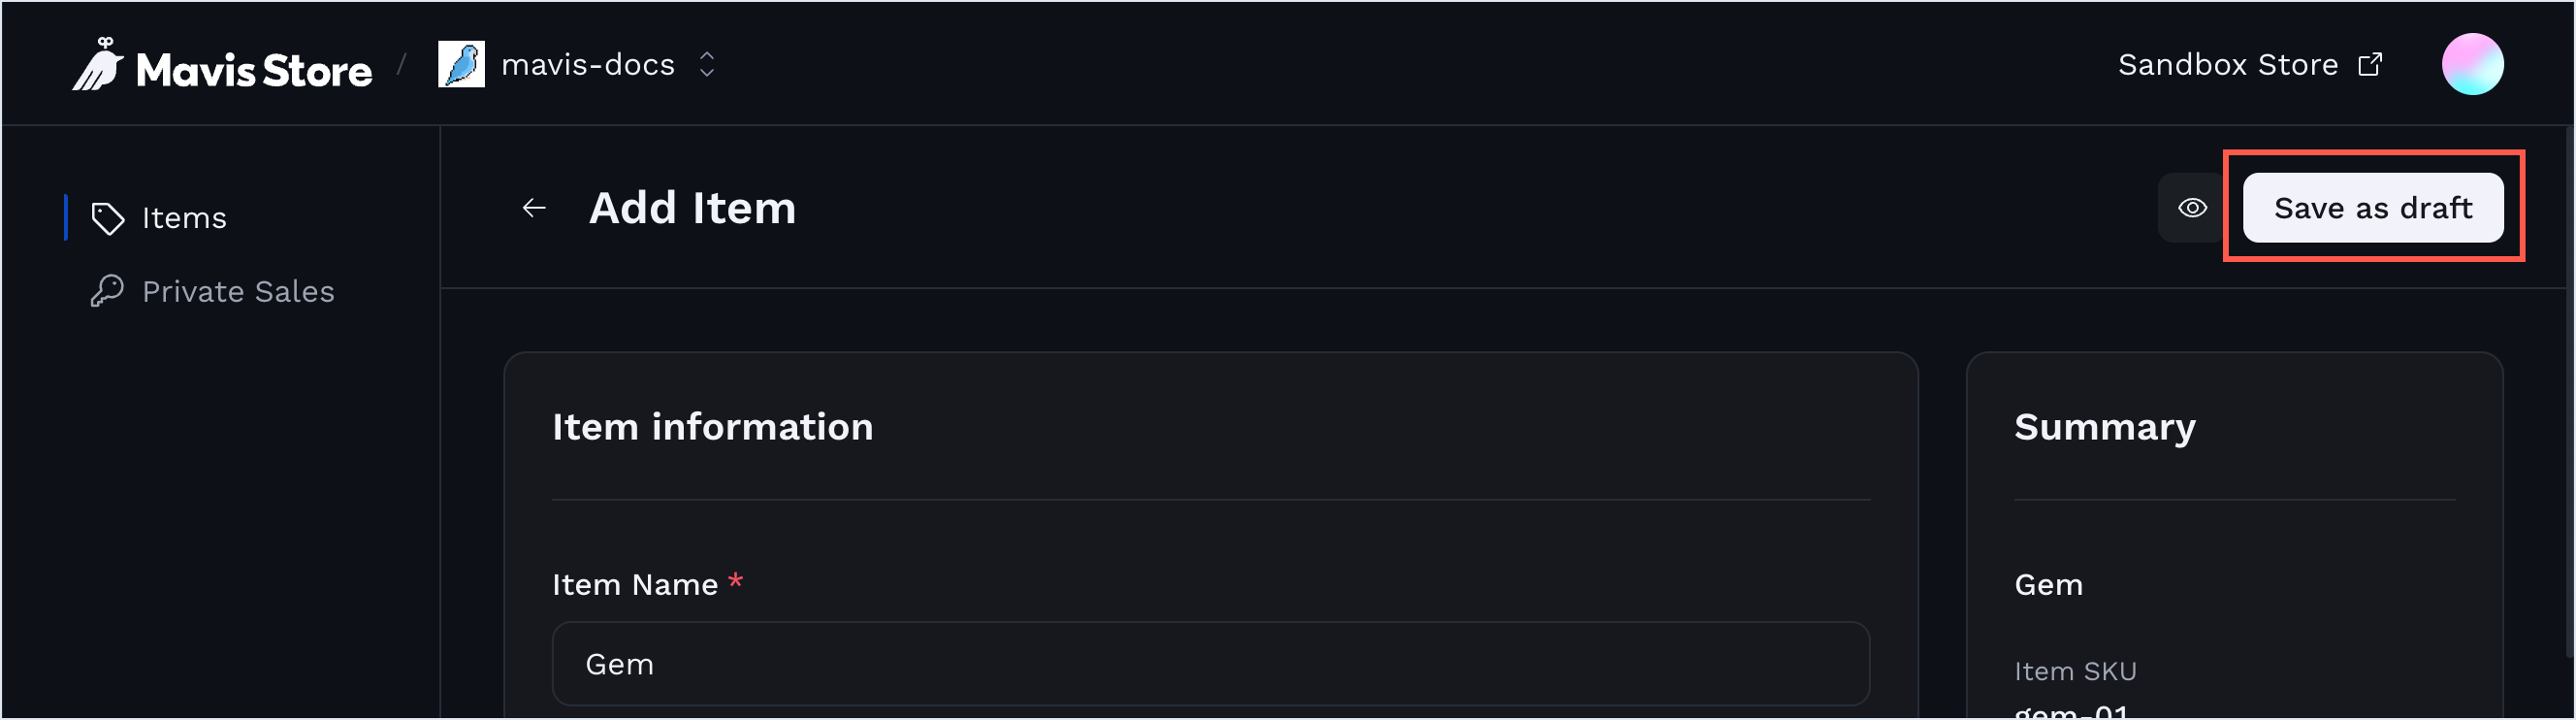
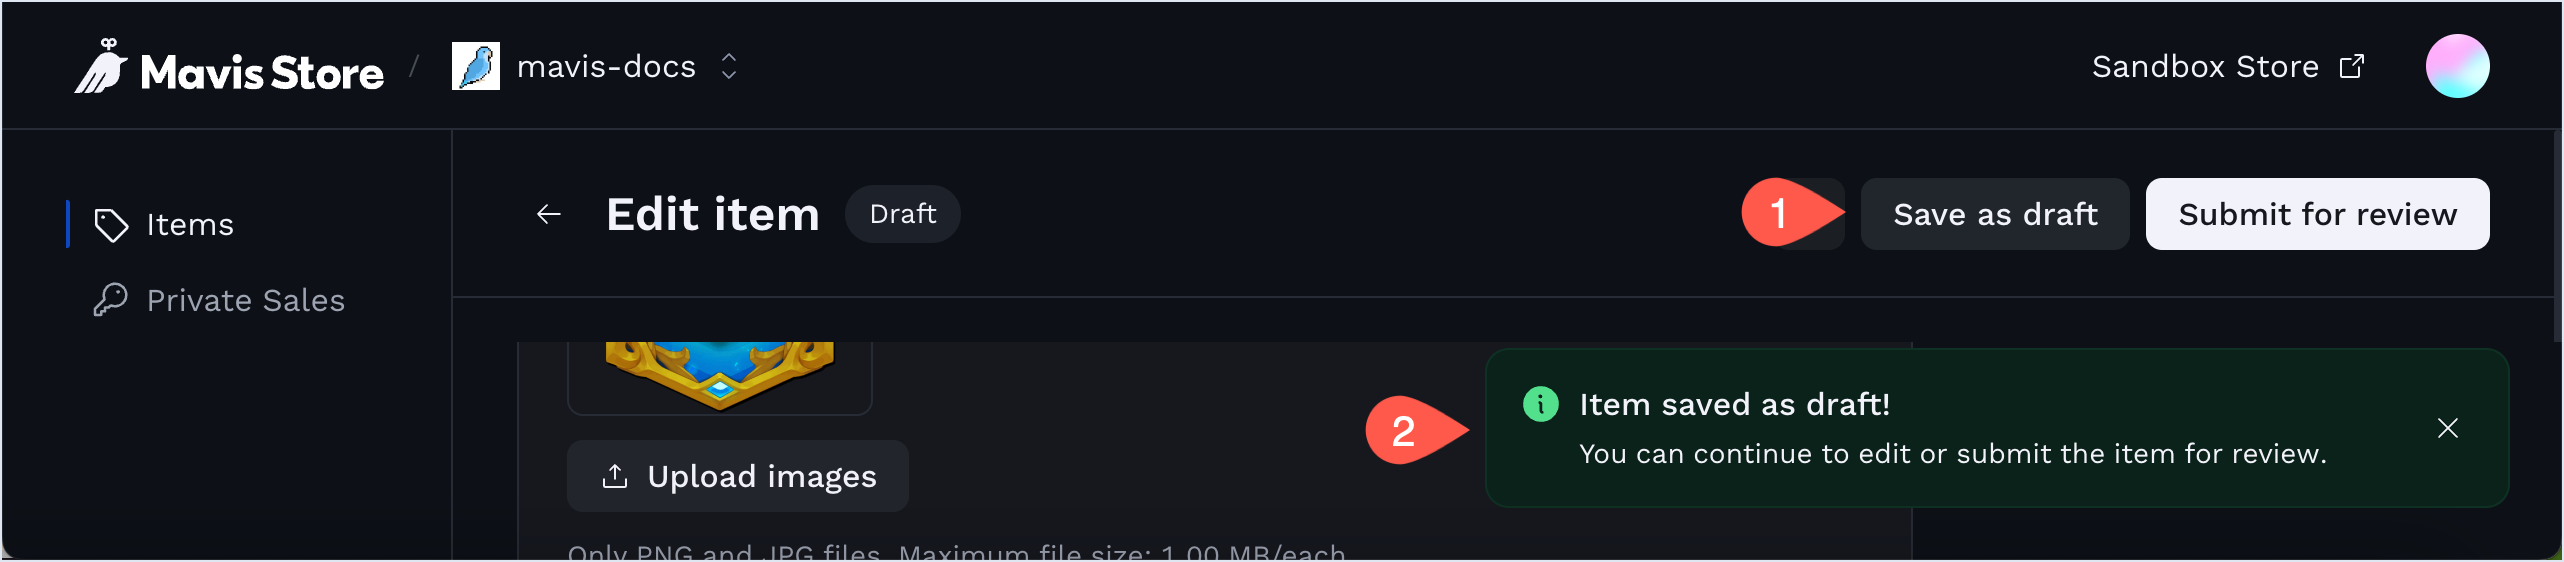
Click Save as draft.
The item's first status is "Draft."

Step 2. Test the item configuration
After adding an item as a draft, use the preview feature to verify the following:
- The item's details are accurately displayed at the storefront, with images appearing crisp and fitting the frame.
- You can create an order with the item.
To make adjustments, update the item's details, save it as a draft, and use the preview function again to verify the changes.
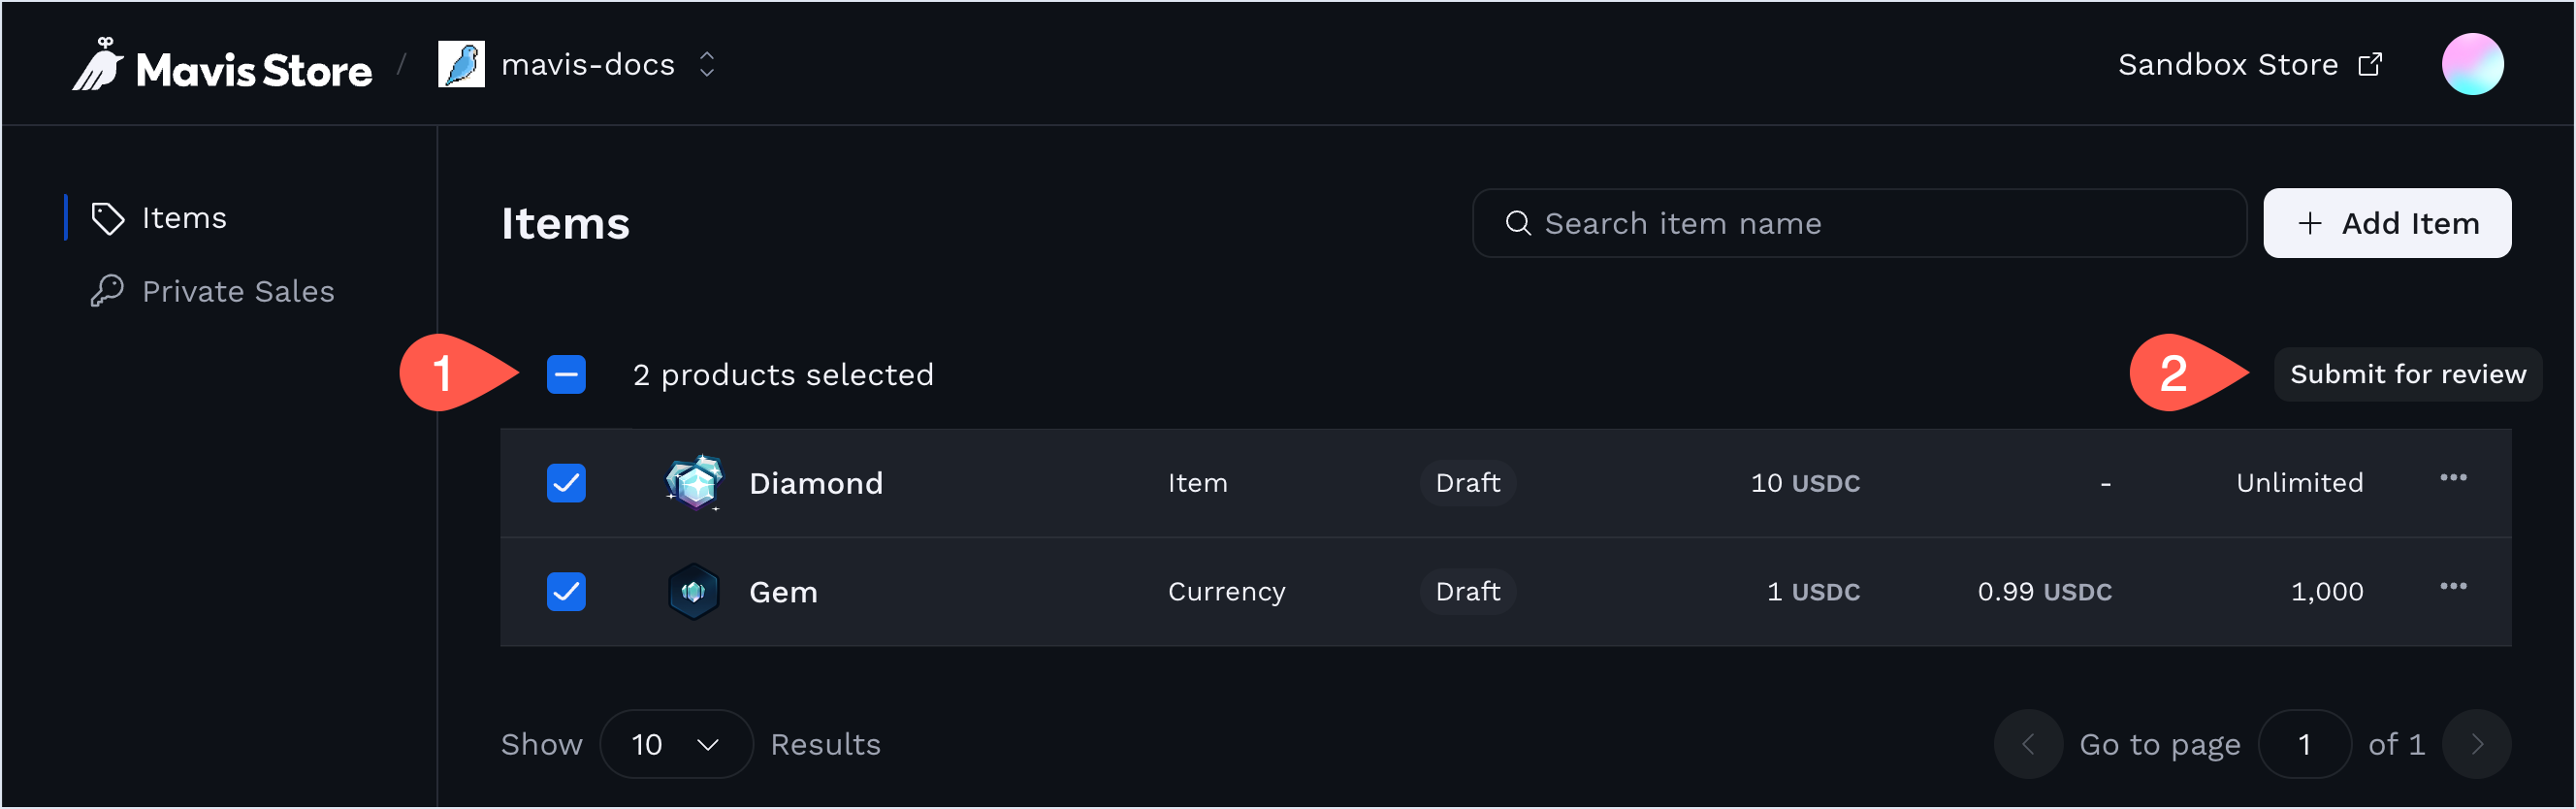
Step 3. Submit the item for review
When ensured that the item looks the way you expect it to, click Submit for review to have your item evaluated by Sky Mavis.

The item's status changes to "Under review."

The review takes 2-3 business days. You can still edit the item under review, but you'll have to submit another review request.
Bulk review: you can submit more than one "Draft" item for review simultaneously. To do that, on the Items page, select the items to review, then click the Submit for review button.
Step 4. Publish the item
After your item passes the review, it reaches the "Ready to publish" status, and you can make it visible in the store.

From the Edit item page, if your item is "Ready to publish," click the Publish item button located in the top right-hand corner.

This action changes the item's status to "Published."

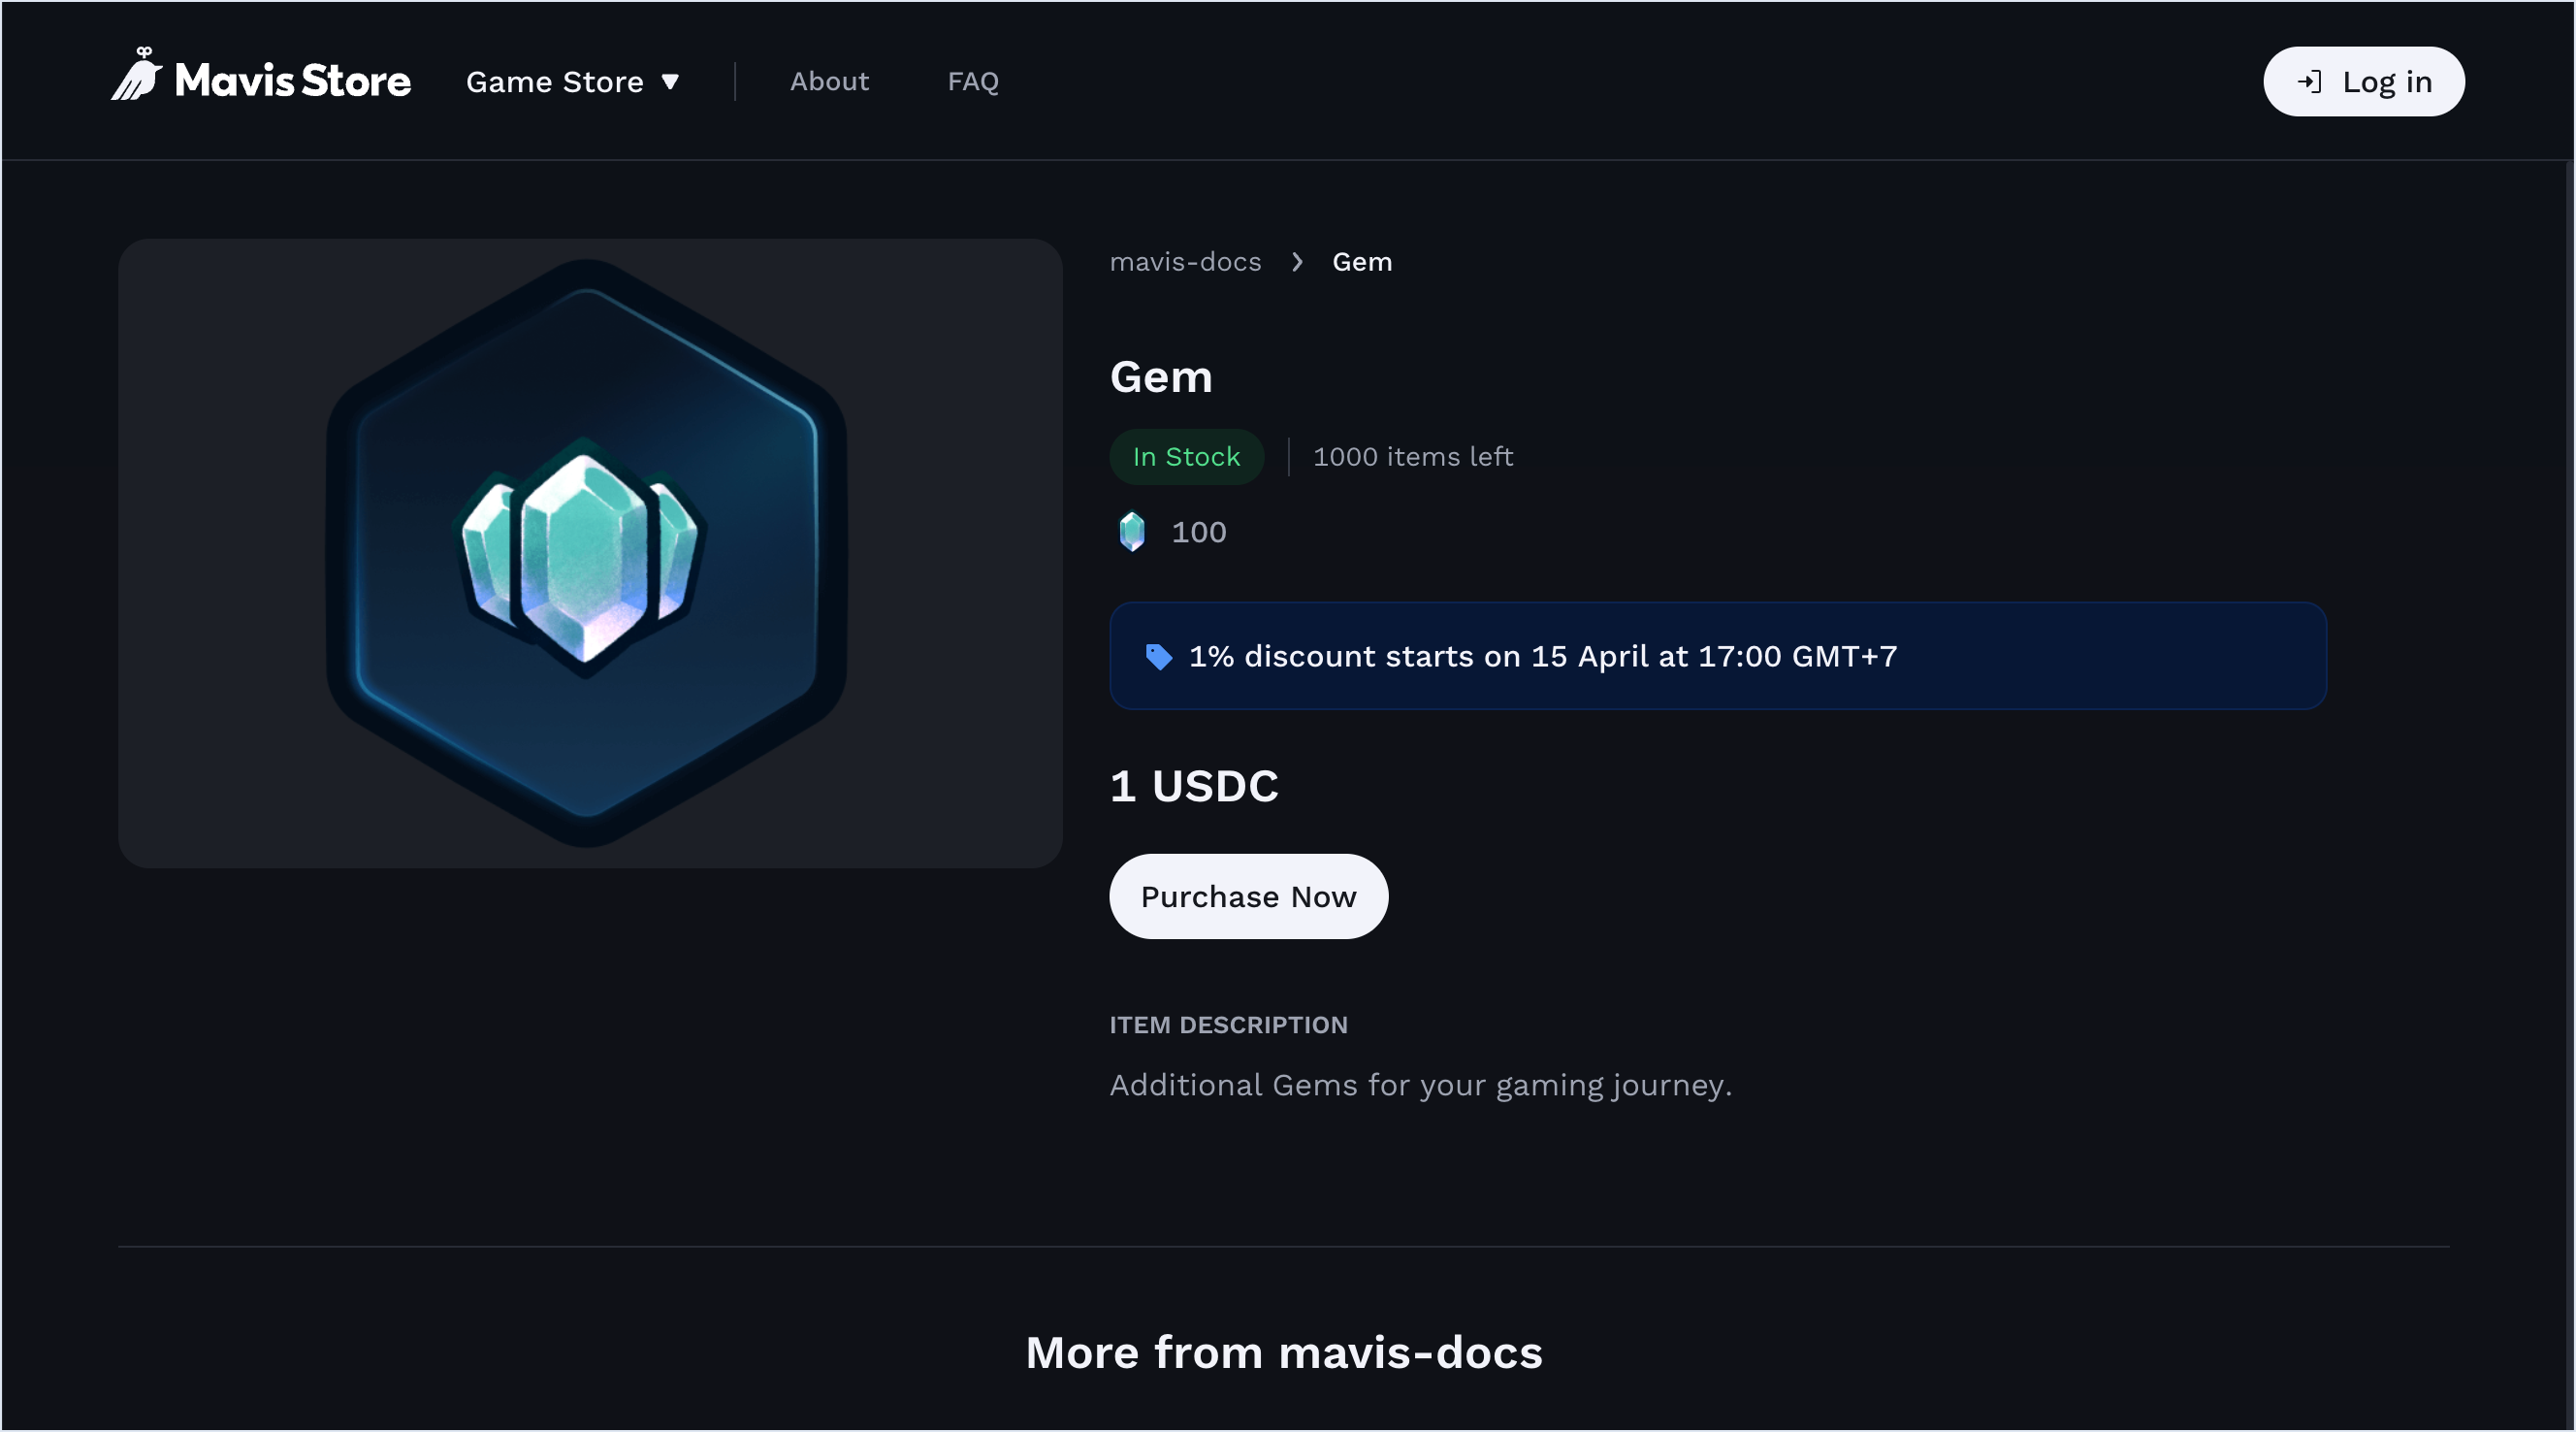
After publishing, the item goes live at the storefront, ready for customers to view and buy.
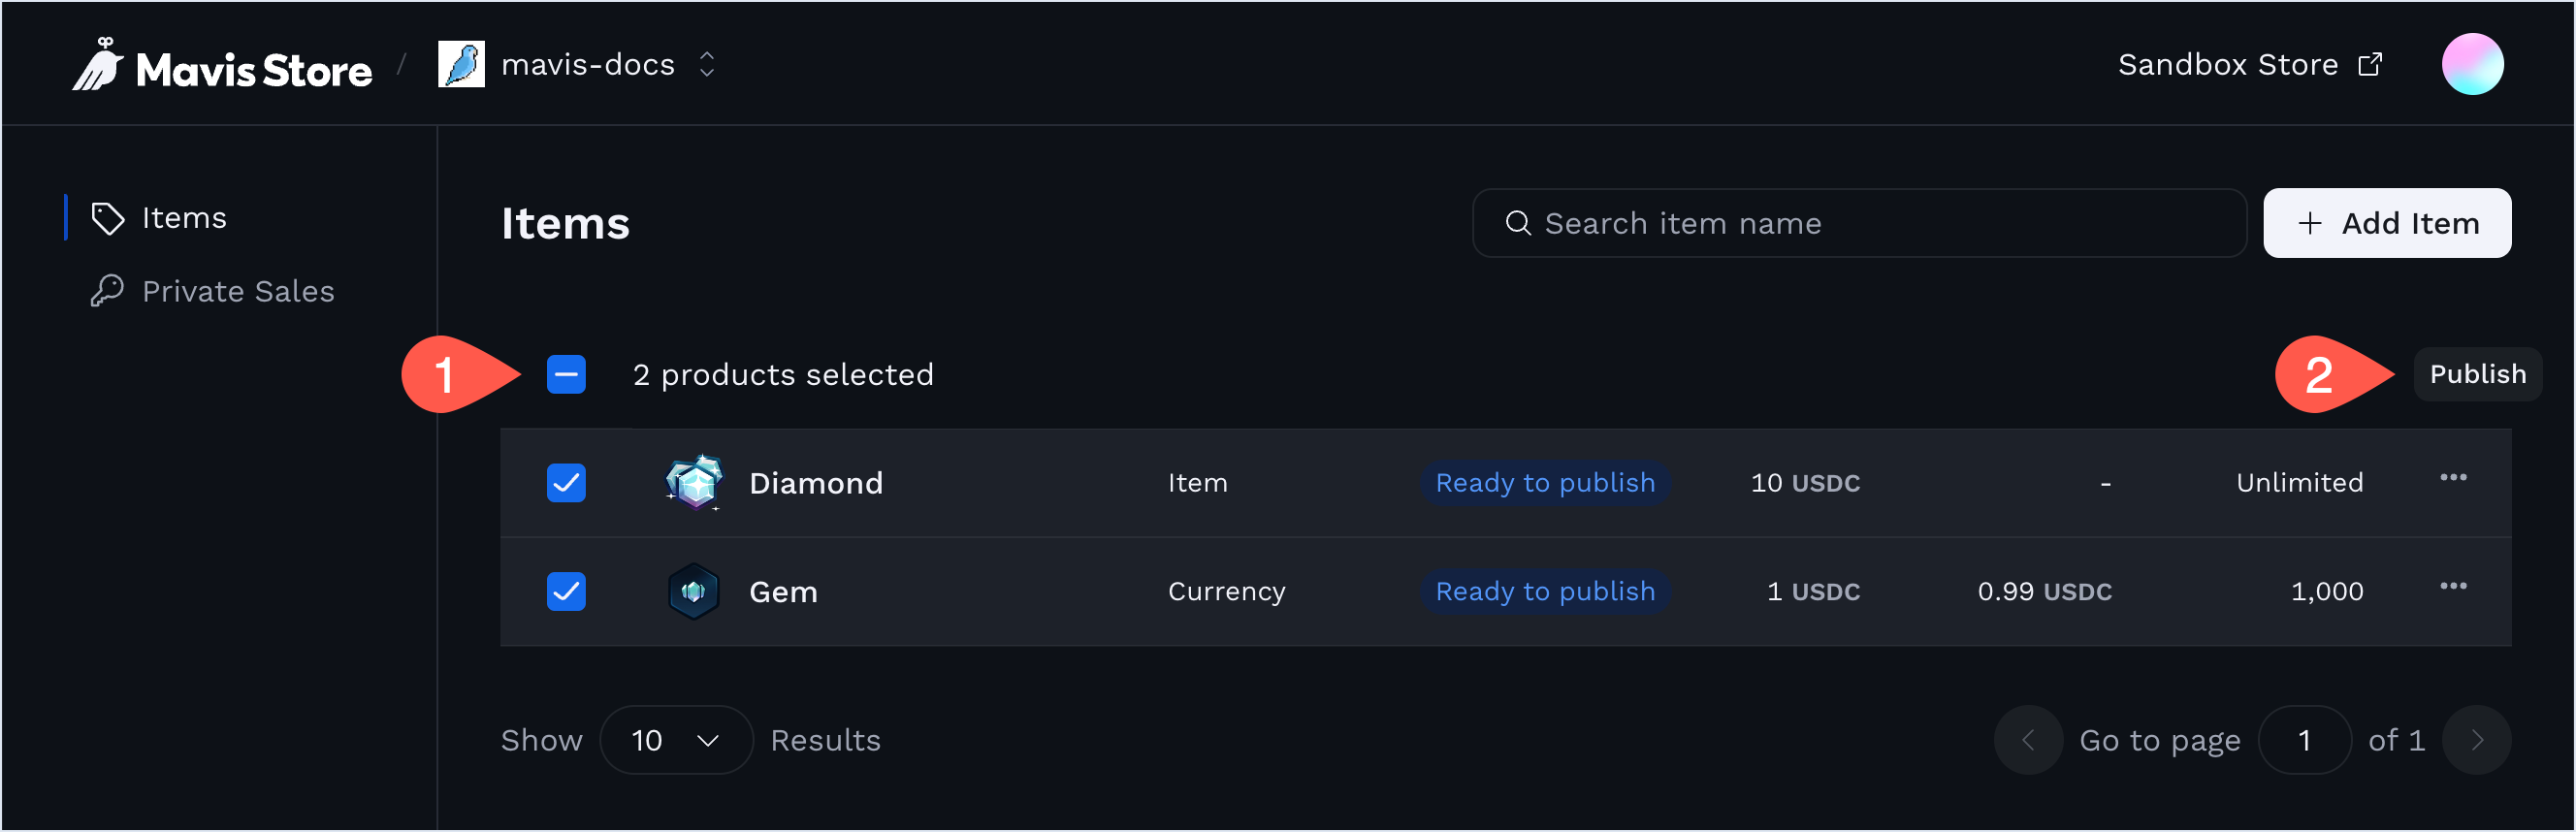
Bulk publishing: you can publish more than one "Ready to publish" item simultaneously. To do that, on the Items page, select the items to publish, then click the Publish button.
After publishing an item, track its performance and stock levels to ensure your listings remain up-to-date and accurate.
Unpublish an item
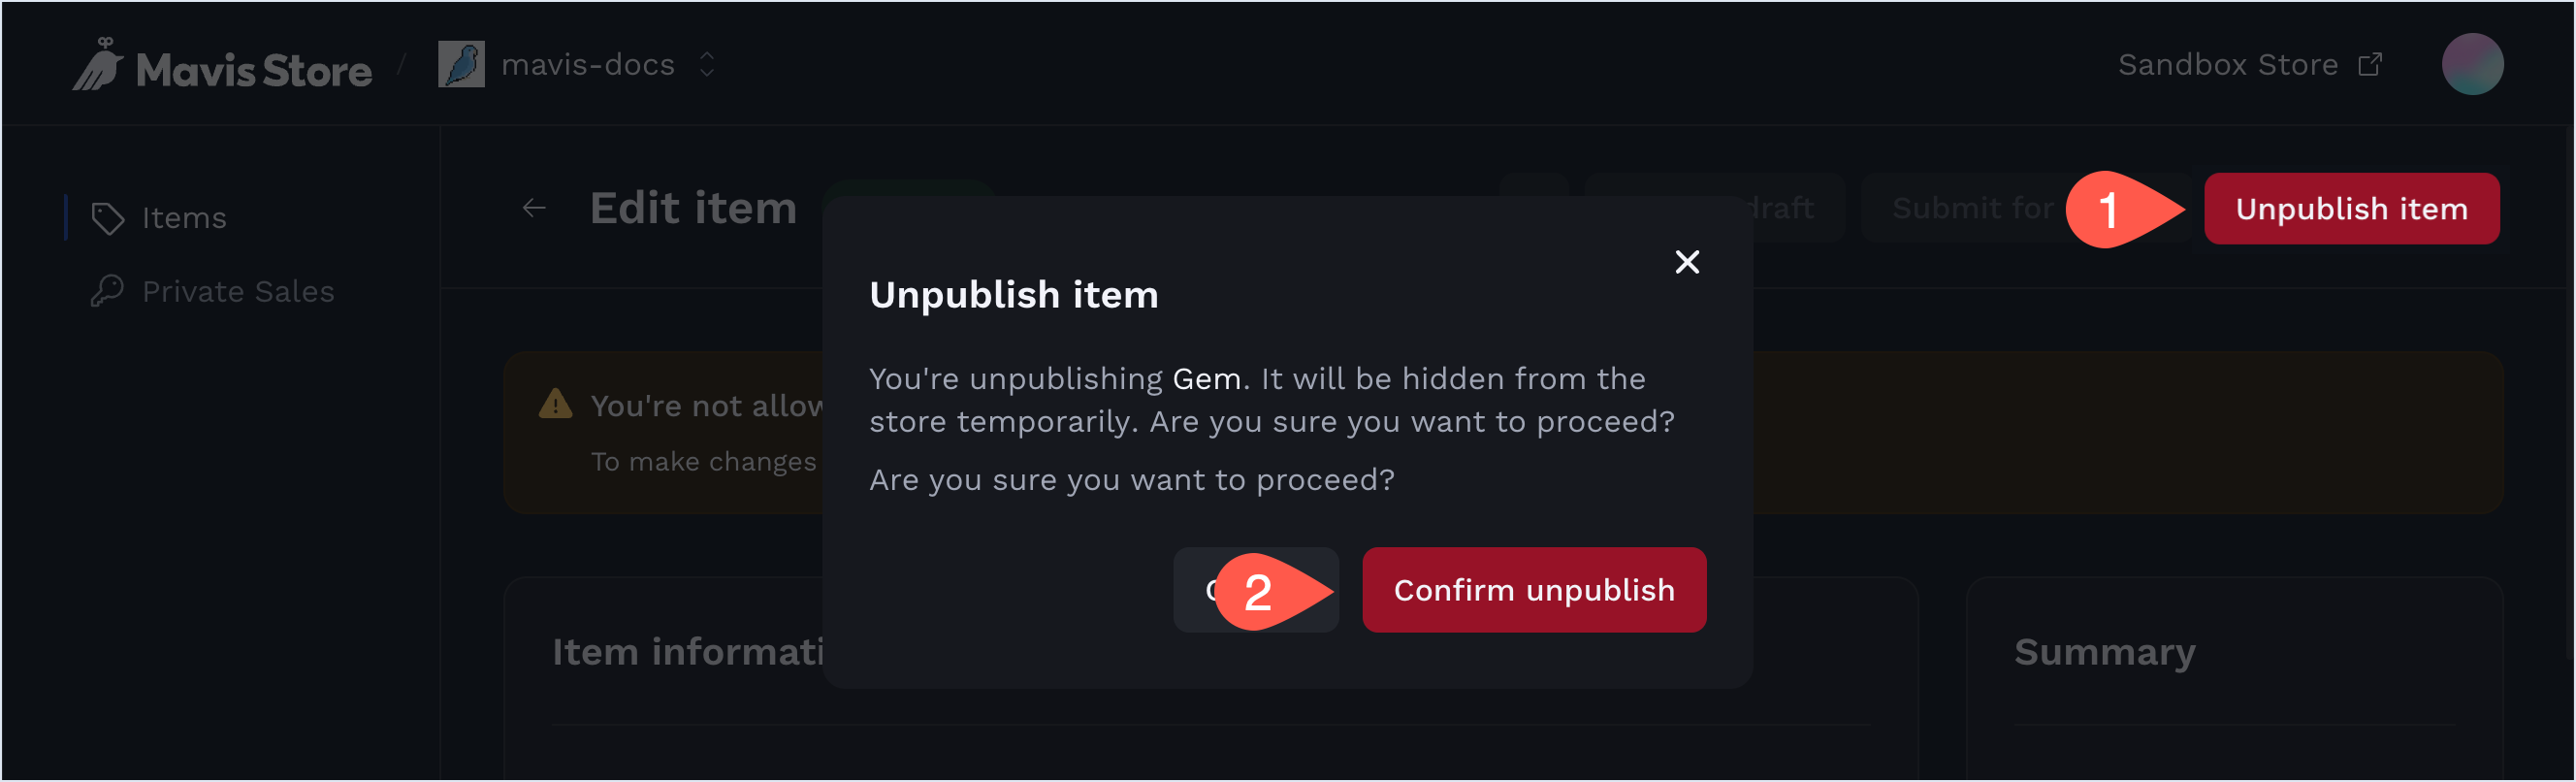
If you want to temporarily hide a published item from the store, open the item's page in the CMS, then click Unpublish item > Confirm unpublish. This changes the item's status to "Ready to publish."
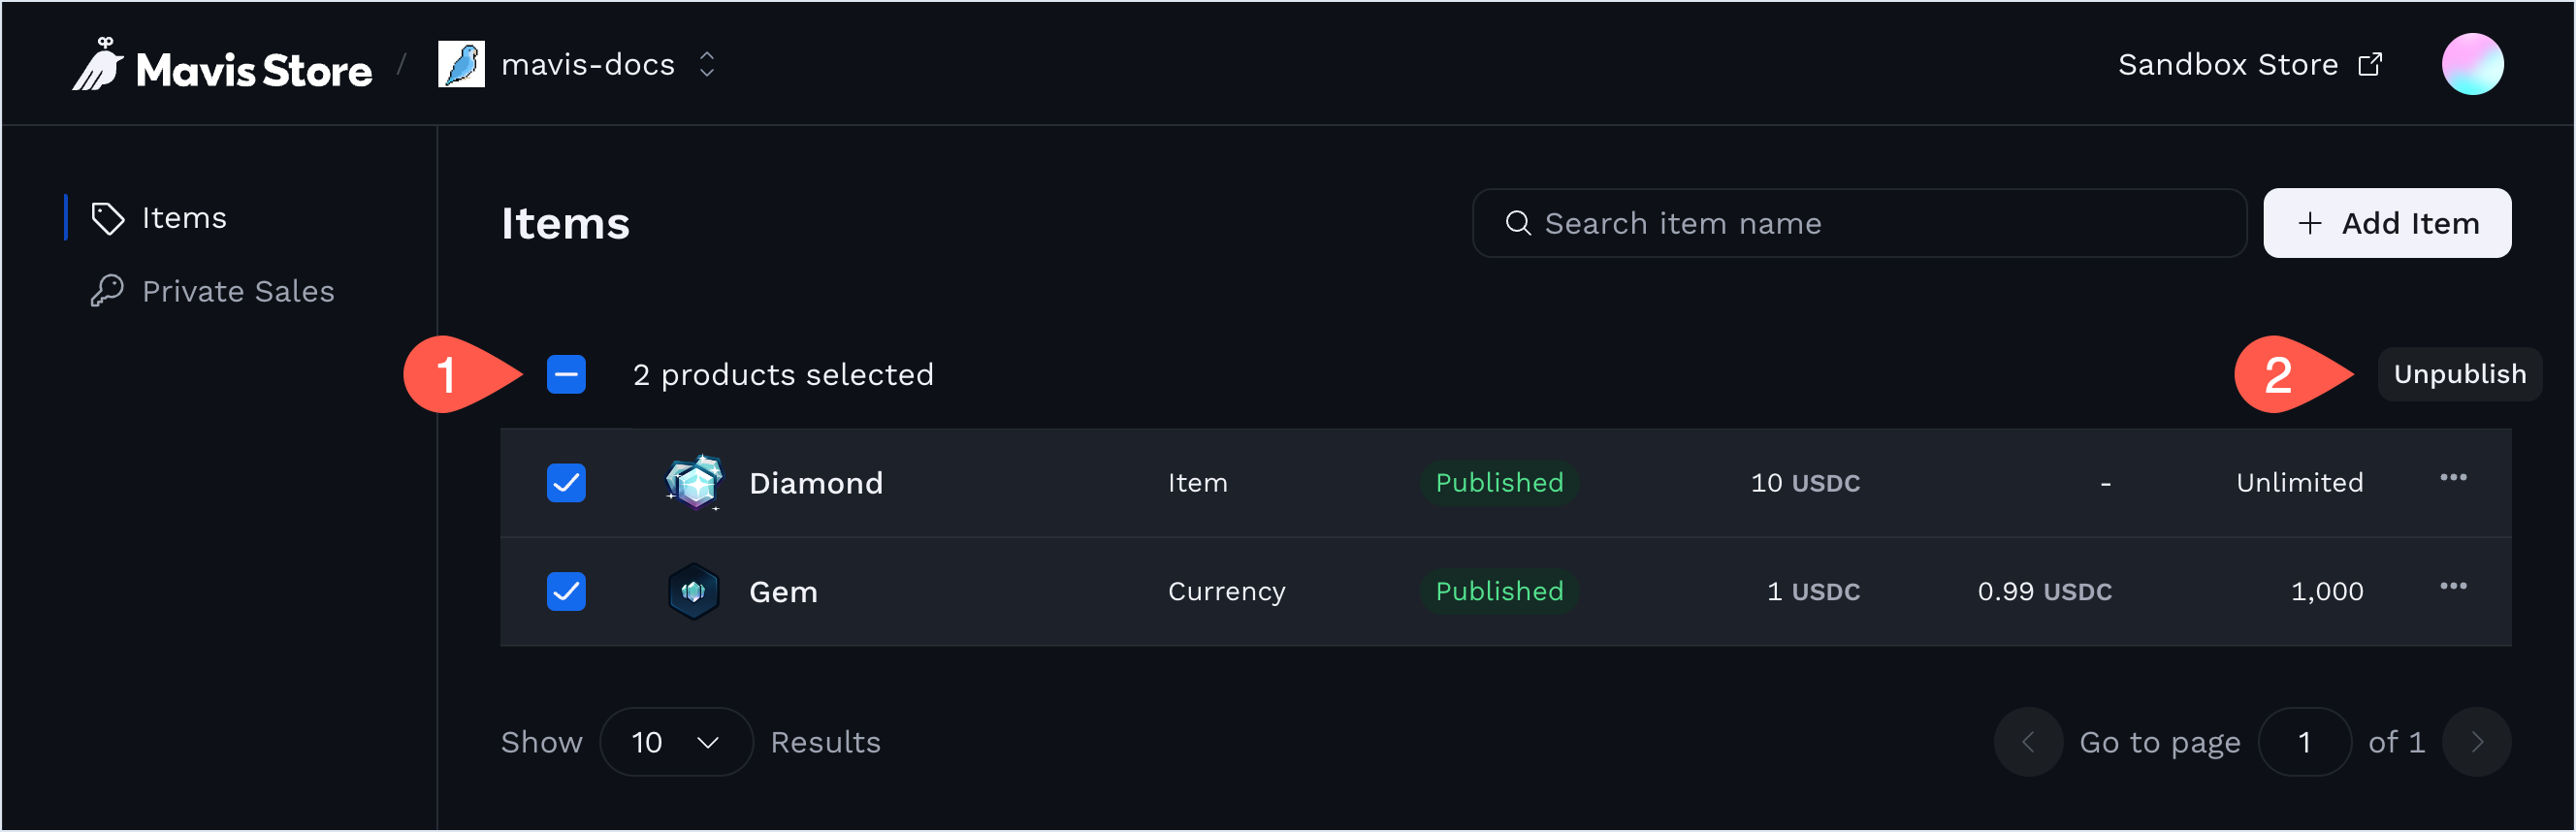
Bulk unpublishing: you can hide more than one "Published" item simultaneously. To do that, on the Items page, select the items to hide, then click the Unpublish items button. This action removes the items from the storefront, changing their status to "Ready to publish."
To display the item again, click Publish item once more.
Edit an item
Step 1. Make the item editable
If you want to edit a "Published" item, you need to first make it editable by following these steps:
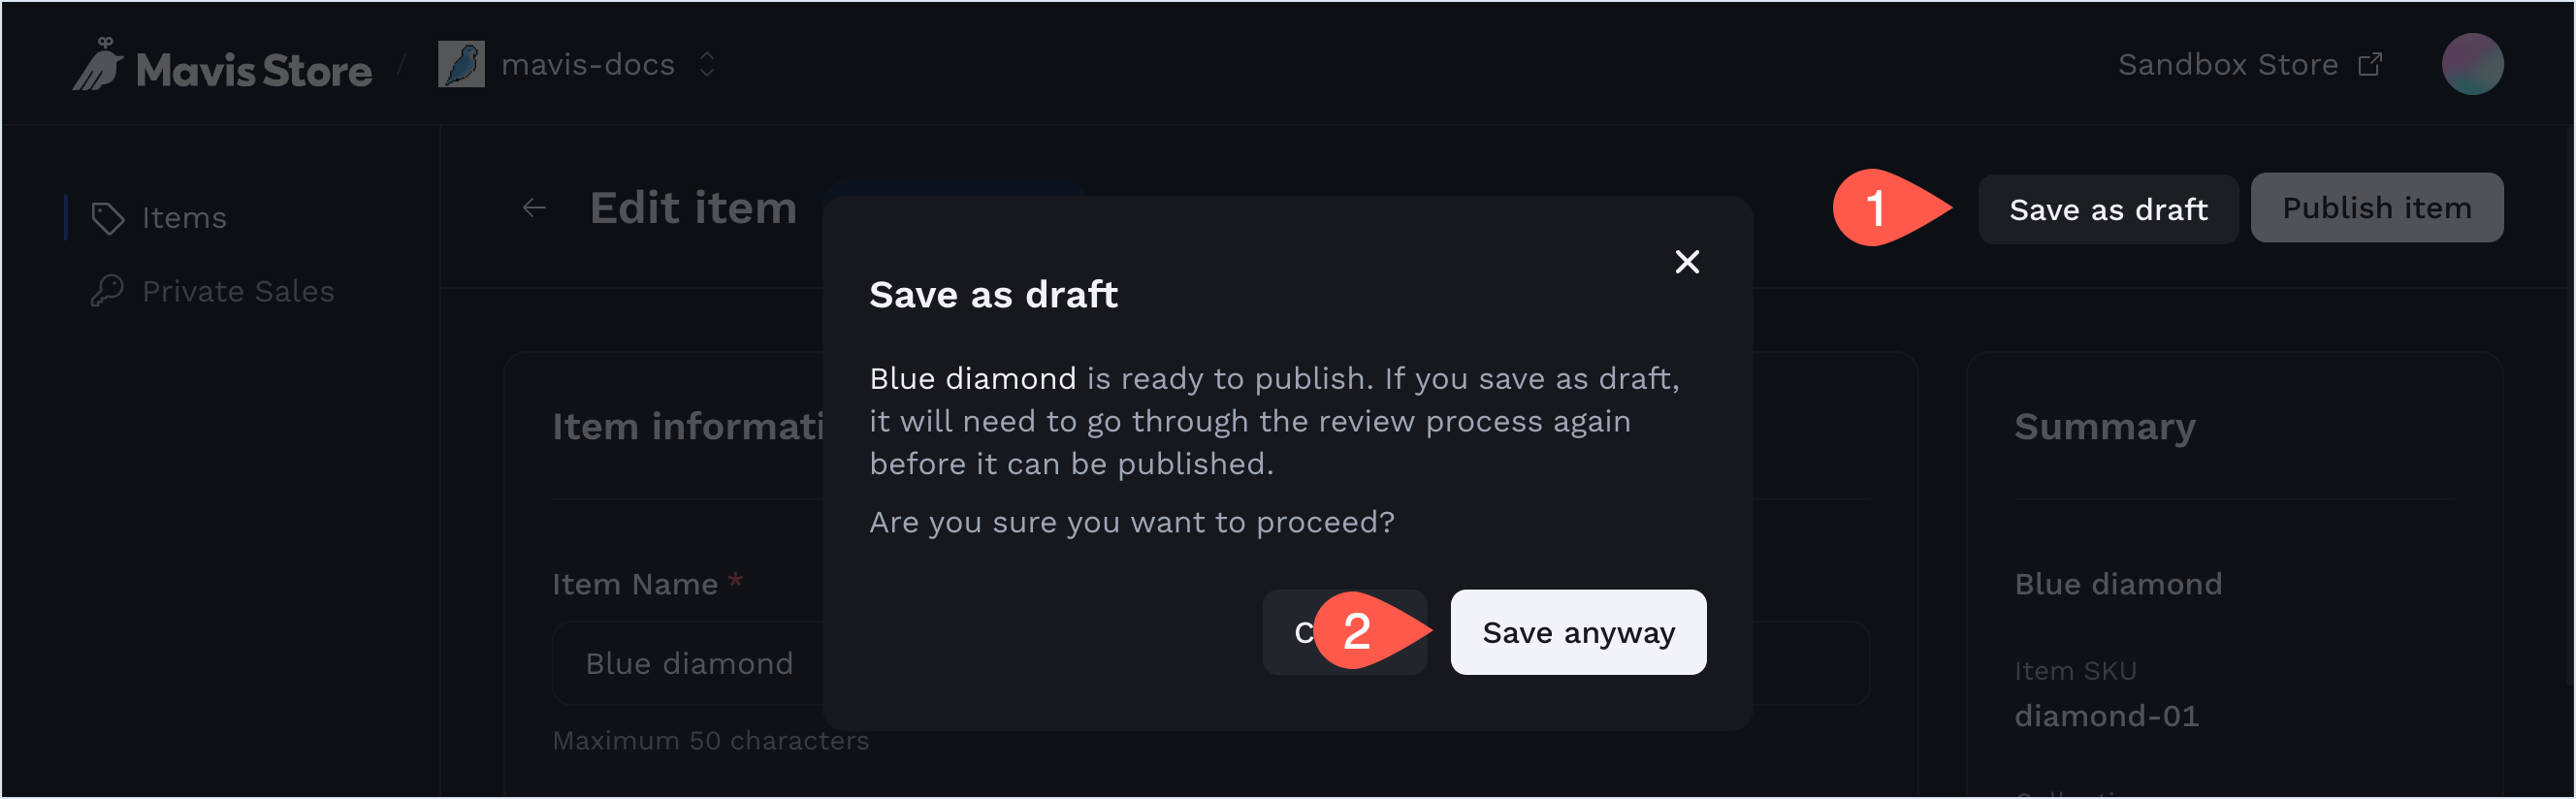
- Unpublish the item.
- Click Save as draft > Save anyway to change the item's status from "Ready to publish" to "Draft," making it editable:
Step 2. Edit item details
You can edit any information except the item's SKU. For example, change the item's description, adjust the price, or update inventory levels.
When editing the details of an item, click Save as draft after changing each individual field or parameter. This helps to ensure that the system captures your changes.
Step 3. Resubmit for review
After saving the changes, click Submit for review to resubmit the draft item for review.
When the item passes review, click Publish item to make it visible at the storefront.