Connect to Ronin Wallet using Web3Modal
Overview
This tutorial shows how to connect your decentralized app to the Ronin Wallet browser extension using the Web3Modal SDK. By the end of this tutorial, you can have a working app that connects to Ronin Wallet using Web3Modal.
Prerequisites
- Node.js v18.16 or later.
- A Ronin chain address that you can sign up for at wallet.roninchain.com.
Create a sample app
If you set up Web3Modal in your own app, skip this step.
This tutorial uses a sample React app with TypeScript. To install the app, run the following commands:
yarn create vite my-project --template react-ts
cd my project
yarn
Step 1. Get a WalletConnect project ID
To use Web3Modal, you need a WalletConnect project ID. Follow these steps:
- Visit cloud.walletconnect.com.
- Sign up for a WalletConnect account or sign in if you already have an account.
- Create a new project or use an existing one.
- Locate and copy the project ID.
Step 2. Install the dependencies
Install the dependencies and start the project by running the following commands:
yarn add @web3modal/wagmi wagmi viem @tanstack/react-query
yarn dev
Step 3. Set up Web3Modal configuration
On top of your app, set up the following configuration, making sure that all functions are called outside any React component to avoid unwanted rerenders.
import './App.css'

import { createWeb3Modal } from '@web3modal/wagmi/react'
import { defaultWagmiConfig } from '@web3modal/wagmi/react/config'

import { WagmiProvider } from 'wagmi'
// 0. Import the Ronin chain
import { ronin, mainnet } from 'wagmi/chains'
import { QueryClient, QueryClientProvider } from '@tanstack/react-query'

// 1. Setup queryClient
const queryClient = new QueryClient()

// 2. Replace with your project ID
const projectId = 'YOUR_PROJECT_ID'

// 3. Create wagmiConfig
const metadata = {
  name: 'Ronin Wallet Web3Modal',
  description: 'Ronin Wallet Web3Modal example',
  // Origin must match your domain and subdomain
  url: 'https://web3modal.com',
  icons: ['https://avatars.githubusercontent.com/u/37784886']
}

const chains = [ ronin, mainnet ] as const
const config = defaultWagmiConfig({
  chains,
  projectId,
  metadata,
  // Remove Coinbase from the modal's main view
  enableCoinbase: false,
  // Set to "true" to enable detection of the Ronin Wallet extension, which will also enable other wallets that support EIP6963
  enableEIP6963: true,
  // Set to "false" because the Ronin Wallet extension can't be detected this way
  enableInjected: false,
})

// 4. Create modal
createWeb3Modal({
  wagmiConfig: config,
  projectId,
  // Set Ronin as a desired chain for the initial connection
  defaultChain: ronin,
  // Remove the "All Wallets" button on the modal
  allWallets: 'HIDE',
  // Add this to connect to Ronin Wallet when browsing on mobile
  featuredWalletIds: ['541d5dcd4ede02f3afaf75bf8e3e4c4f1fb09edb5fa6c4377ebf31c2785d9adf'],
})

export function Web3ModalProvider({ children }) {
  return (
    <WagmiProvider config={config}>
      <QueryClientProvider client={queryClient}>{children}</QueryClientProvider>
    </WagmiProvider>
  )
}
Step 4. Trigger the modal
To open Web3Modal, you can use WalletConnect's web component or build your own button using Web3Modal hooks.
export default function ConnectButton() {
  return <w3m-button />
}
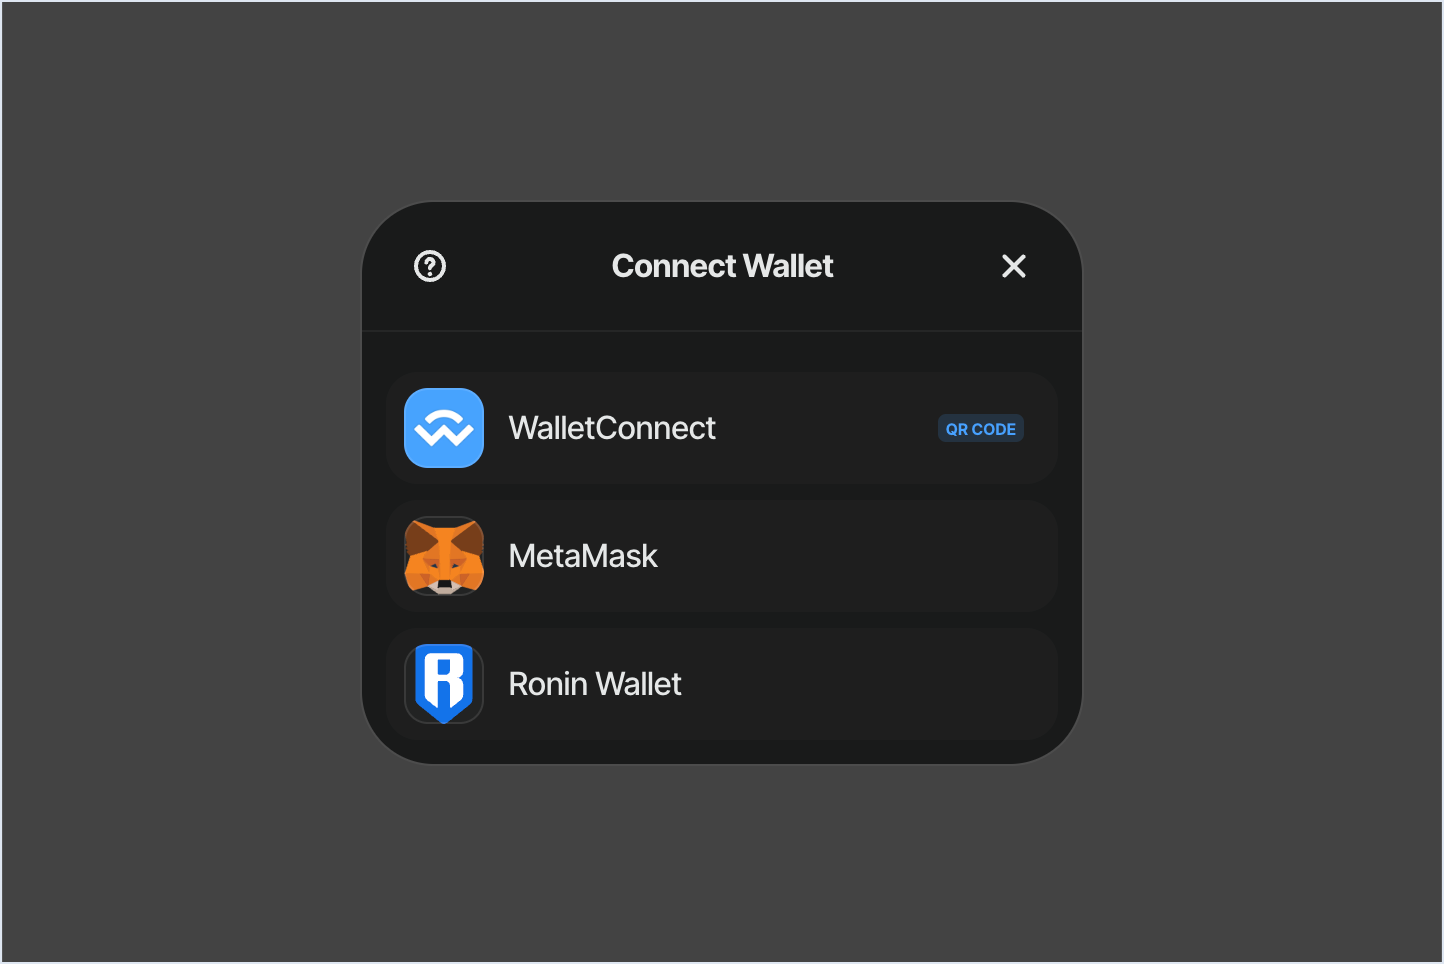
Step 5. Connect Ronin Wallet
After all the preceding steps, your app configuration should look like this:
import './App.css'

import { createWeb3Modal } from '@web3modal/wagmi/react'
import { defaultWagmiConfig } from '@web3modal/wagmi/react/config'

import { WagmiProvider } from 'wagmi'
import { ronin, mainnet } from 'wagmi/chains'
import { QueryClient, QueryClientProvider } from '@tanstack/react-query'

const queryClient = new QueryClient()

const projectId = 'YOUR_PROJECT_ID'

const metadata = {
  name: 'Ronin Wallet Web3Modal',
  description: 'Ronin Wallet Web3Modal example',
  url: 'https://web3modal.com',
  icons: ['https://avatars.githubusercontent.com/u/37784886']
}

const chains = [ ronin, mainnet ] as const
const config = defaultWagmiConfig({
  chains,
  projectId,
  metadata,
  enableCoinbase: false,
  enableEIP6963: true,
  enableInjected: false,
})

createWeb3Modal({
  wagmiConfig: config,
  projectId,
  defaultChain: ronin,
  allWallets: 'HIDE',
  featuredWalletIds: ['541d5dcd4ede02f3afaf75bf8e3e4c4f1fb09edb5fa6c4377ebf31c2785d9adf'],
})

export function Web3ModalProvider({ children }) {
  return (
    <WagmiProvider config={config}>
      <QueryClientProvider client={queryClient}>{children}</QueryClientProvider>
    </WagmiProvider>
  )
}
Refresh the page and connect your Ronin Wallet.
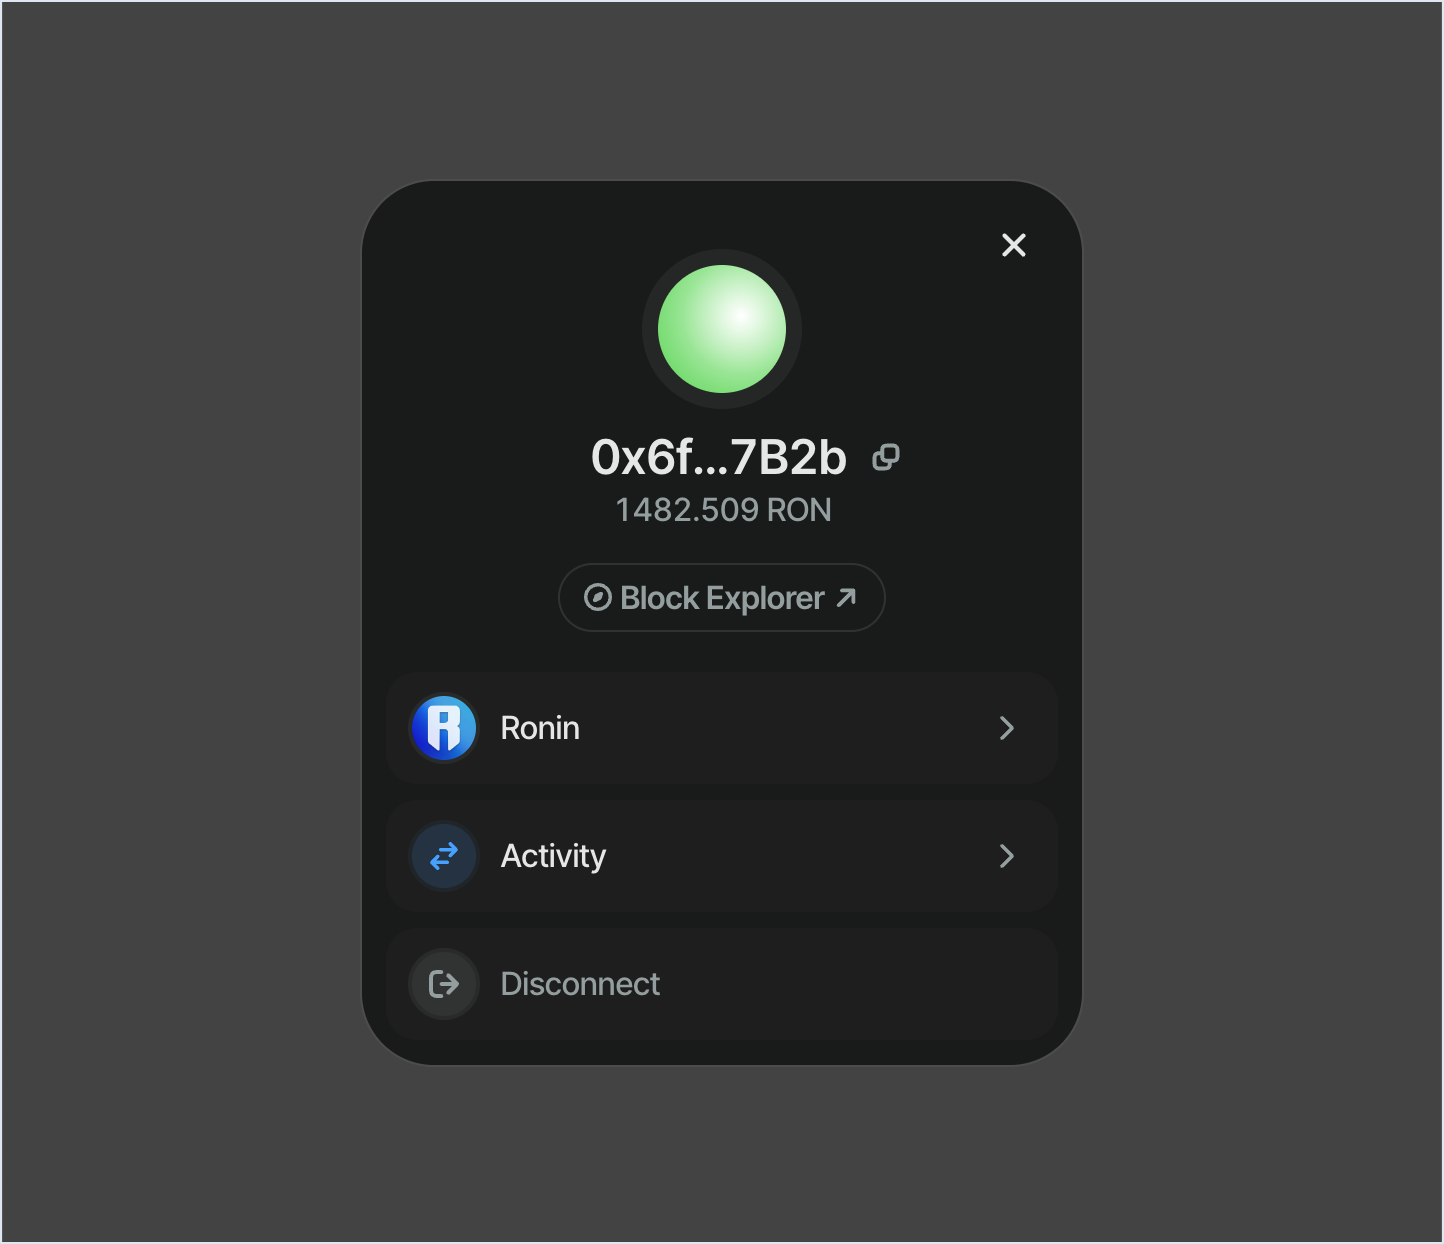
When connected, your Ronin address and balance are displayed.
Conclusion
You now have a working app that can connect to Ronin Wallet using Web3Modal. For further exploration, see the official Web3Modal documentation.