🪪 3. Authorize a user with Ronin Waypoint
To do daily check-in, the app must authorize a user first.
In this step, Ronin Waypoint plays an important role, enabling the following features:
- Lets users log in using familiar social login methods or email and password.
- After authentication, users can create a keyless wallet.
- Users can back up their wallet upon creation.
Add "Log in with Ronin Waypoint" button
-
Go to your home page in
page.tsxfile. -
Remove the redundant code of the Next.js template.
export default function Home() {
  return <main className="flex flex-col items-start min-h-screen gap-4 p-24"></main>
} -
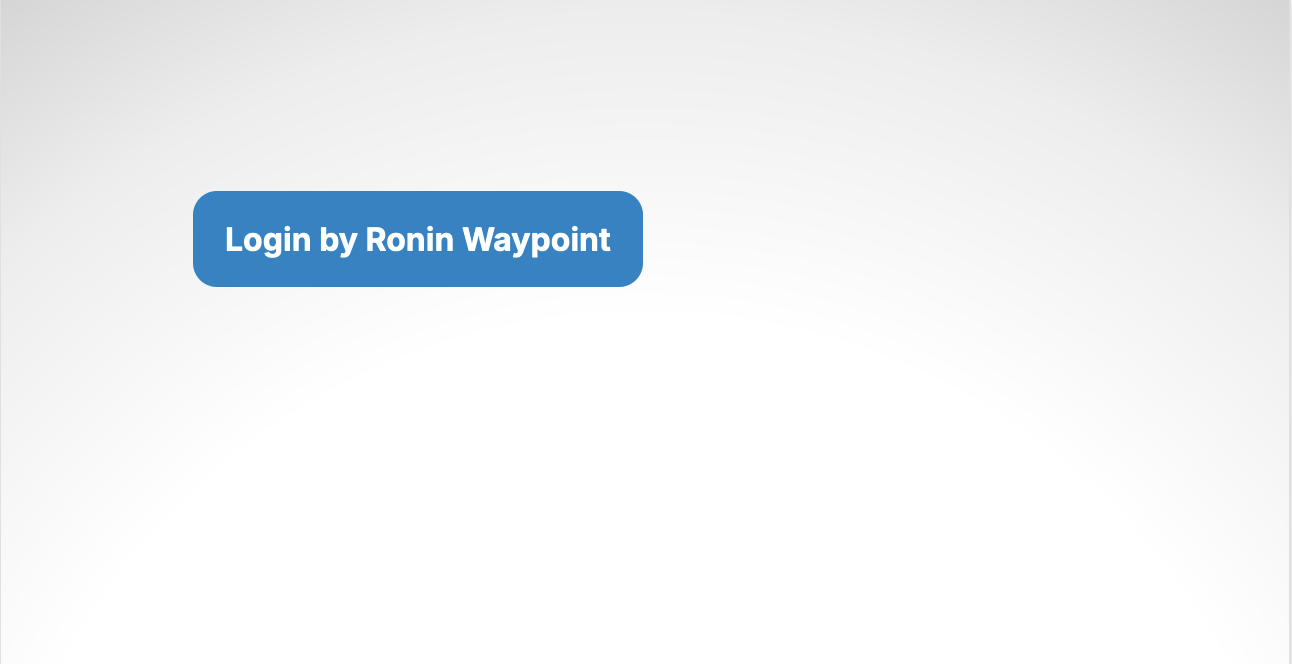
Create a button for users to log in and connect the wallet.
<button
  className={clsx(
    "px-4 py-3 font-bold text-white bg-sky-600 hover:bg-sky-700 rounded-xl",
    account && "hidden",
  )}
  onClick={handleAuthorize}
>
  Login by Ronin Waypoint
</button> -
Add
errorandaccountstates for handling the connect flow.const [account, setAccount] = useState<Address>()
const [error, setError] = useState<string>()
Authorize user
Ronin Waypoint provides two methods for authorization:
- Popup: open Ronin Waypoint in a new window and communicate between the two tabs.
- Redirect: open Ronin Waypoint in the current window and redirect back to the app after authorization.
We recommend using the redirect flow since it works well with Telegram Mini App and provides a better user experience on the Telegram web view.
Add function to handle wallet connection flow
-
Call
authorizefrom the Ronin Waypoint SDK@sky-mavis/waypoint. -
In
clientId, replaceYOUR_CLIENT_IDwith the Client ID you received from the previous step. -
In
scopes, you must include"email", "profile", "openid", "wallet". With thewalletscope, Ronin Waypoint creates a keyless wallet and backs up the user's recovery password flow on the waypoint.roninchain.com website.import { authorize } from "@sky-mavis/waypoint"
const handleAuthorize = async () => {
try {
authorize({
mode:"redirect",
clientId: `YOUR_CLIENT_ID`,
scopes: ["email", "profile", "openid", "wallet"],
})
} catch (error) {
console.debug("🚀 | handleAuthorize:", error)
setAccount(undefined)
setError("User reject to connect wallet! Check your console for future details.")
}
}
After this step, clicking the Login by Ronin Waypoint button should redirect the user to Ronin Waypoint.
Handle redirect link from Ronin Waypoint
Run your app in localhost and finish the authorization flow with Ronin Waypoint. After the user logs in, Ronin Waypoint redirects them a URL like this:
http://localhost:3000/
?state=17de6113-3b1a-4cc4-abd3-355edbdca7ec
&method=auth
&version=1.0
&type=success
&data=USER_WAYPOINT_TOKEN
&address=USER_KEYLESS_ADDRESS
You can parse this URL with the parseRedirectUrl function from the SDK.
  useEffect(() => {
    try {
      const { token, address = "" } = parseRedirectUrl()

      if (isAddress(address) && token) {
        setAccount(address)

        localStorage.setItem("address", address)
        localStorage.setItem("token", token)
      }
    } catch (error) {
      console.debug("🚀 | parseRedirectUrl:", error)
    }
  }, [])
If everything is okay, you should do the following:
- Set the
accountstate with the new address received from Ronin Waypoint. - Set
addressandwaypointTokeninlocalStoragefor further use.
Add UI to display user address or error
return (
    <main className="flex flex-col items-start min-h-screen gap-4 p-24">
      <button
        className={clsx(
          "px-4 py-3 font-bold text-white bg-sky-600 hover:bg-sky-700 rounded-xl",
          account && "hidden",
        )}
        onClick={handleAuthorize}
      >
        Login by Ronin Waypoint
      </button>

      {account && (
        <div>
          <div className="mt-2 text-2xl font-semibold text-slate-800">Welcome back!</div>
          <div className="mt-1 text-md font-semibold tracking-tight text-slate-500">
            Login as: {account}
          </div>
        </div>
      )}
      {error && <p className="text-rose-600 font-semibold">{error}</p>}
    </main>
  )
At this stage, you successfully implemented the user authorization flow with Ronin Waypoint. The UI should look like this:
After the user logs in, the UI should look like this:
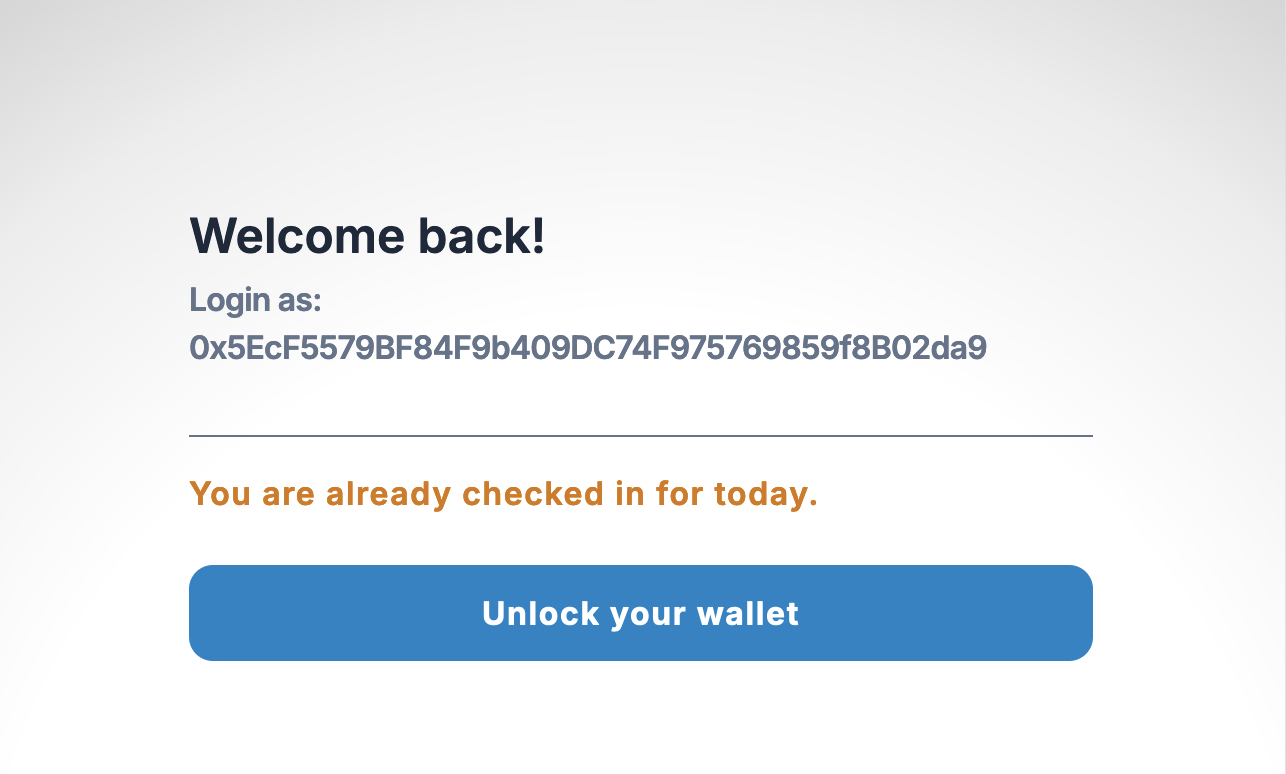
By now, you have authorized the user and got their keyless wallet address. This information is enough to get the daily check-in status of the user.