Quickstart for MPC in Unity
Overview
Follow the steps in this guide to install and run a demo Unity app that's already integrated with the MPC Solution. Get a feel for how MPC works by generating an MPC private key for a user. After that, explore other features such as creating transactions, signing messages, and more.
Prerequisites
Before completing this quickstart, make sure you have the following:
- Access to the MPC service. For more information, see Get started.
- Dependencies:
- Unity 2020.3 or later
- Json.NET
- Google.Protobuf
- System.Runtime.CompilerServices.Unsafe
Step 1. Run the demo app
Clone the mpc-unity-examples repository with the demo Unity project:
git clone git@github.com:axieinfinity/mpc-unity-examples.gitOpen the repository as a project in the Unity editor: File > Open Project.
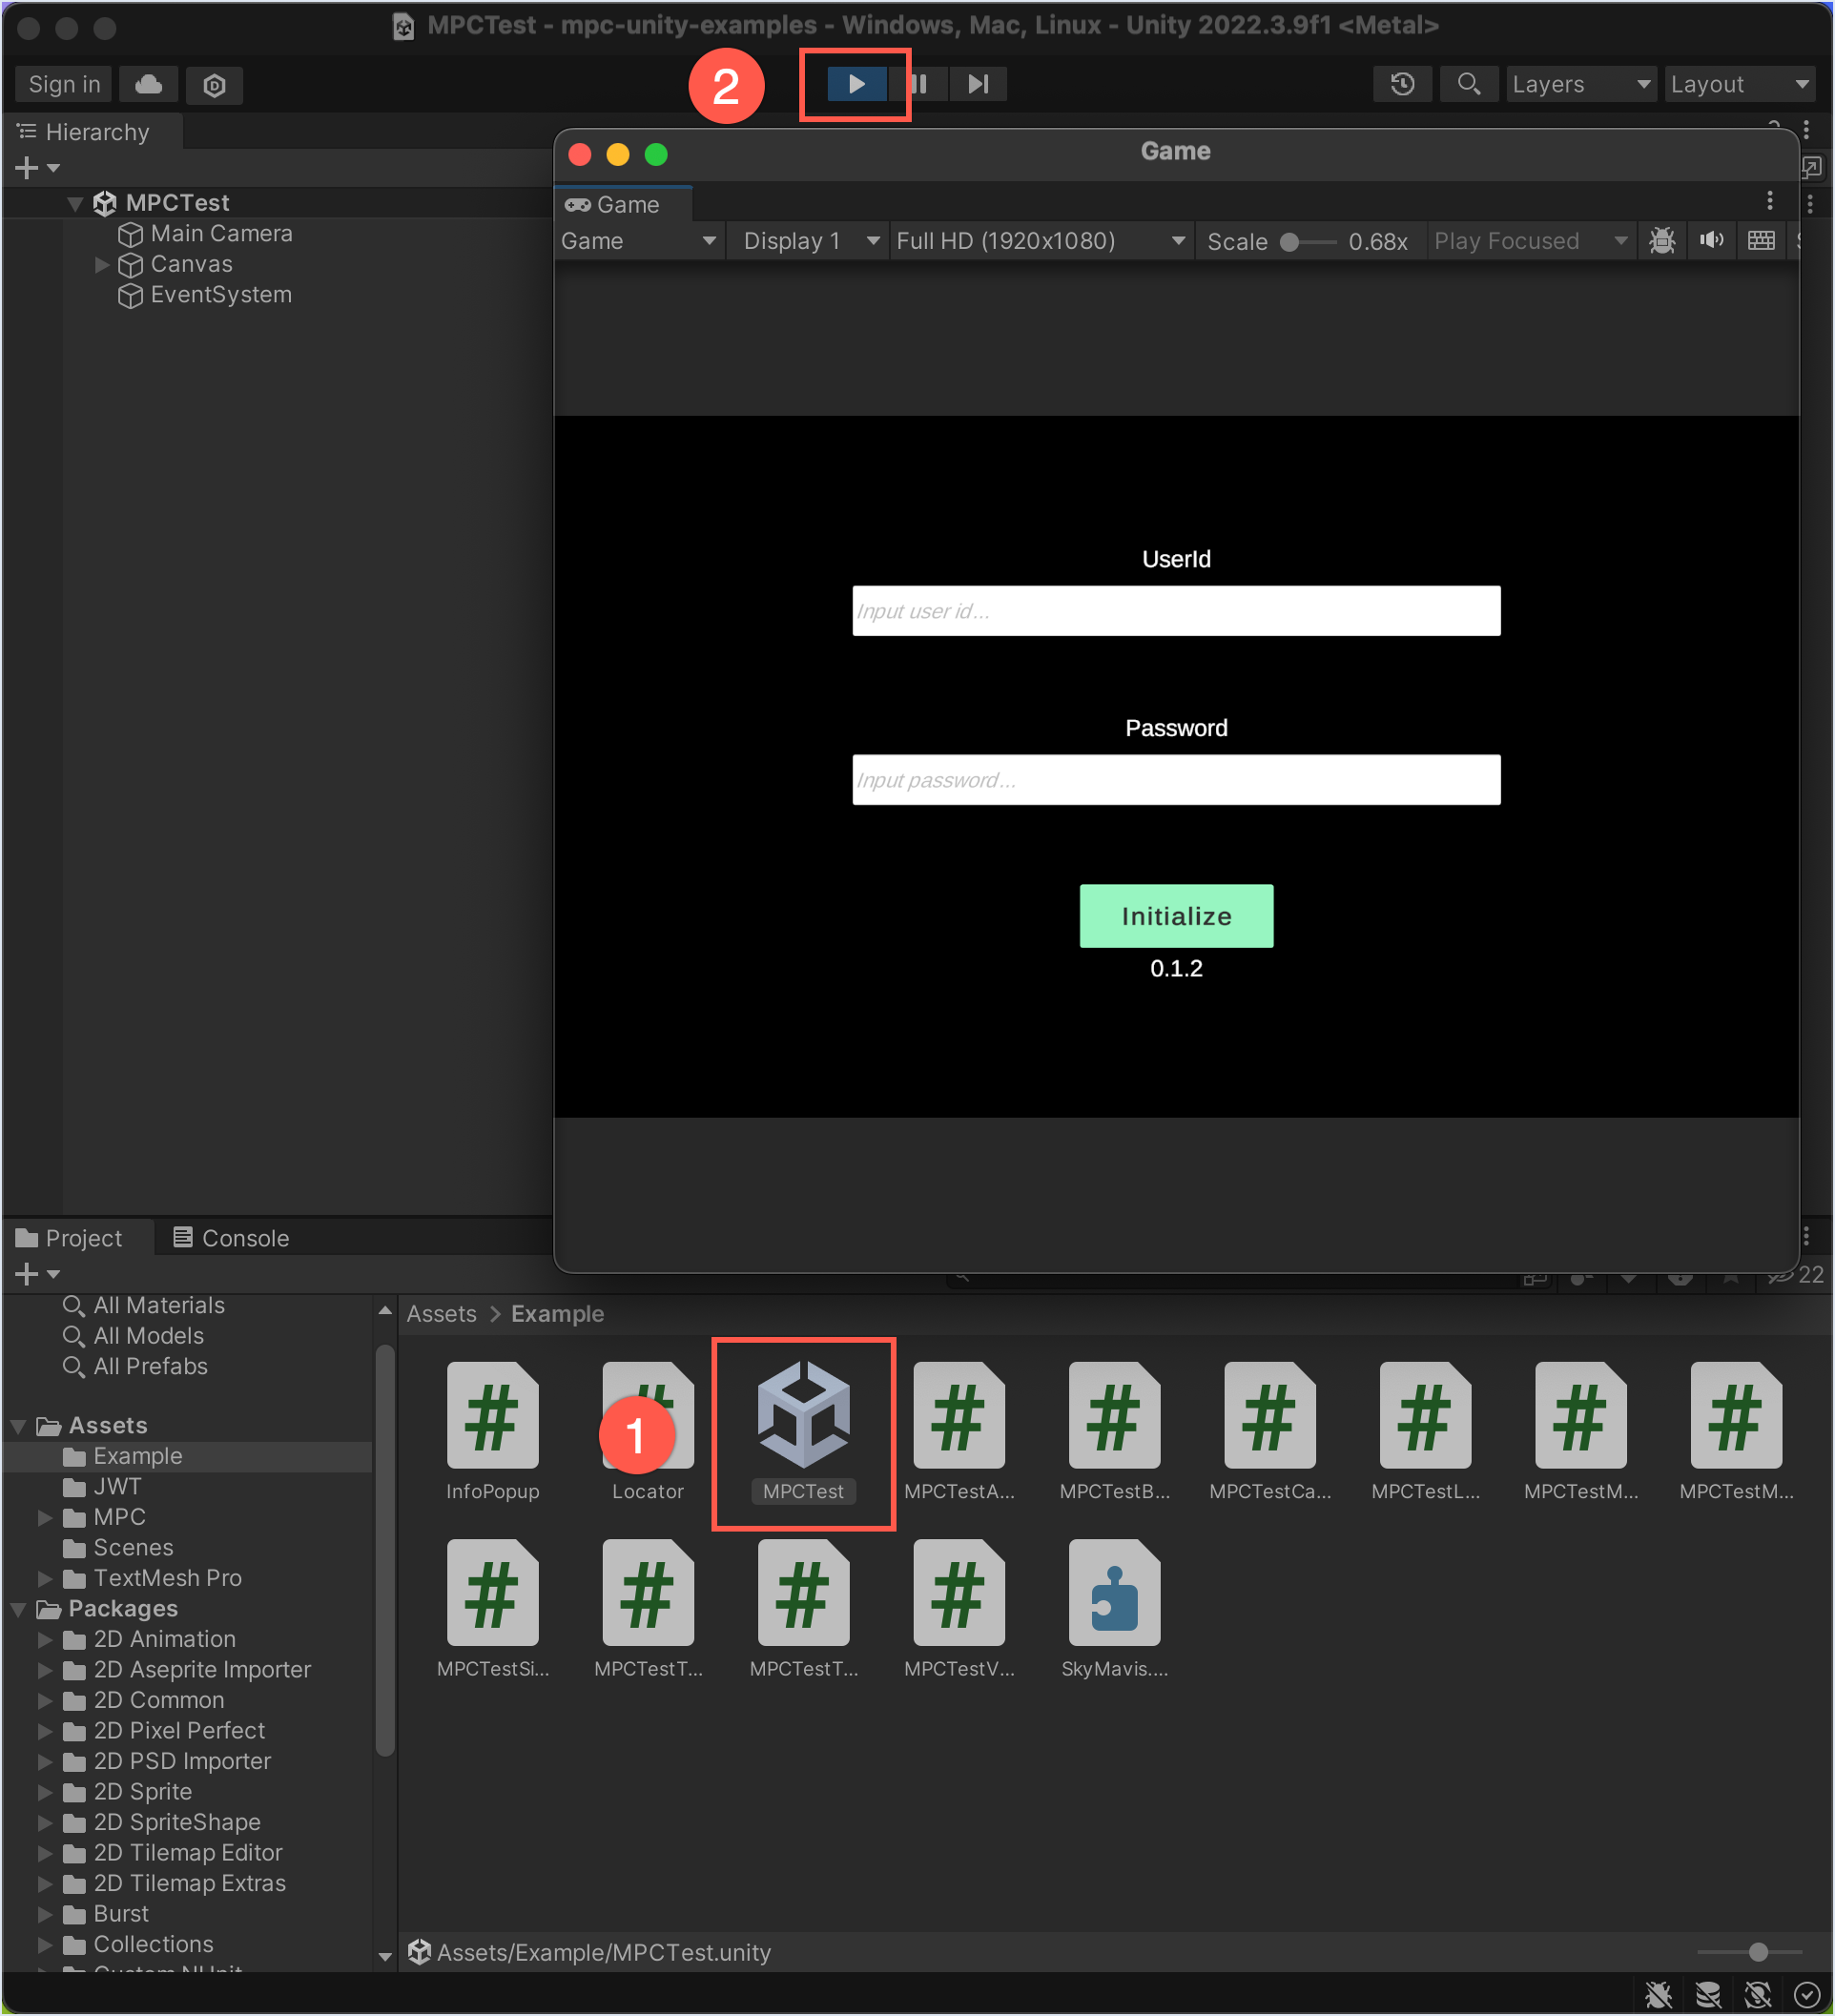
Run the demo scene: Project > Assets > Example > MPCTest > Play.
Step 2. Initialize MPC
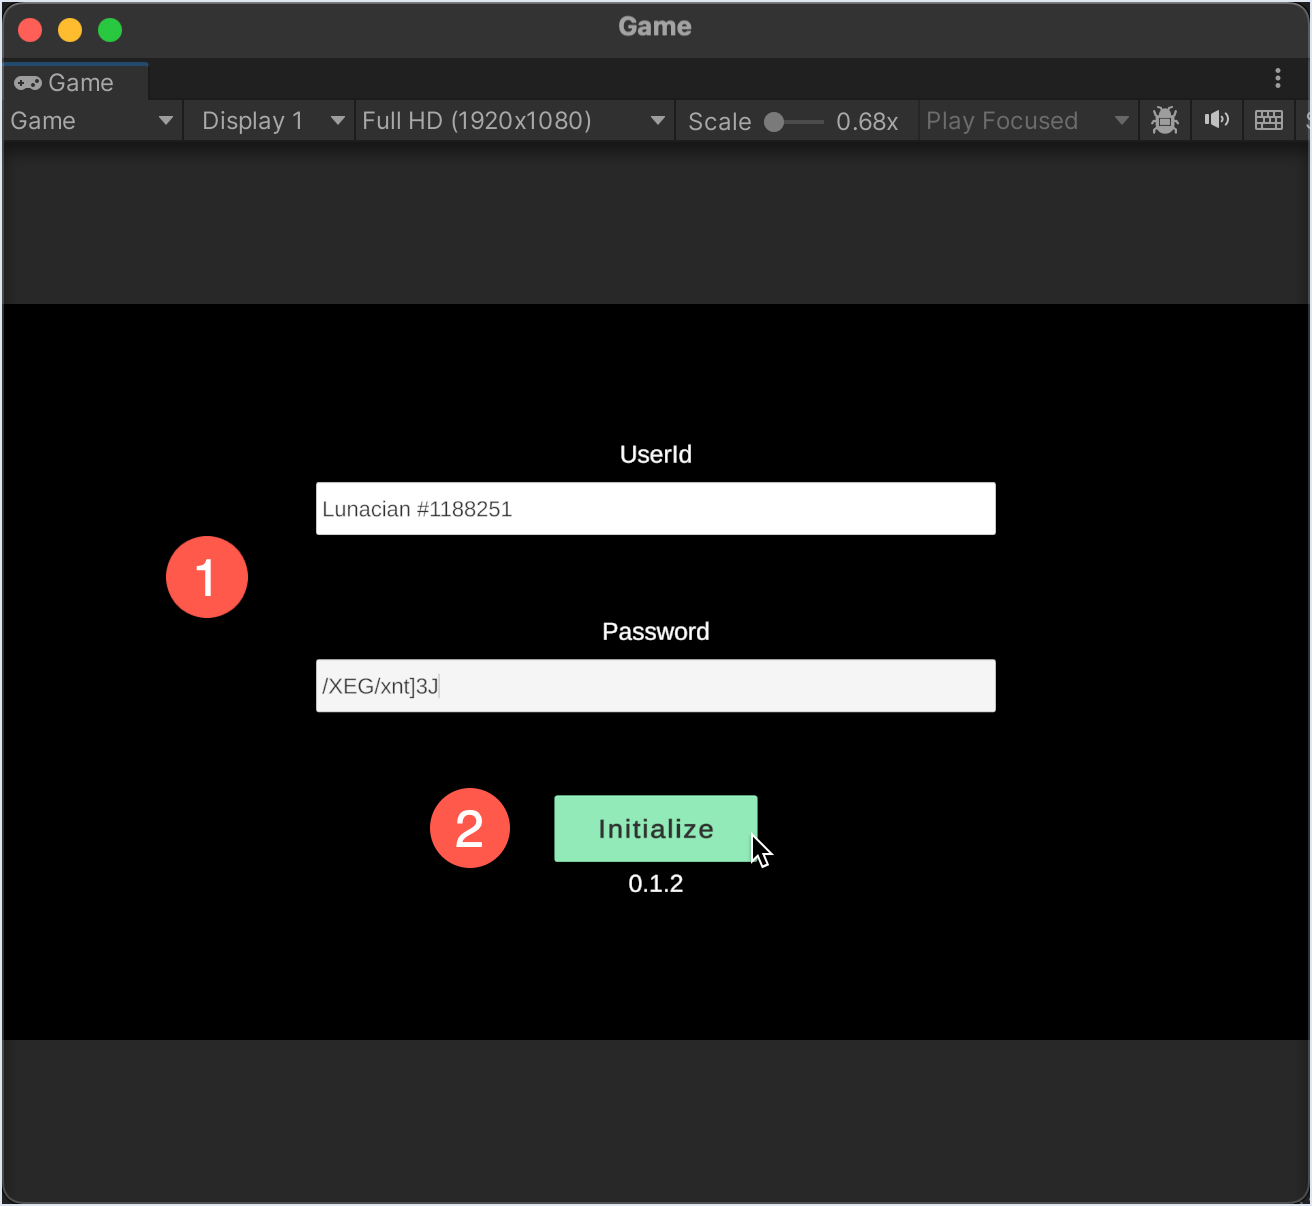
- In the UserId field, enter any string as the user's identifier.
- In the Password field, enter a recovery password—minimum 8 characters, at least one special character and at least one number.
- Click Initialize.
During initialization, the demo app generates a mock OAuth 2.0 access token for the user. When using MPC in a live game environment, you'll need to send a request to the Sky Mavis Account service to acquire the access token.
Step 3. Generate MPC wallet
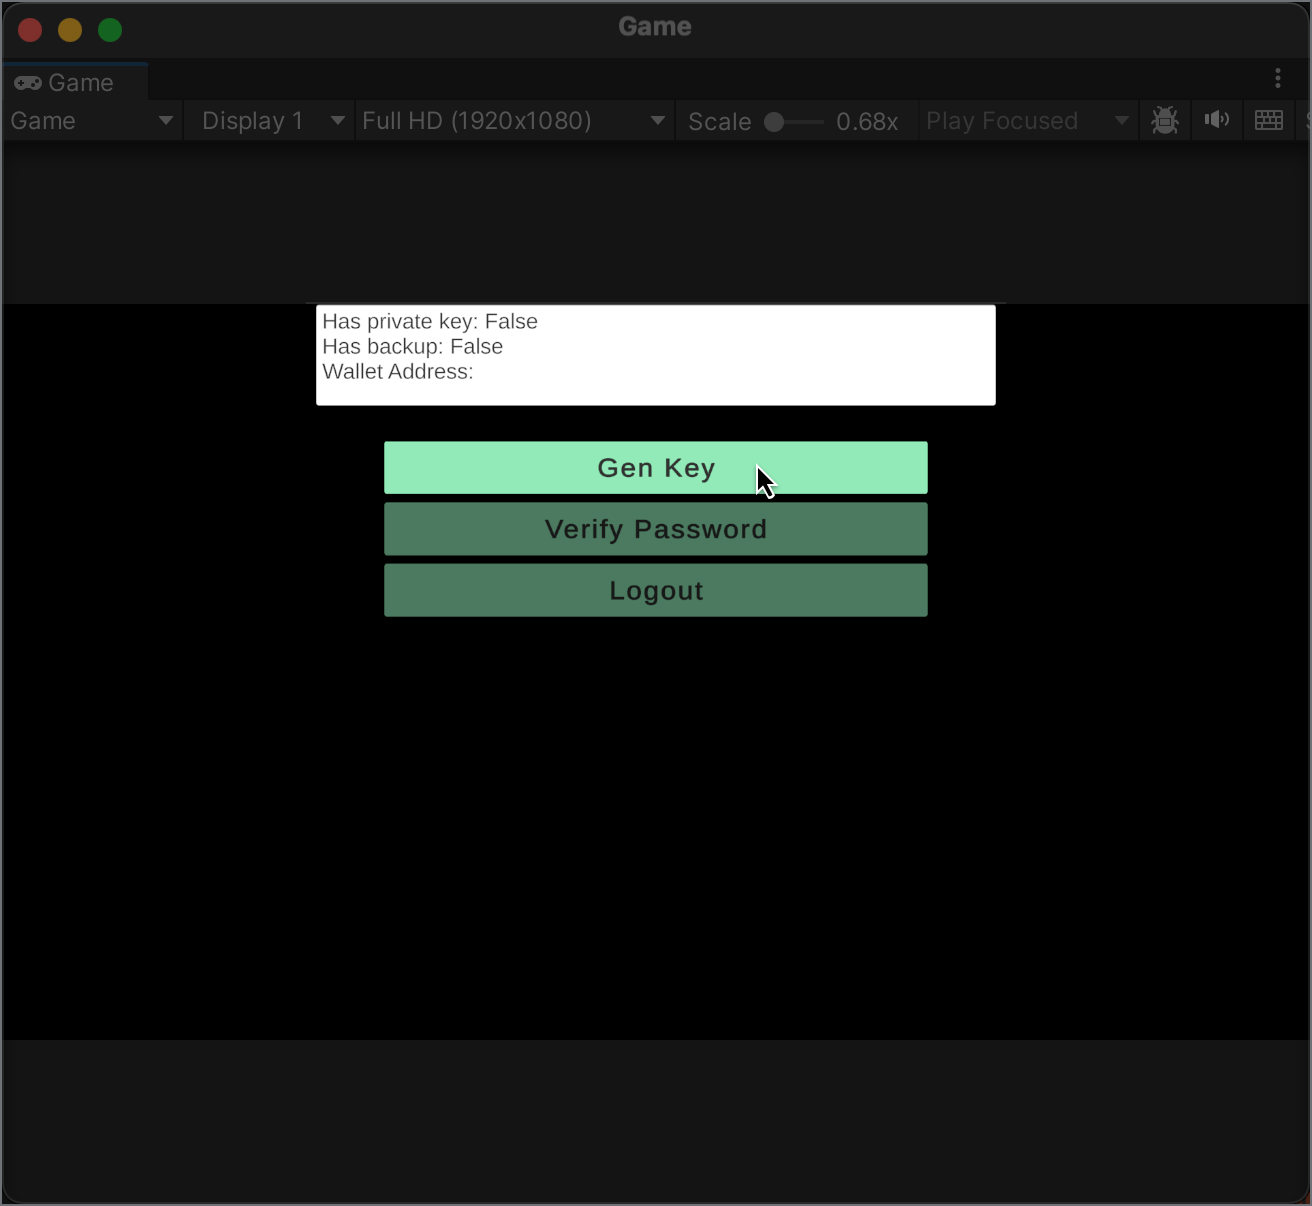
To generate an MPC wallet, click Gen Key.
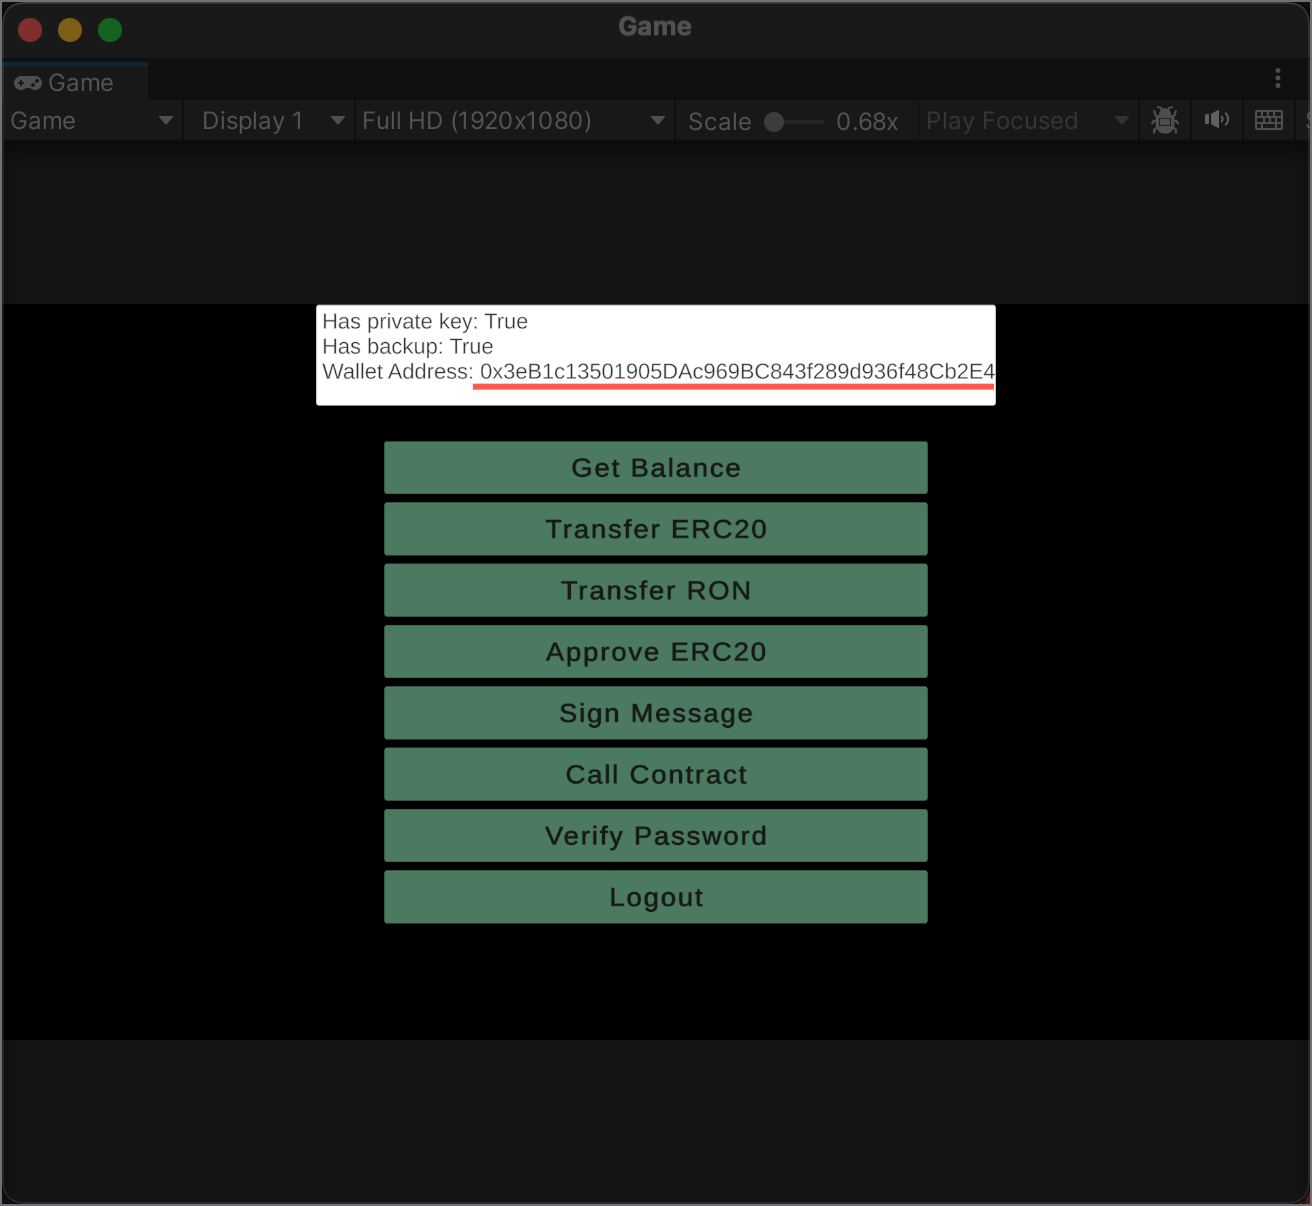
This action generates an MPC private key using the recovery password and access token. After that, the system automatically encrypts the key using the recovery password. The encrypted key is then backed up to the Sky Mavis backup server. The system uses this copy in the recovery process when the user logs in with the wallet on a device.
The result should look like this:
Step 4. Explore other MPC features
Explore other MPC features, such as creating transactions or signing messages, at your own pace. When you're ready, move on the next step—installing and initializing the Unity SDK in your project.